You don’t need AI to summarize this page, I’ll tell you everything you want to know here in the first paragraph. I love my copy of this camera. But, if the one you are looking at purchasing has not recently been serviced, then you will probably not be happy with it. I don’t know of anyone who services these, because to do it properly would cost more than the camera would ever be worth. I do not repair these as a service and I do not sell spare parts. Finally, if you take it apart and cannot get it back together then please just send it to me rather than throwing it out.
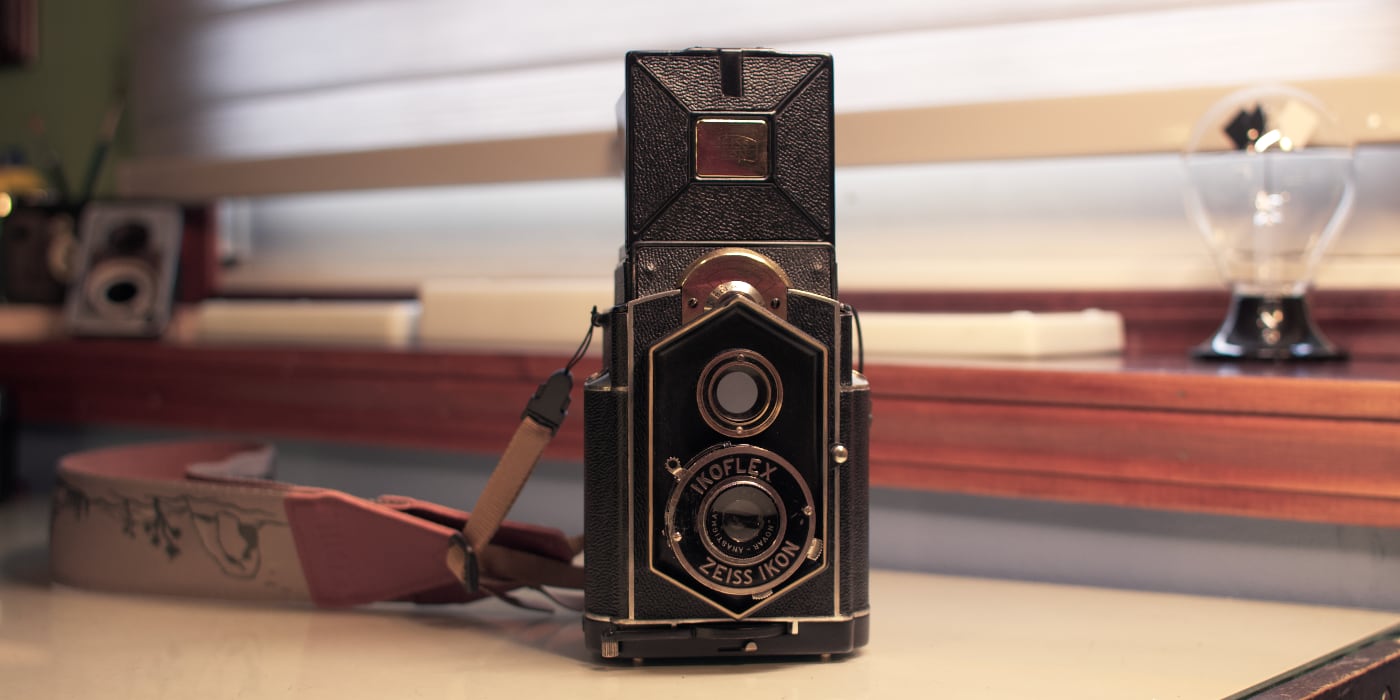
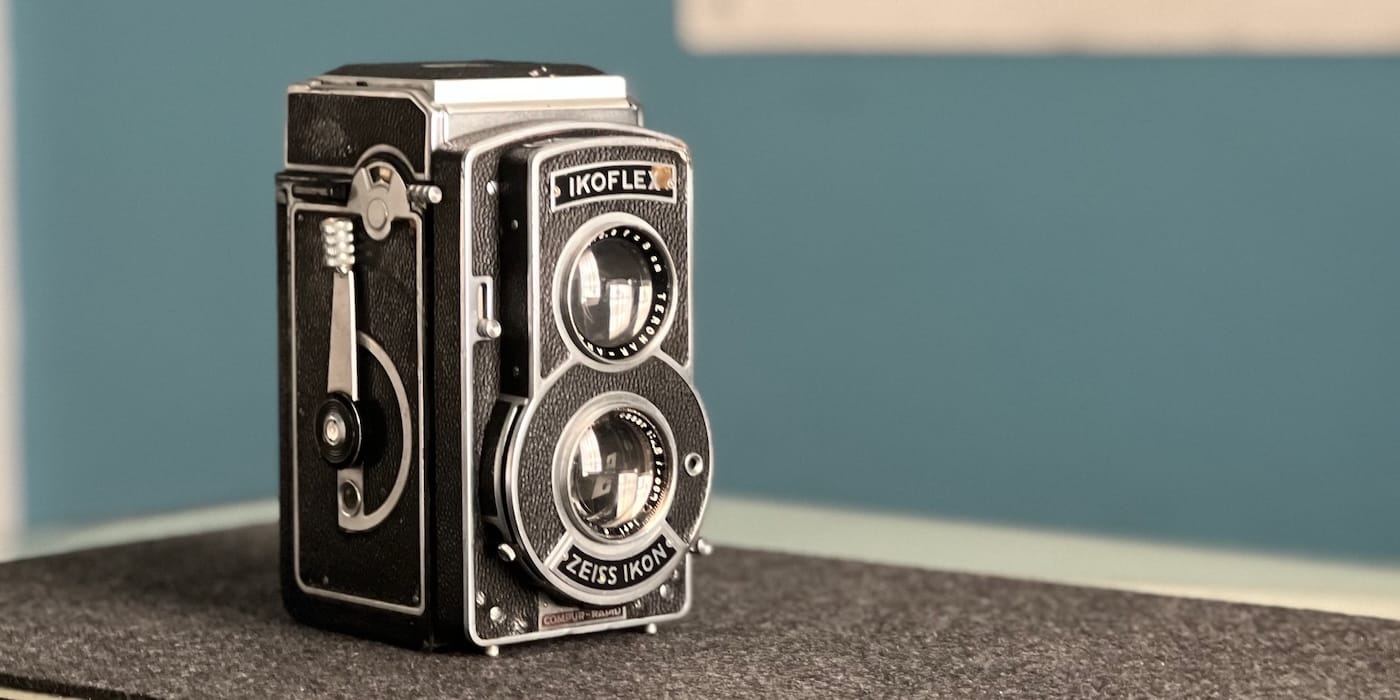
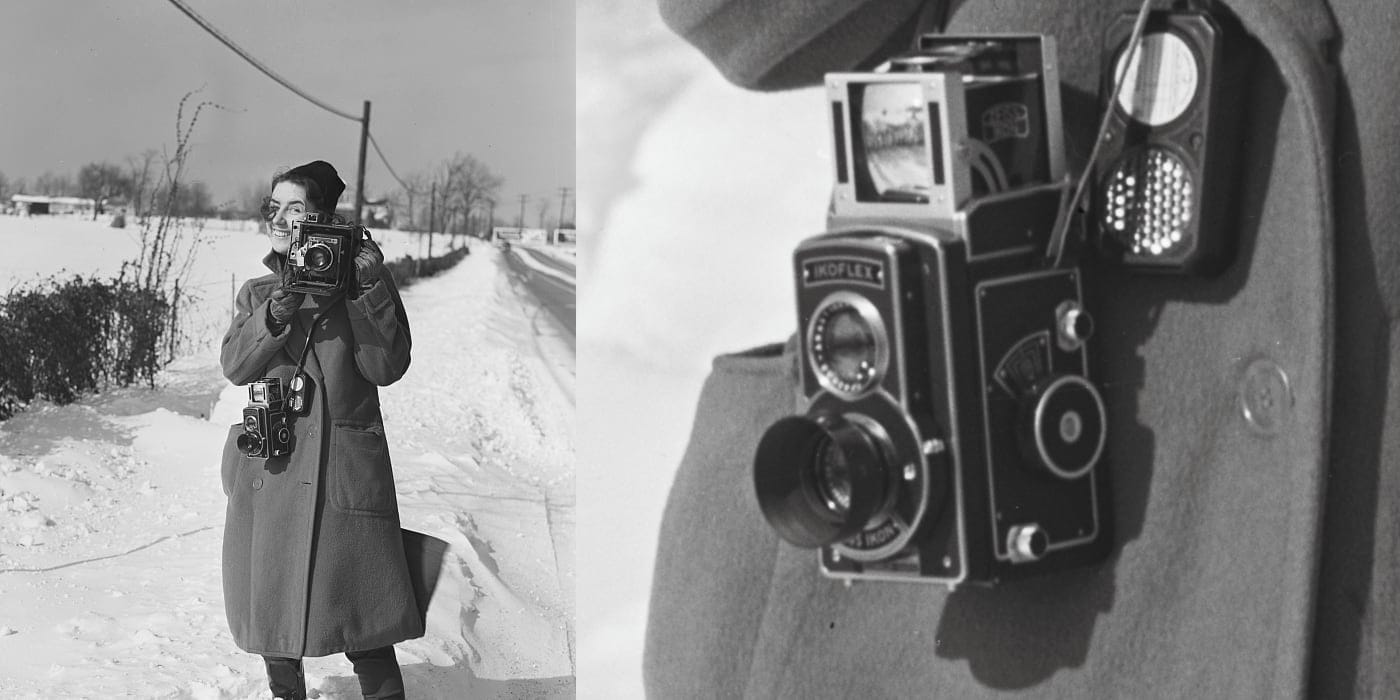
The Ikoflex III (853/16) is a great old camera. It lacks a light meter and flash connector, but has most of the features you could reasonably expect from a mechanical camera. If you can find one that actually works, it could be a great camera for street photography. Not stealth street photography, but street photography where you engage with folks. The Compur Rapid is almost disappointingly quiet, but the camera just draws attention. In addition to the inherent novelty of TLR cameras, the Albada sport finder has a mirrored front surface which encourages people to smile or mug for the camera.
I’m going to assert that the lack of a light meter is a positive in this case. The earliest in-built light meters were selenium meters; these meters did not require batteries, but they all eventually stop working and there is little that can be done to fix them. Having no meter is better than having a broken meter.
Speaking of things that eventually stop working, that perfectly describes the focus mechanism on this and all Ikoflex TLRs. The grease that they used eventually dries, and it becomes more of a glue than a lubricant. It cannot be renewed, it must be completely removed and replaced with new grease. To make matters worse, the focus mechanism goes through the camera. So replacing the grease requires a near complete disassembly.
Despite the challenges, I have repaired quite a few Ikoflex cameras. The first film camera that I restored was an Ikoflex Ia. After that I purchased a lot of Ikoflex cameras that someone had disassembled. I was able to make a single working camera from the remnants of six or more. If you count that Frankenstein’s monster of a camera, then I have repaired every Ikoflex model. But, that was during the pandemic lockdowns, I generally don’t do that anymore.
I wouldn’t recommend attempting to repair this camera if you have never done a complete rebuild before, but an experienced repair person should be able to do it without much difficulty.
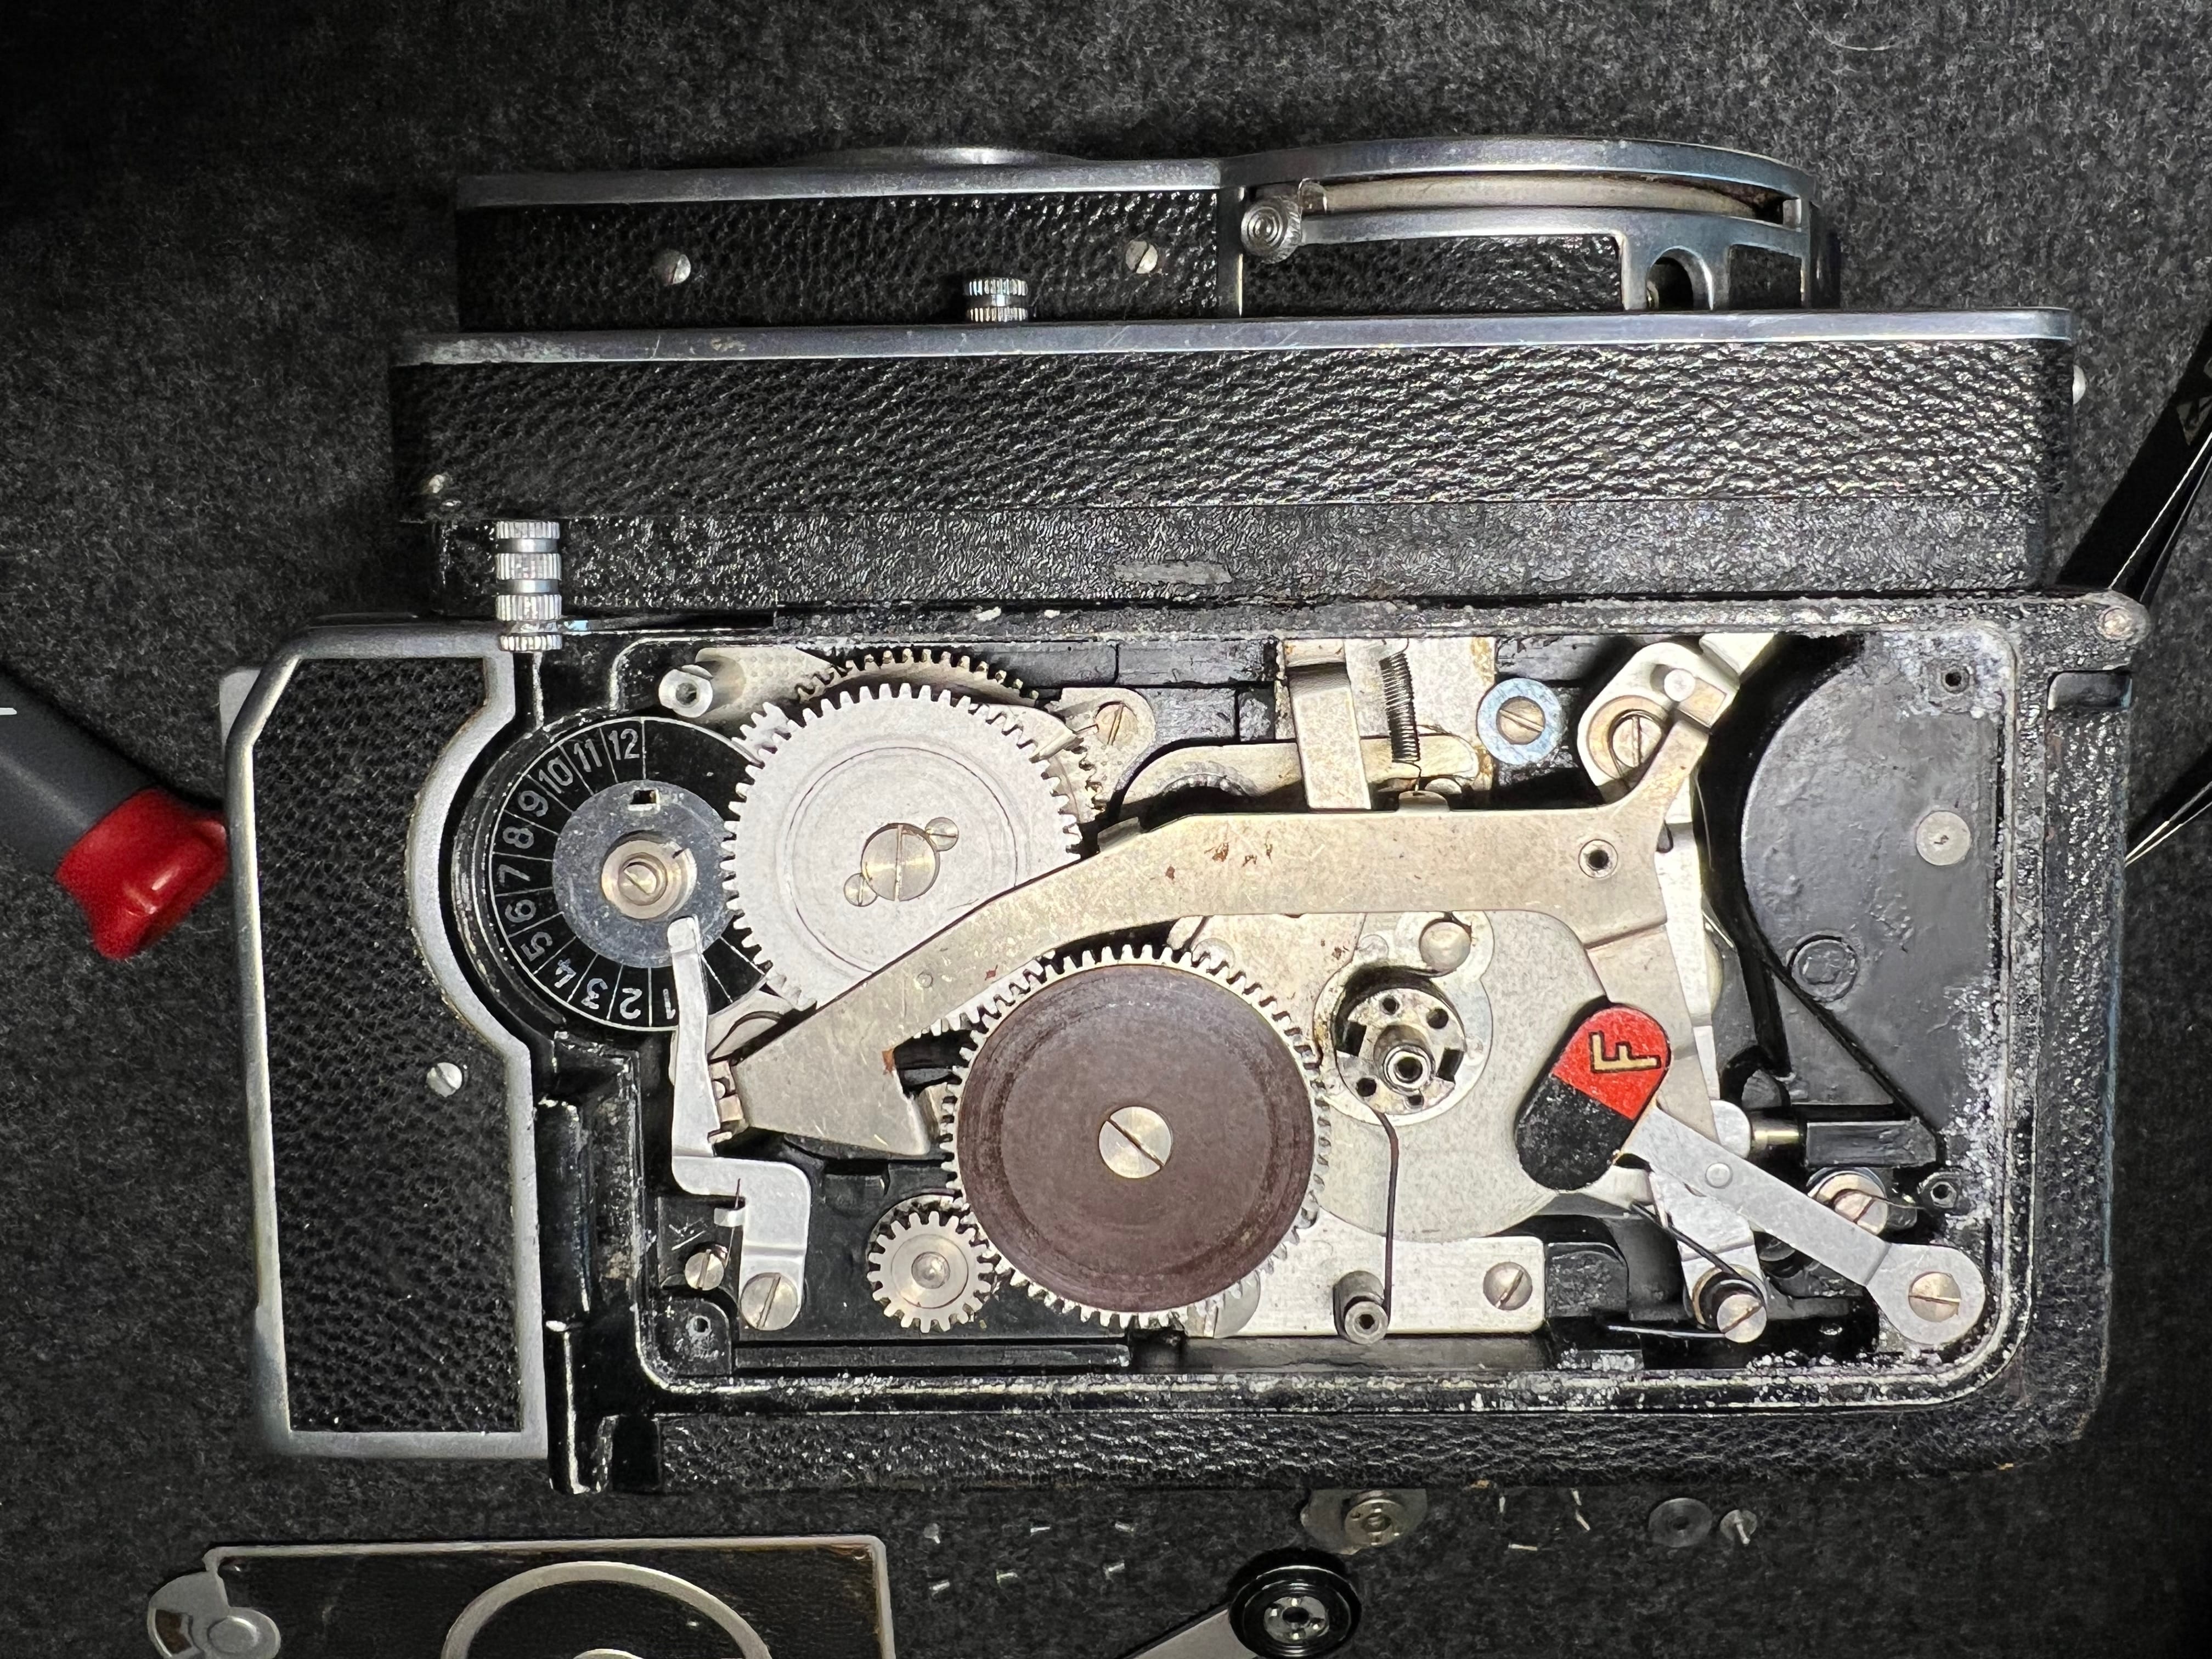
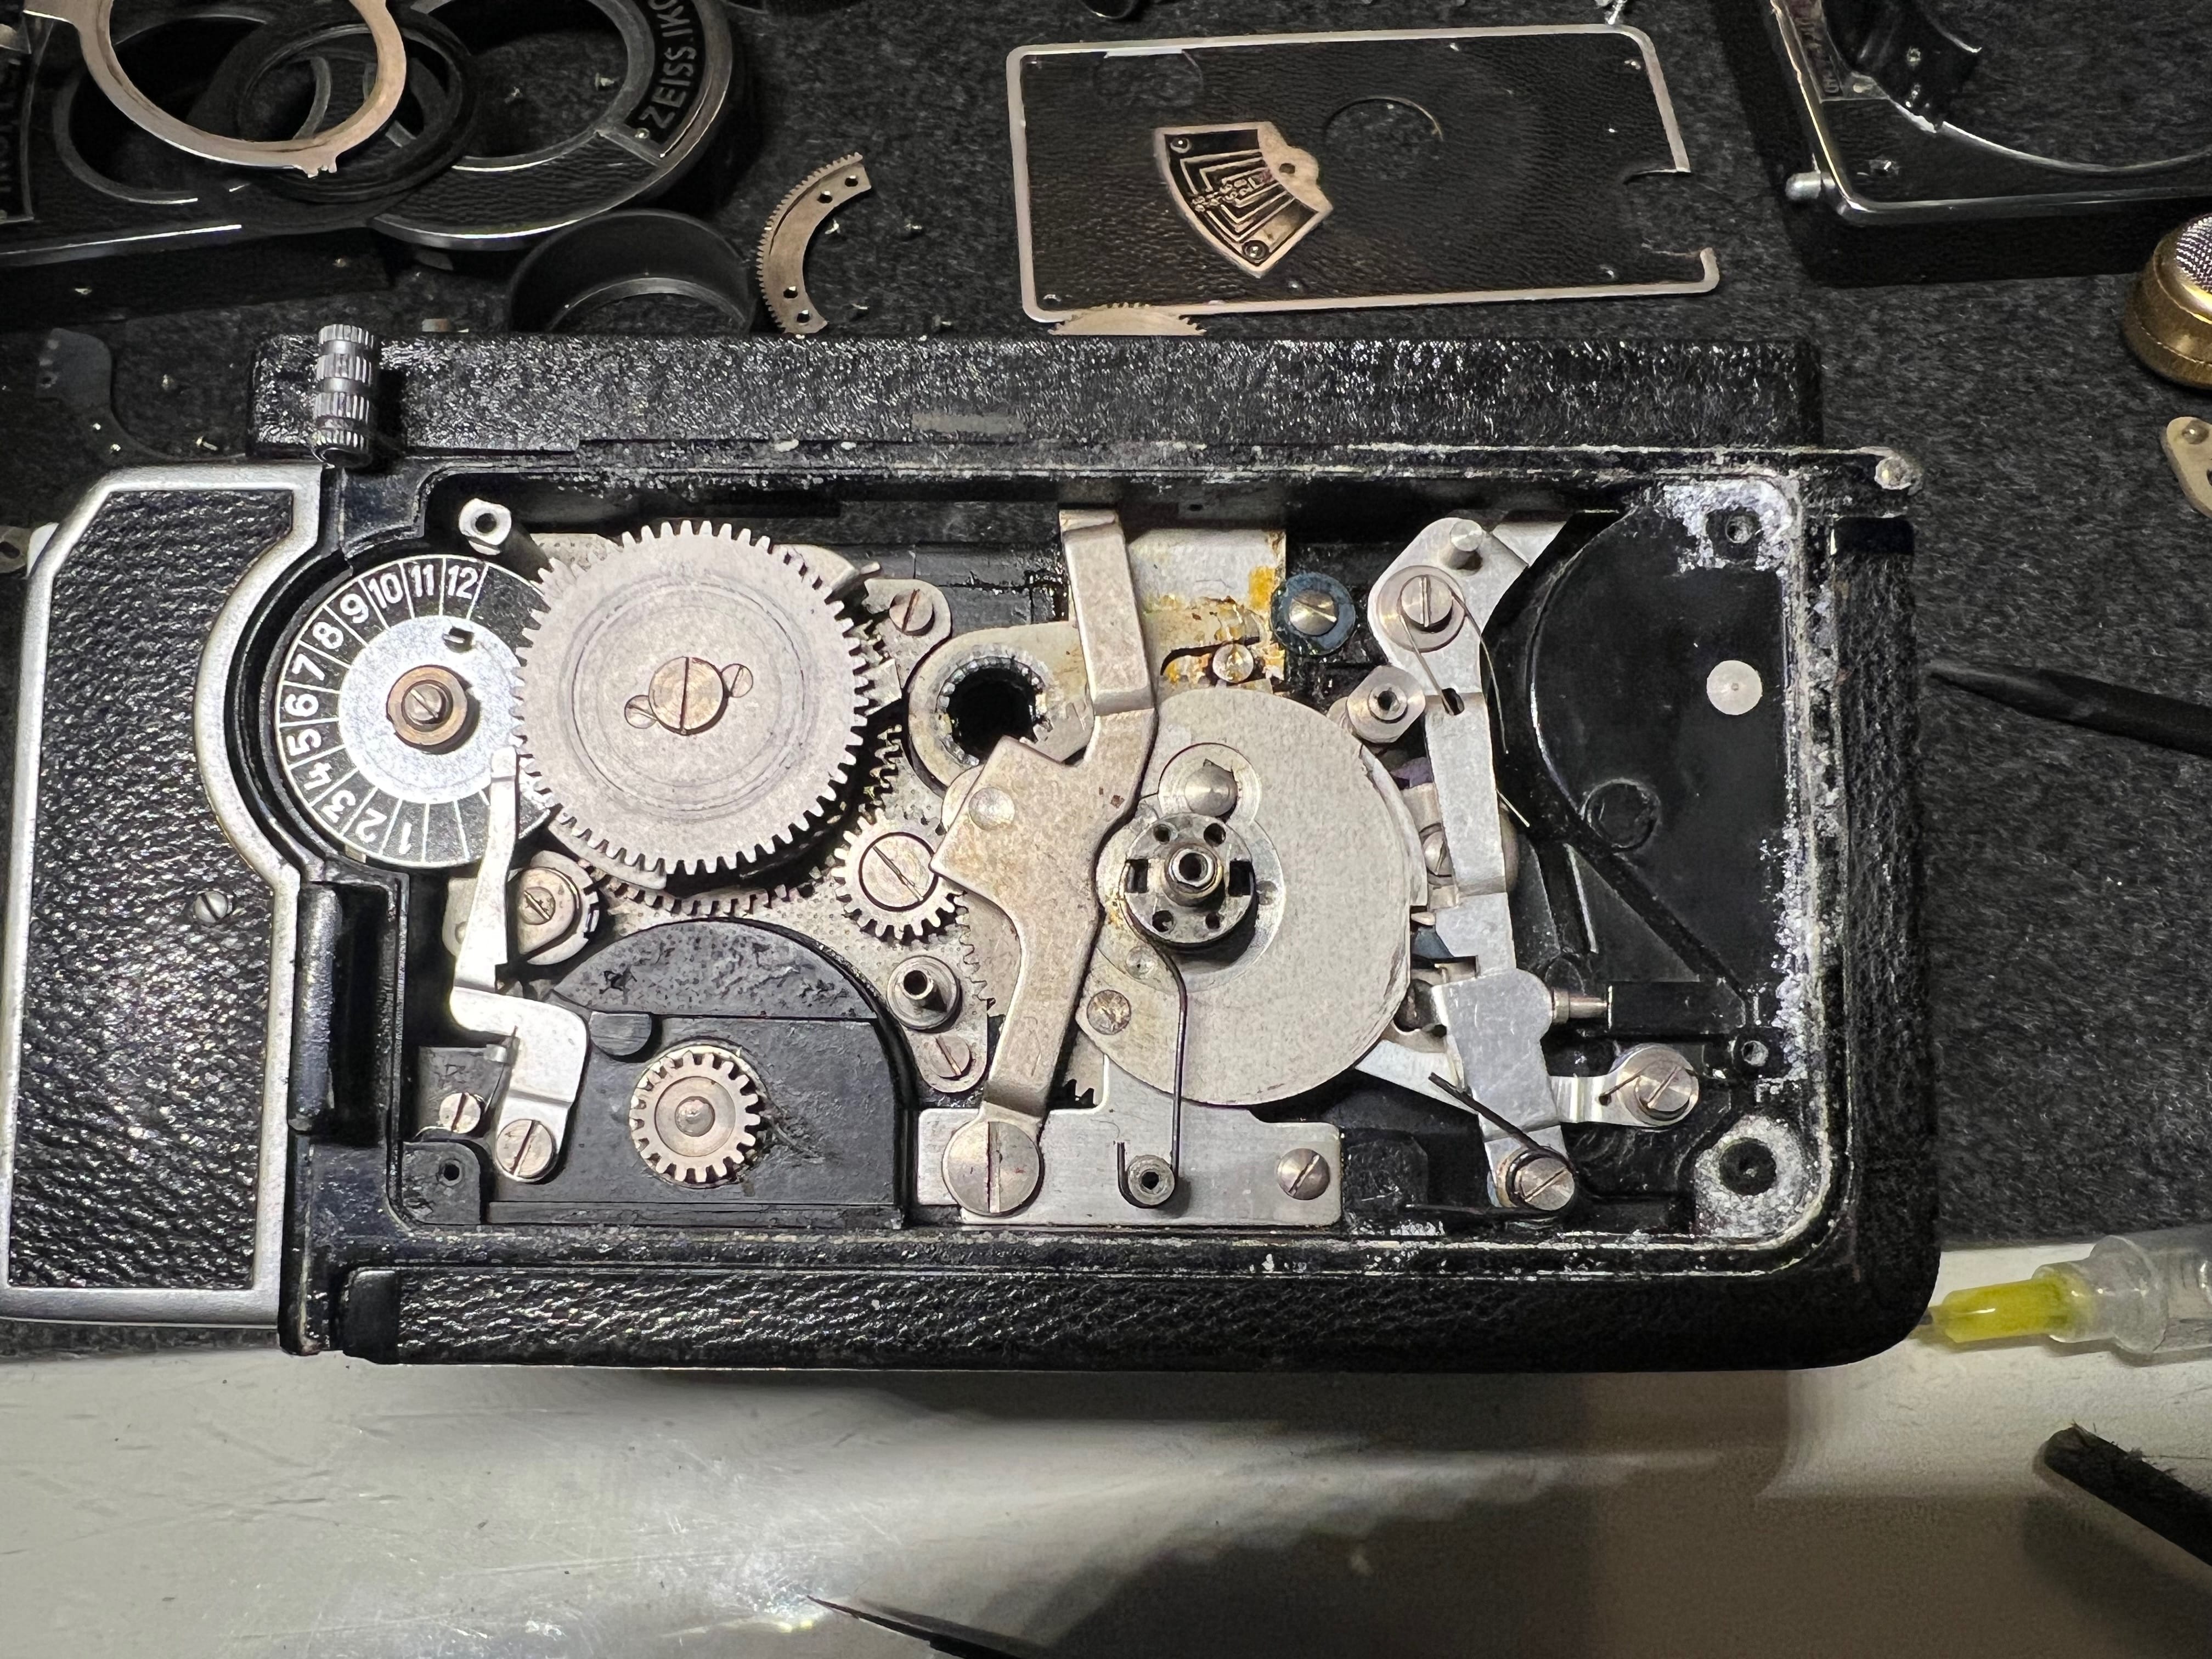
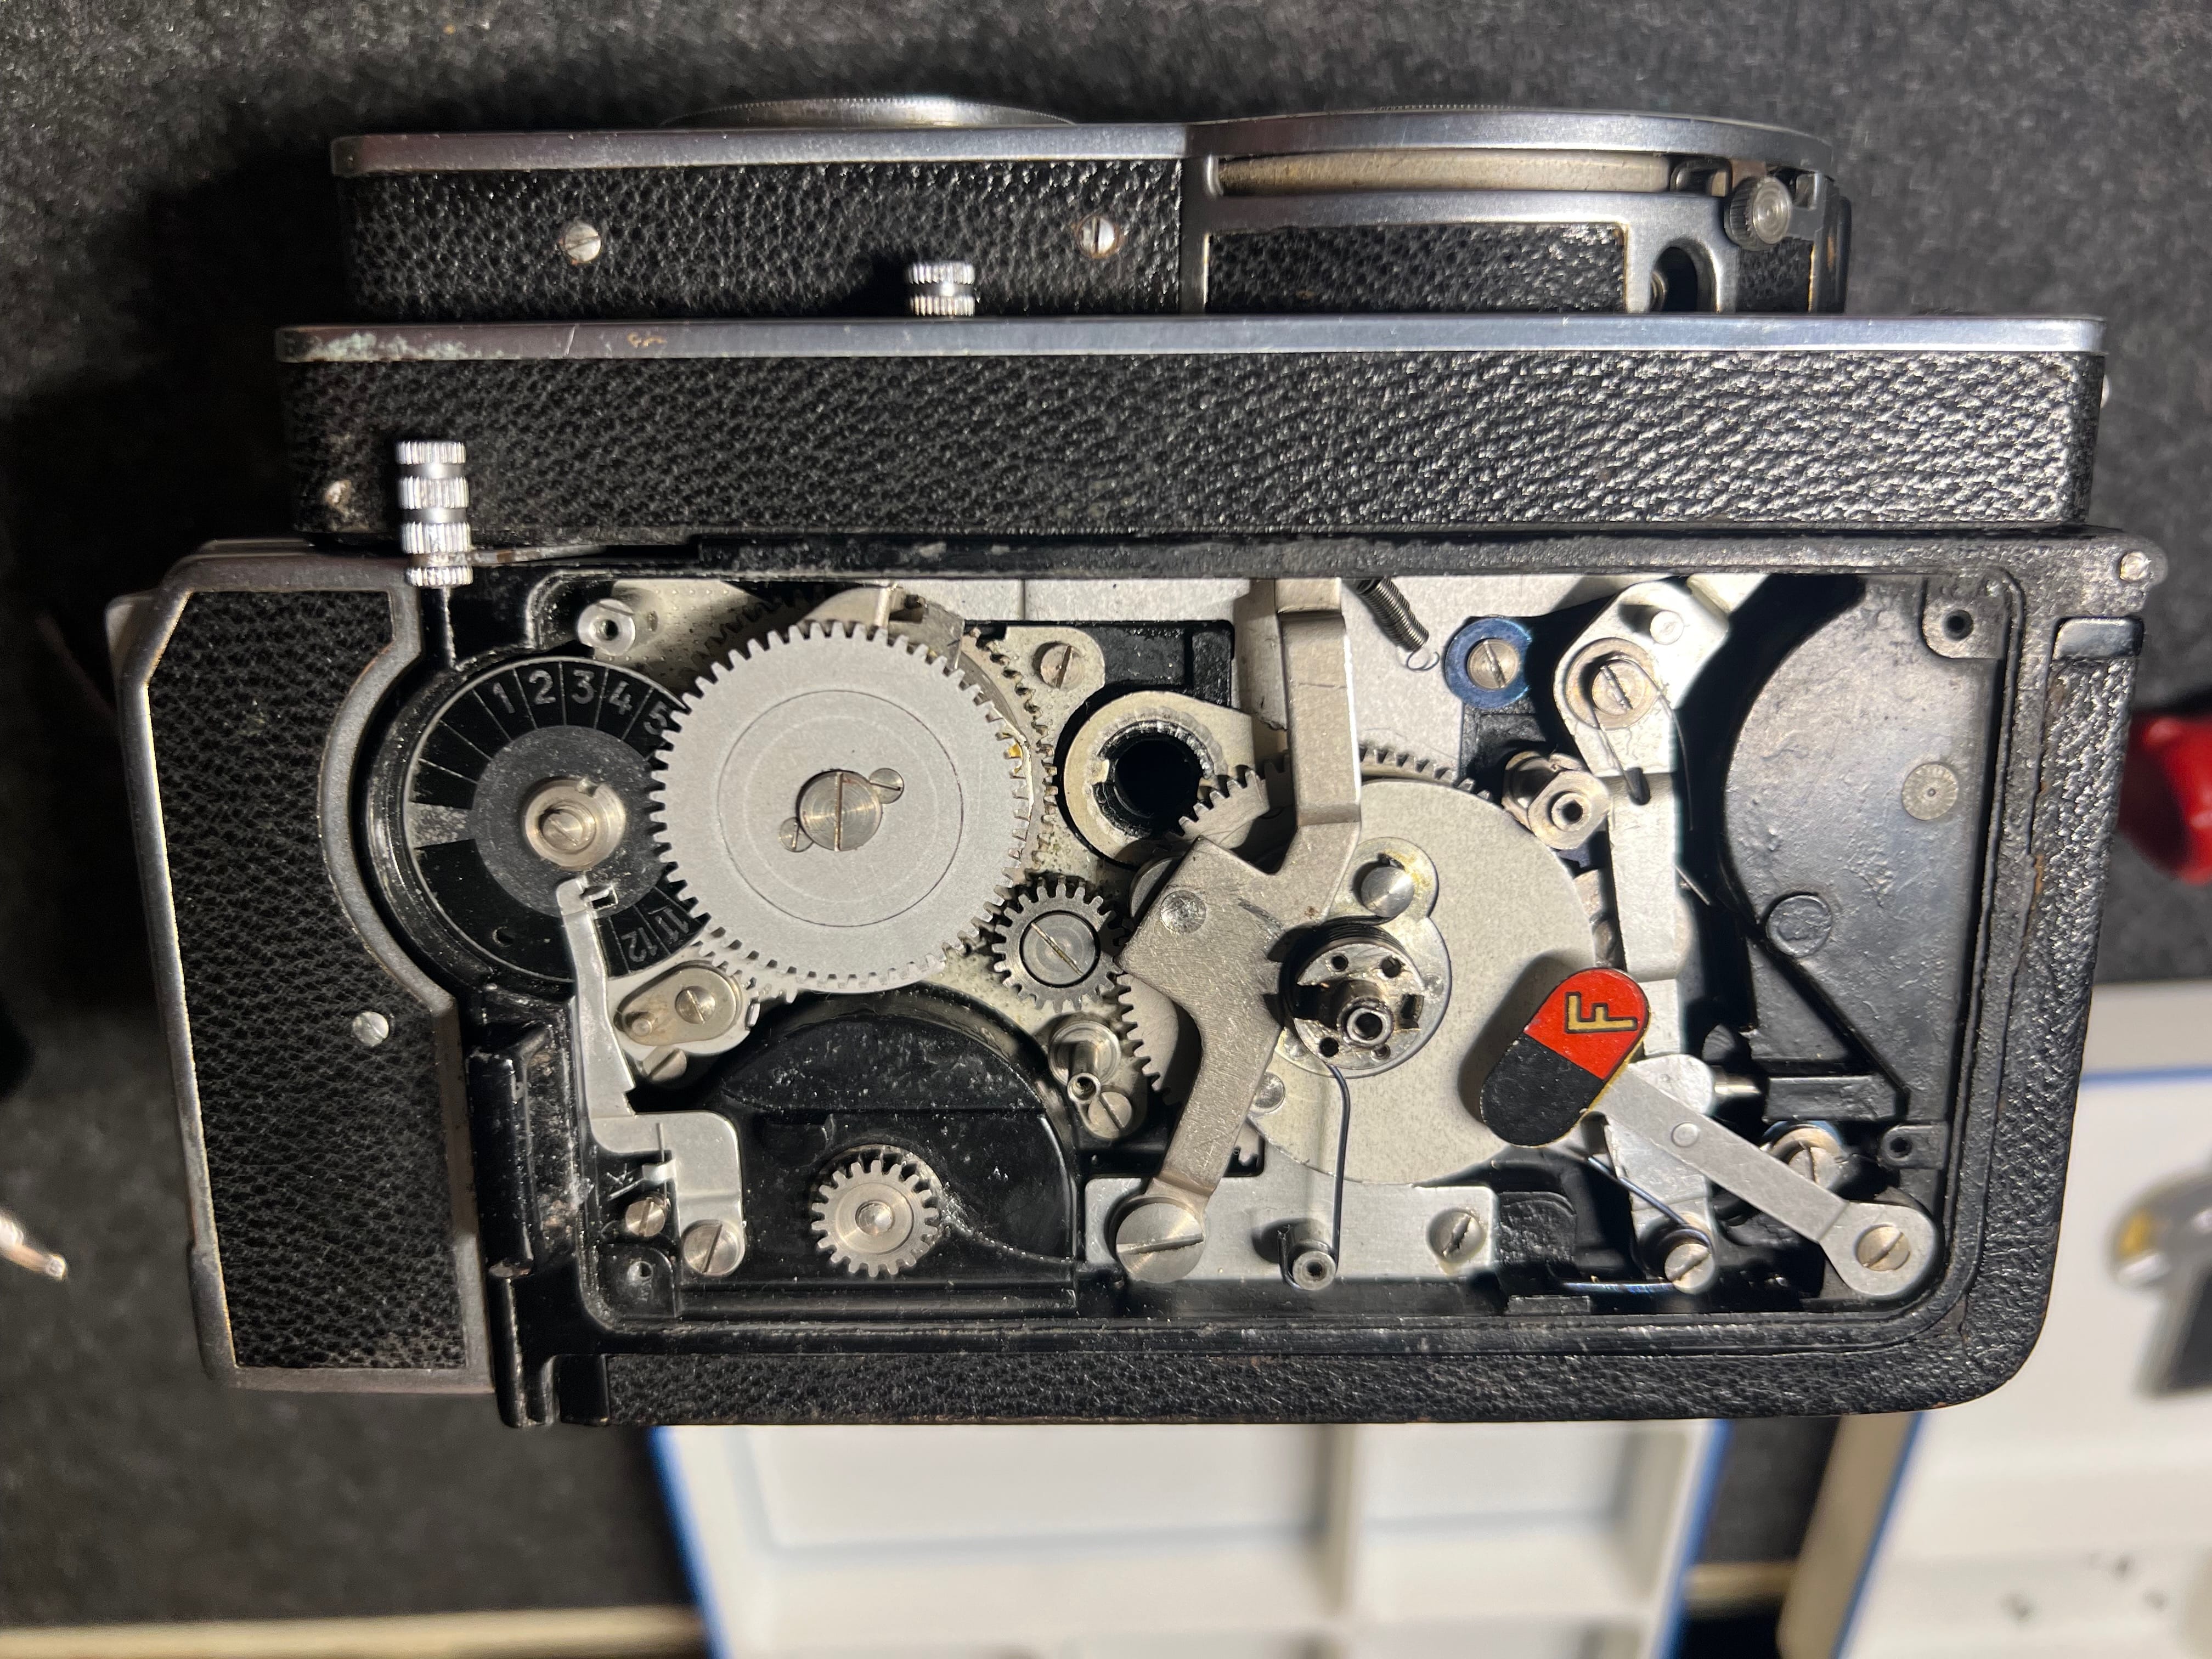
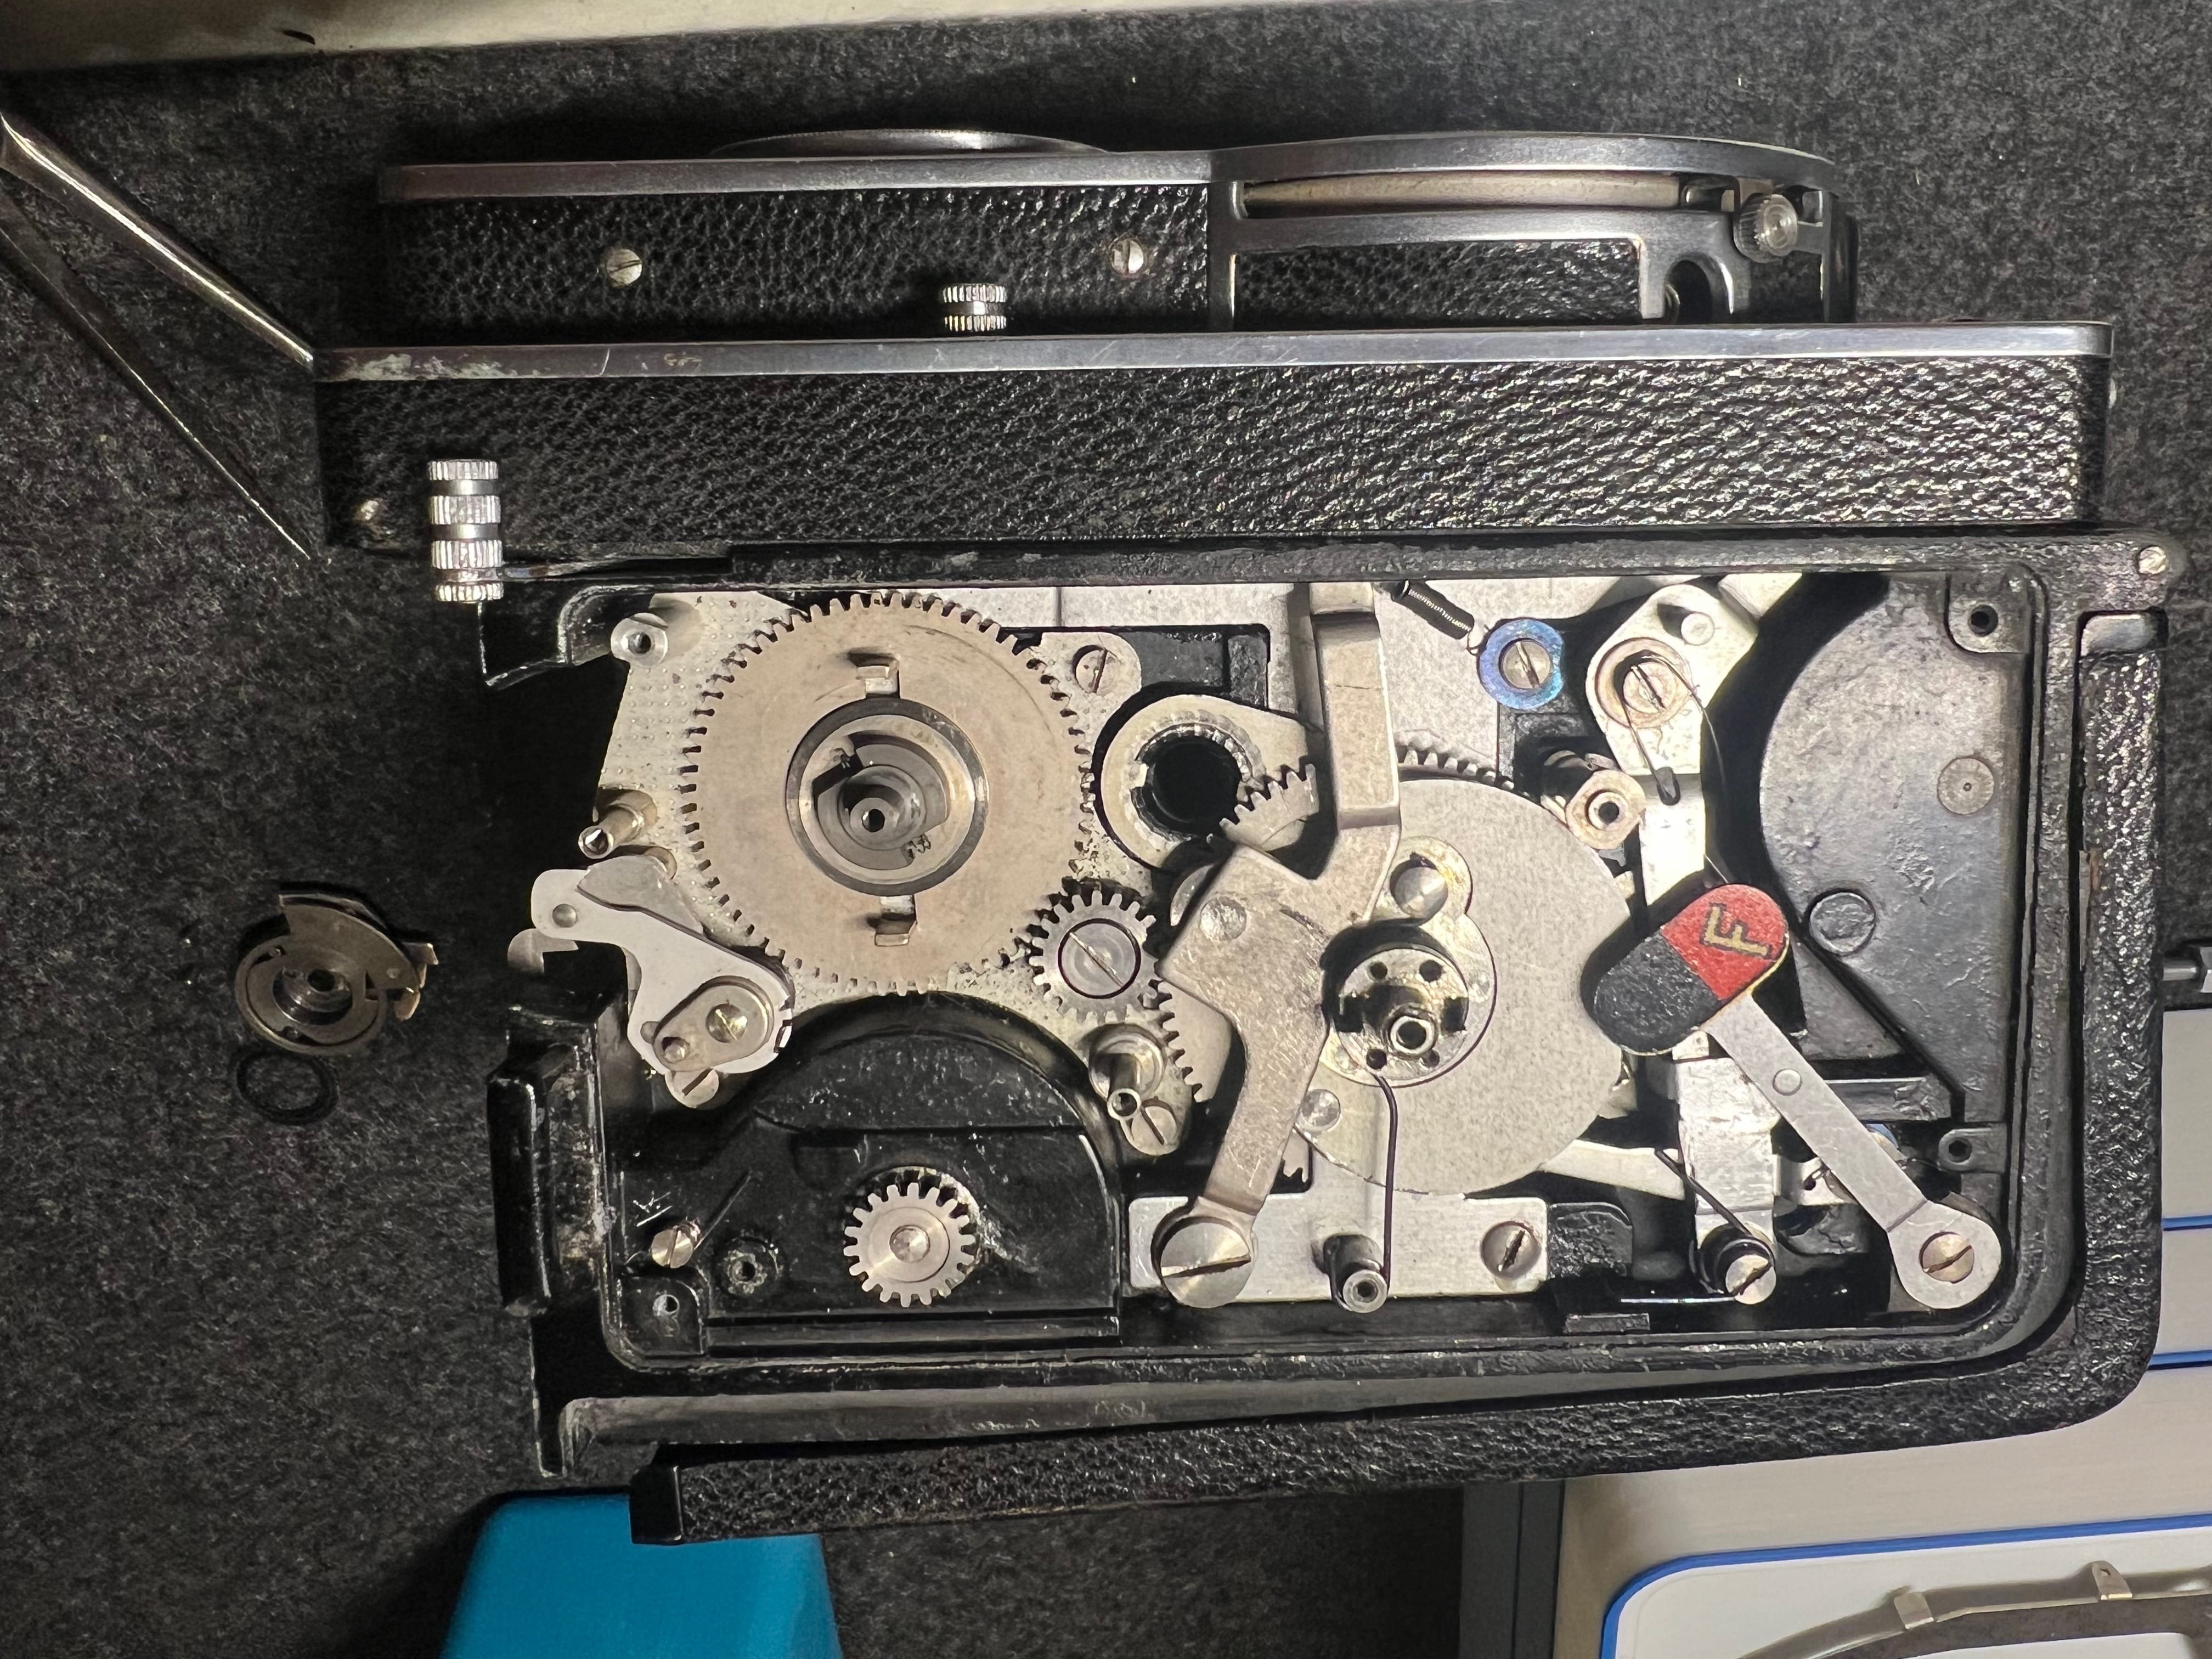
I have not found a service manual for this camera, so I’m sharing extensive tear-down photos of a camera which was not missing any pieces. I’ll also share any tips or tricks that I have found while getting my Ikoflex III back into working condition.
If the focus mechanism is locked up, then do not try to force it. It is not going to work free with use. You are more likely to damage the soft metal components than break the dried grease free.
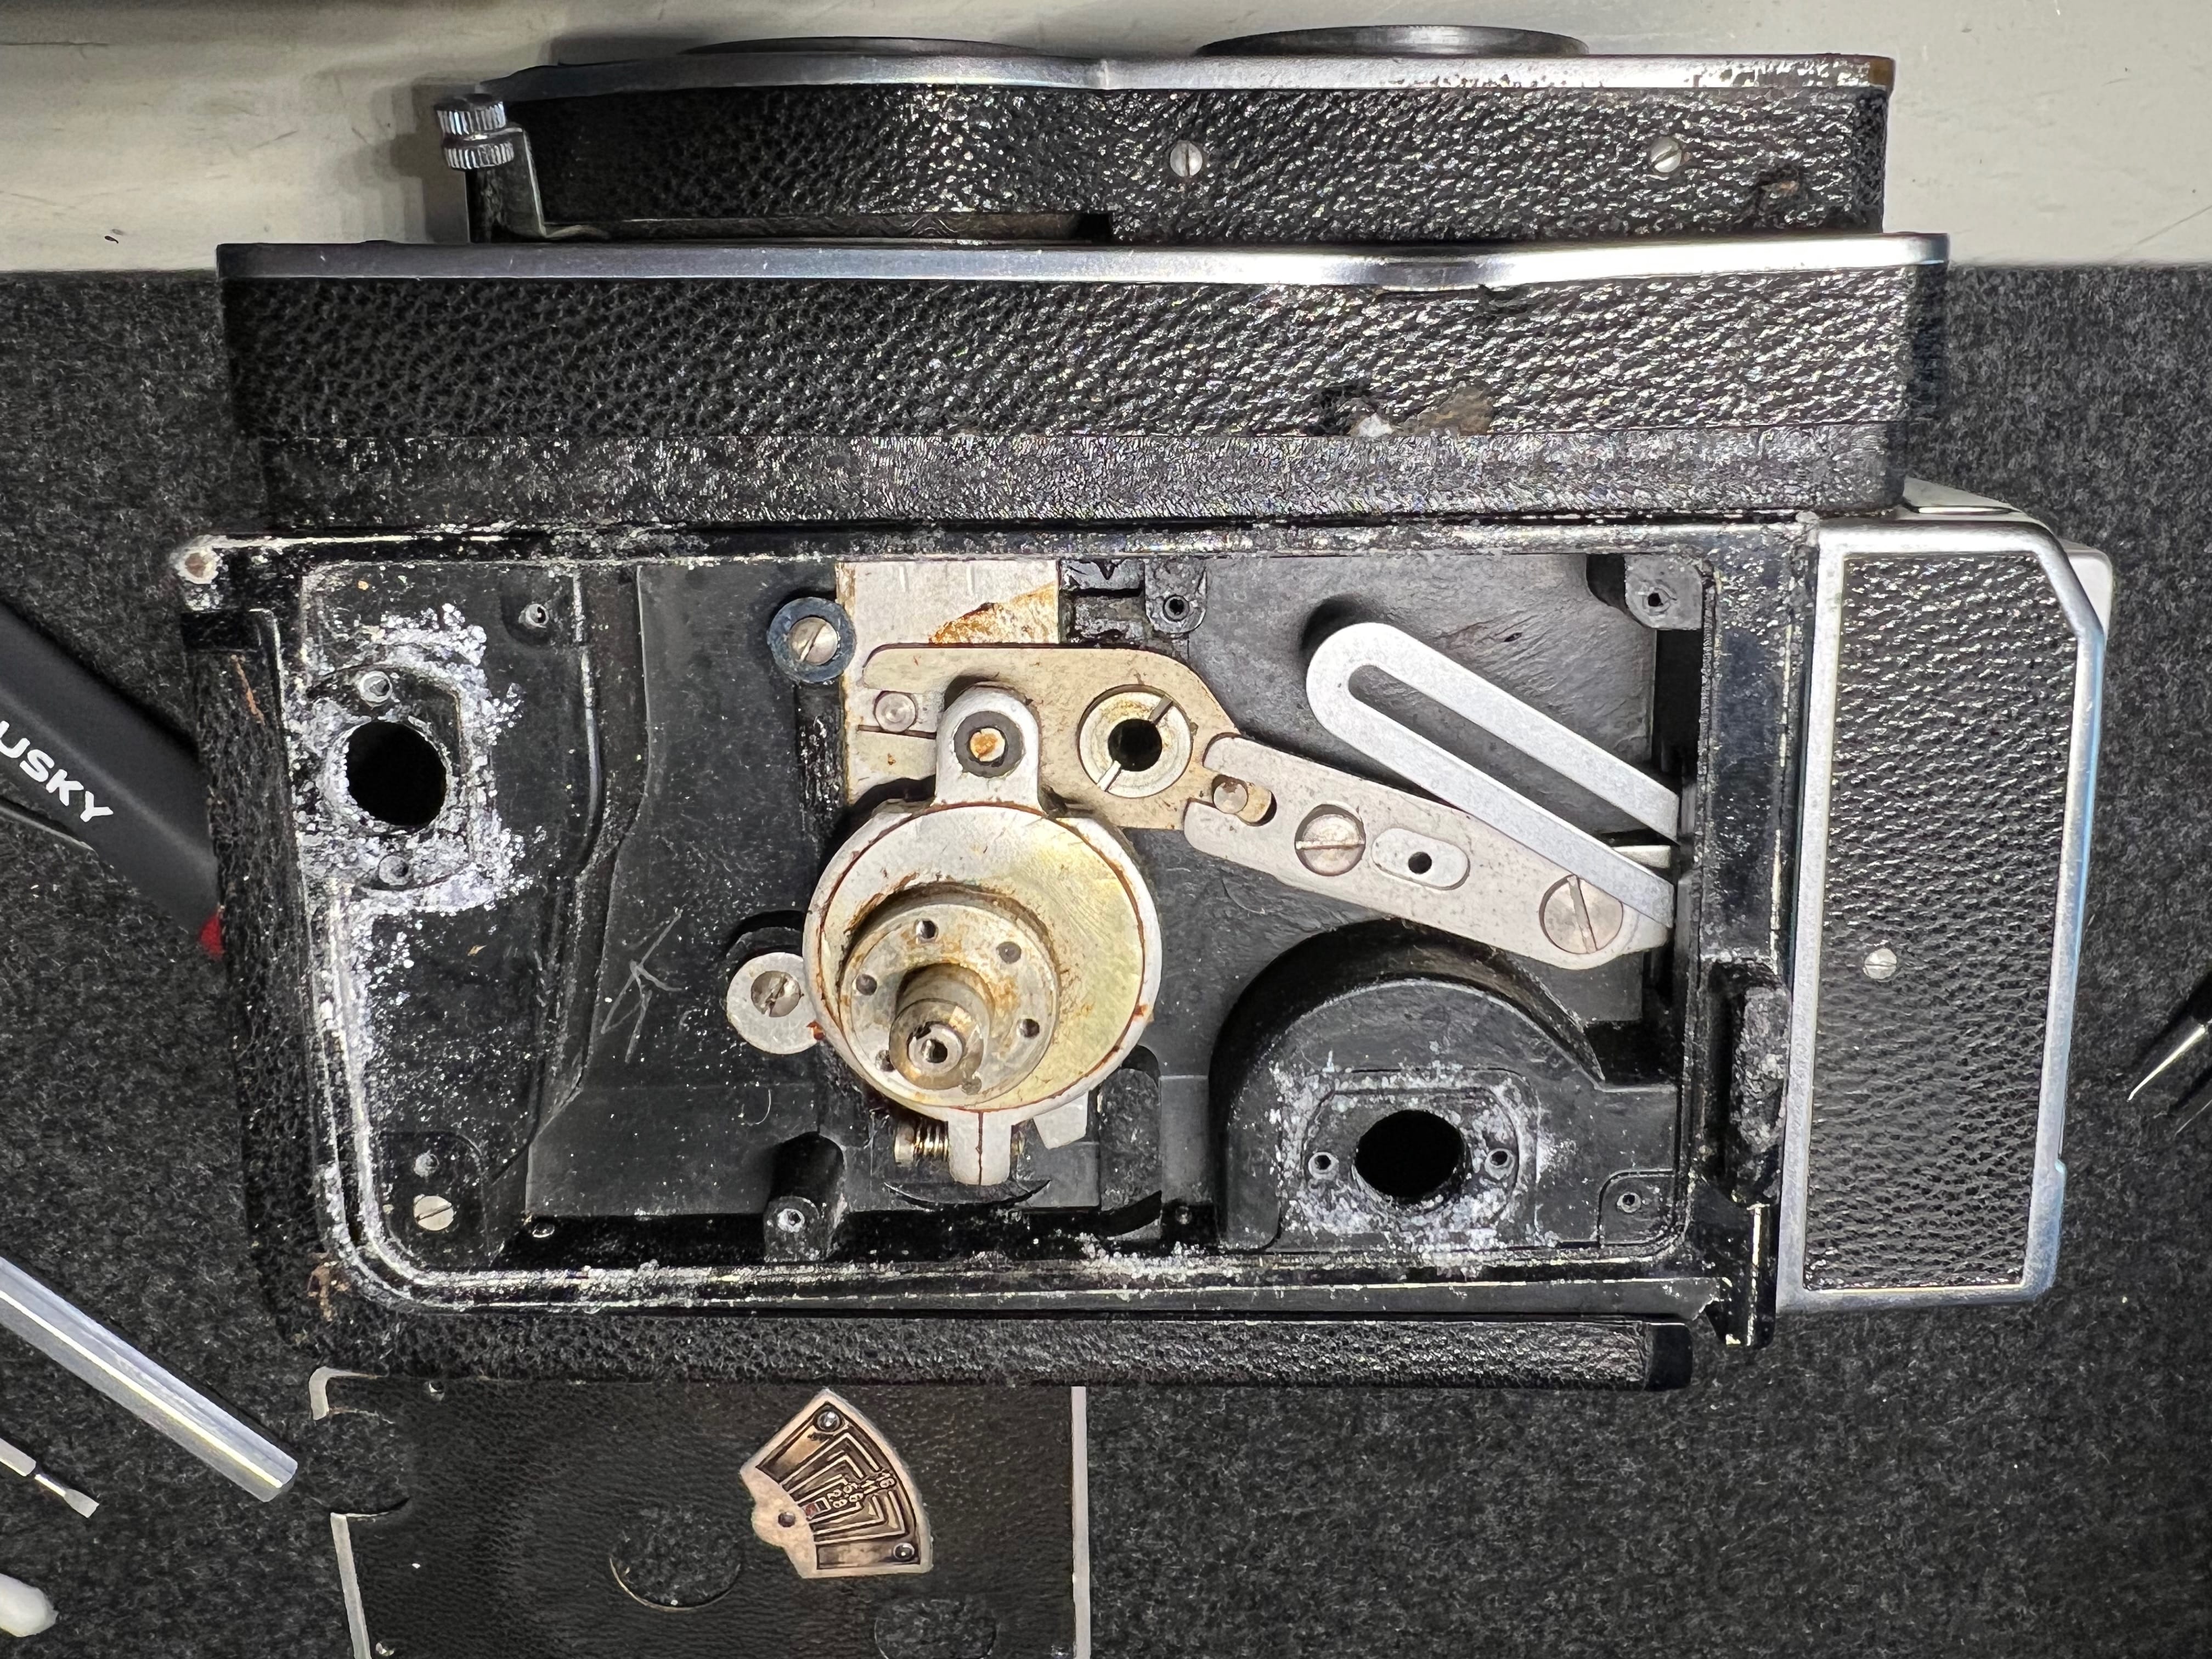
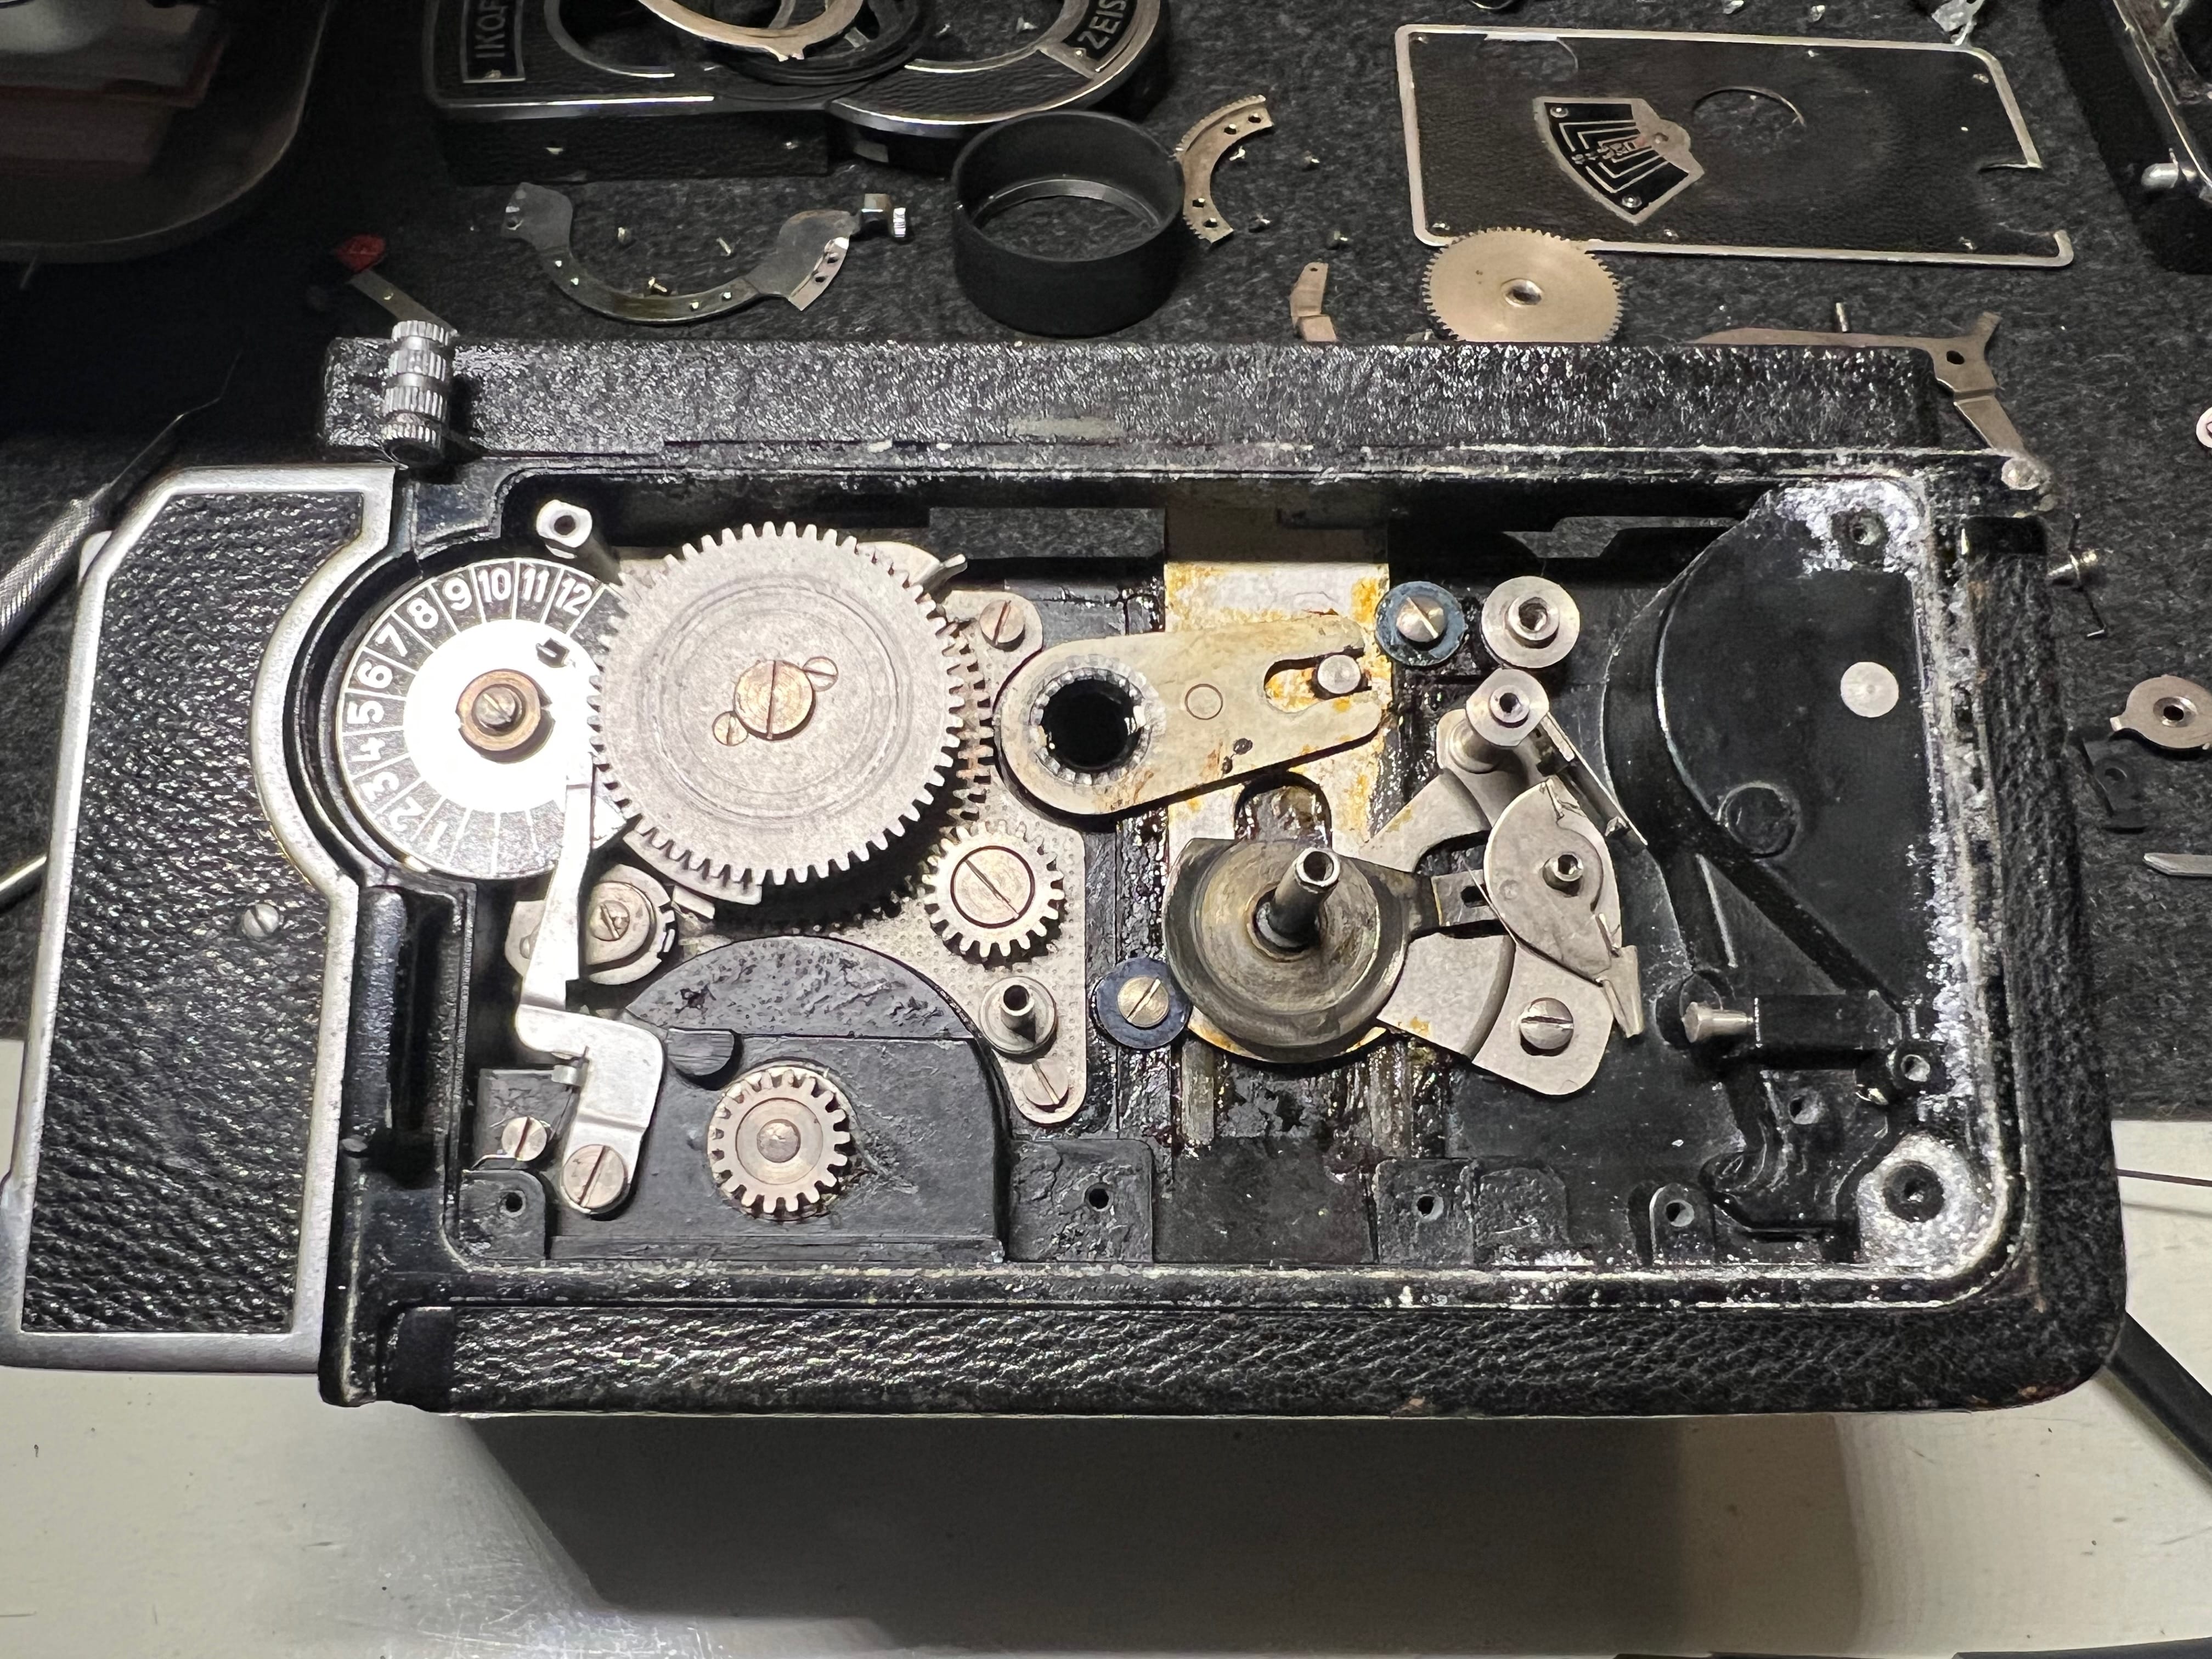
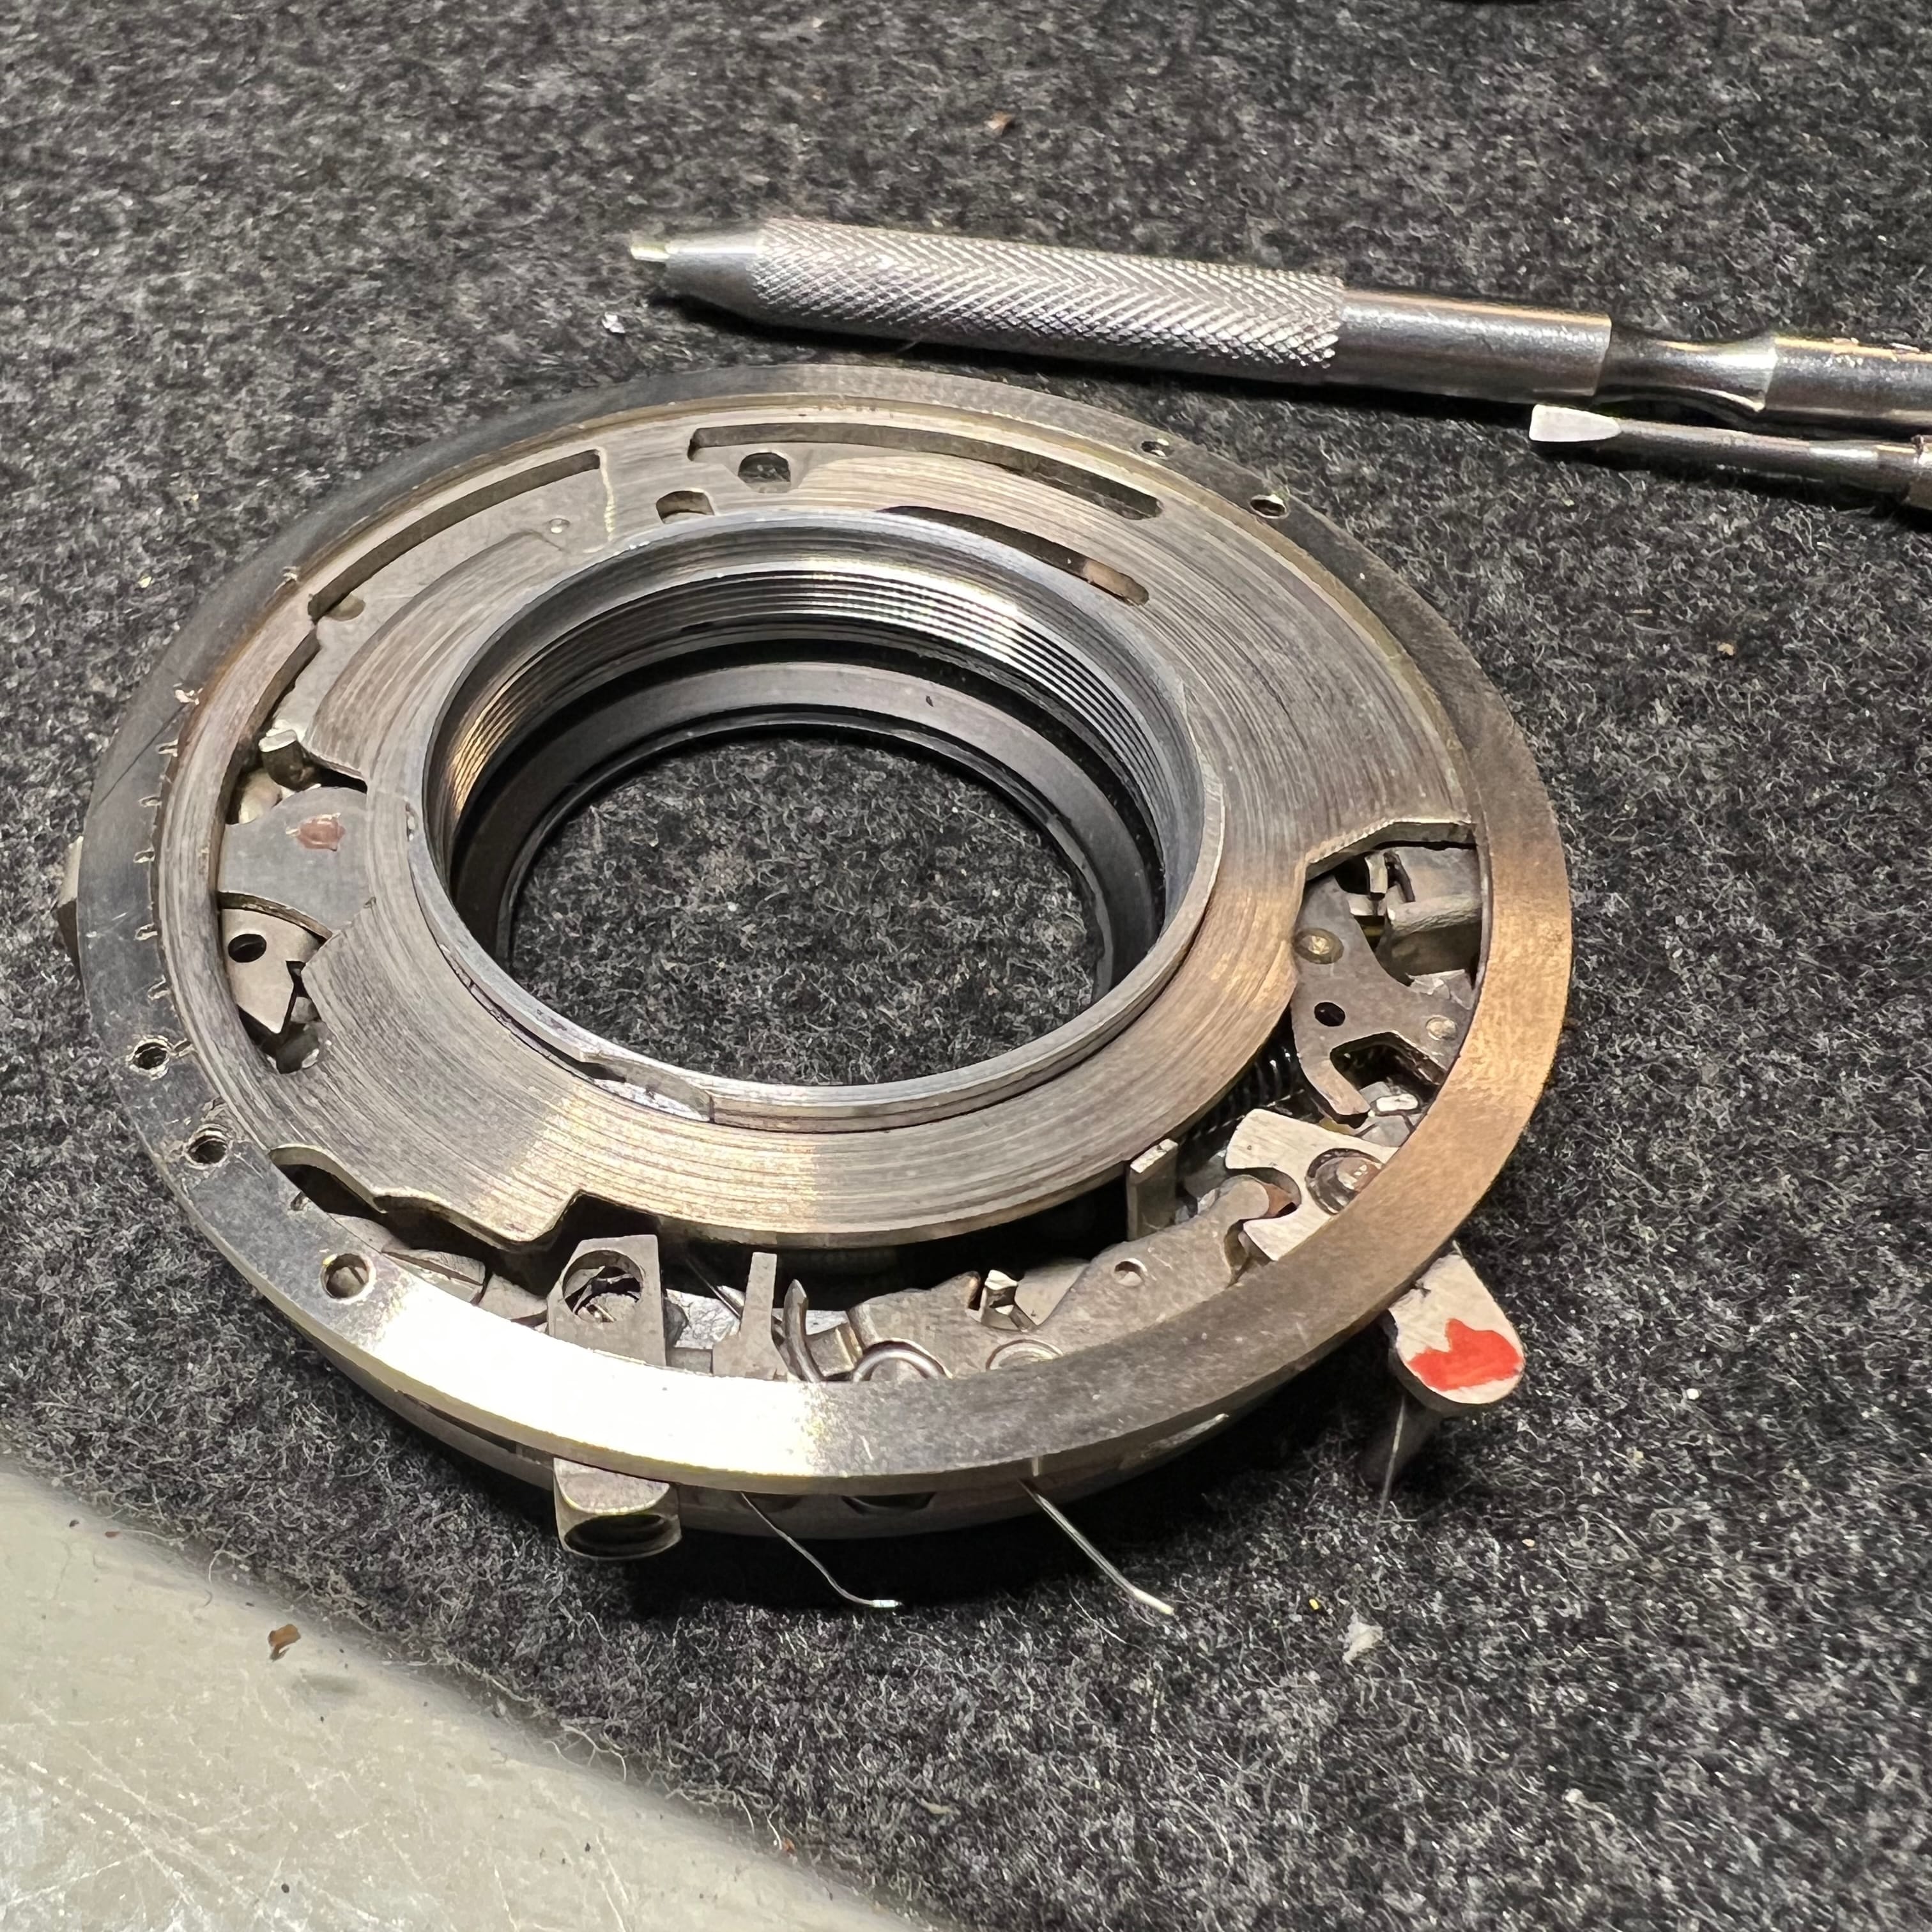
The eccentric mechanism shown above might get stuck on the center post. It must be carefully pried up as a single unit. The screw and spring on the outer part of the eccentric is for adjusting focus tension. Do not try to pry that piece apart. The metal is soft and can be easily broken; without it the focus will not work properly.
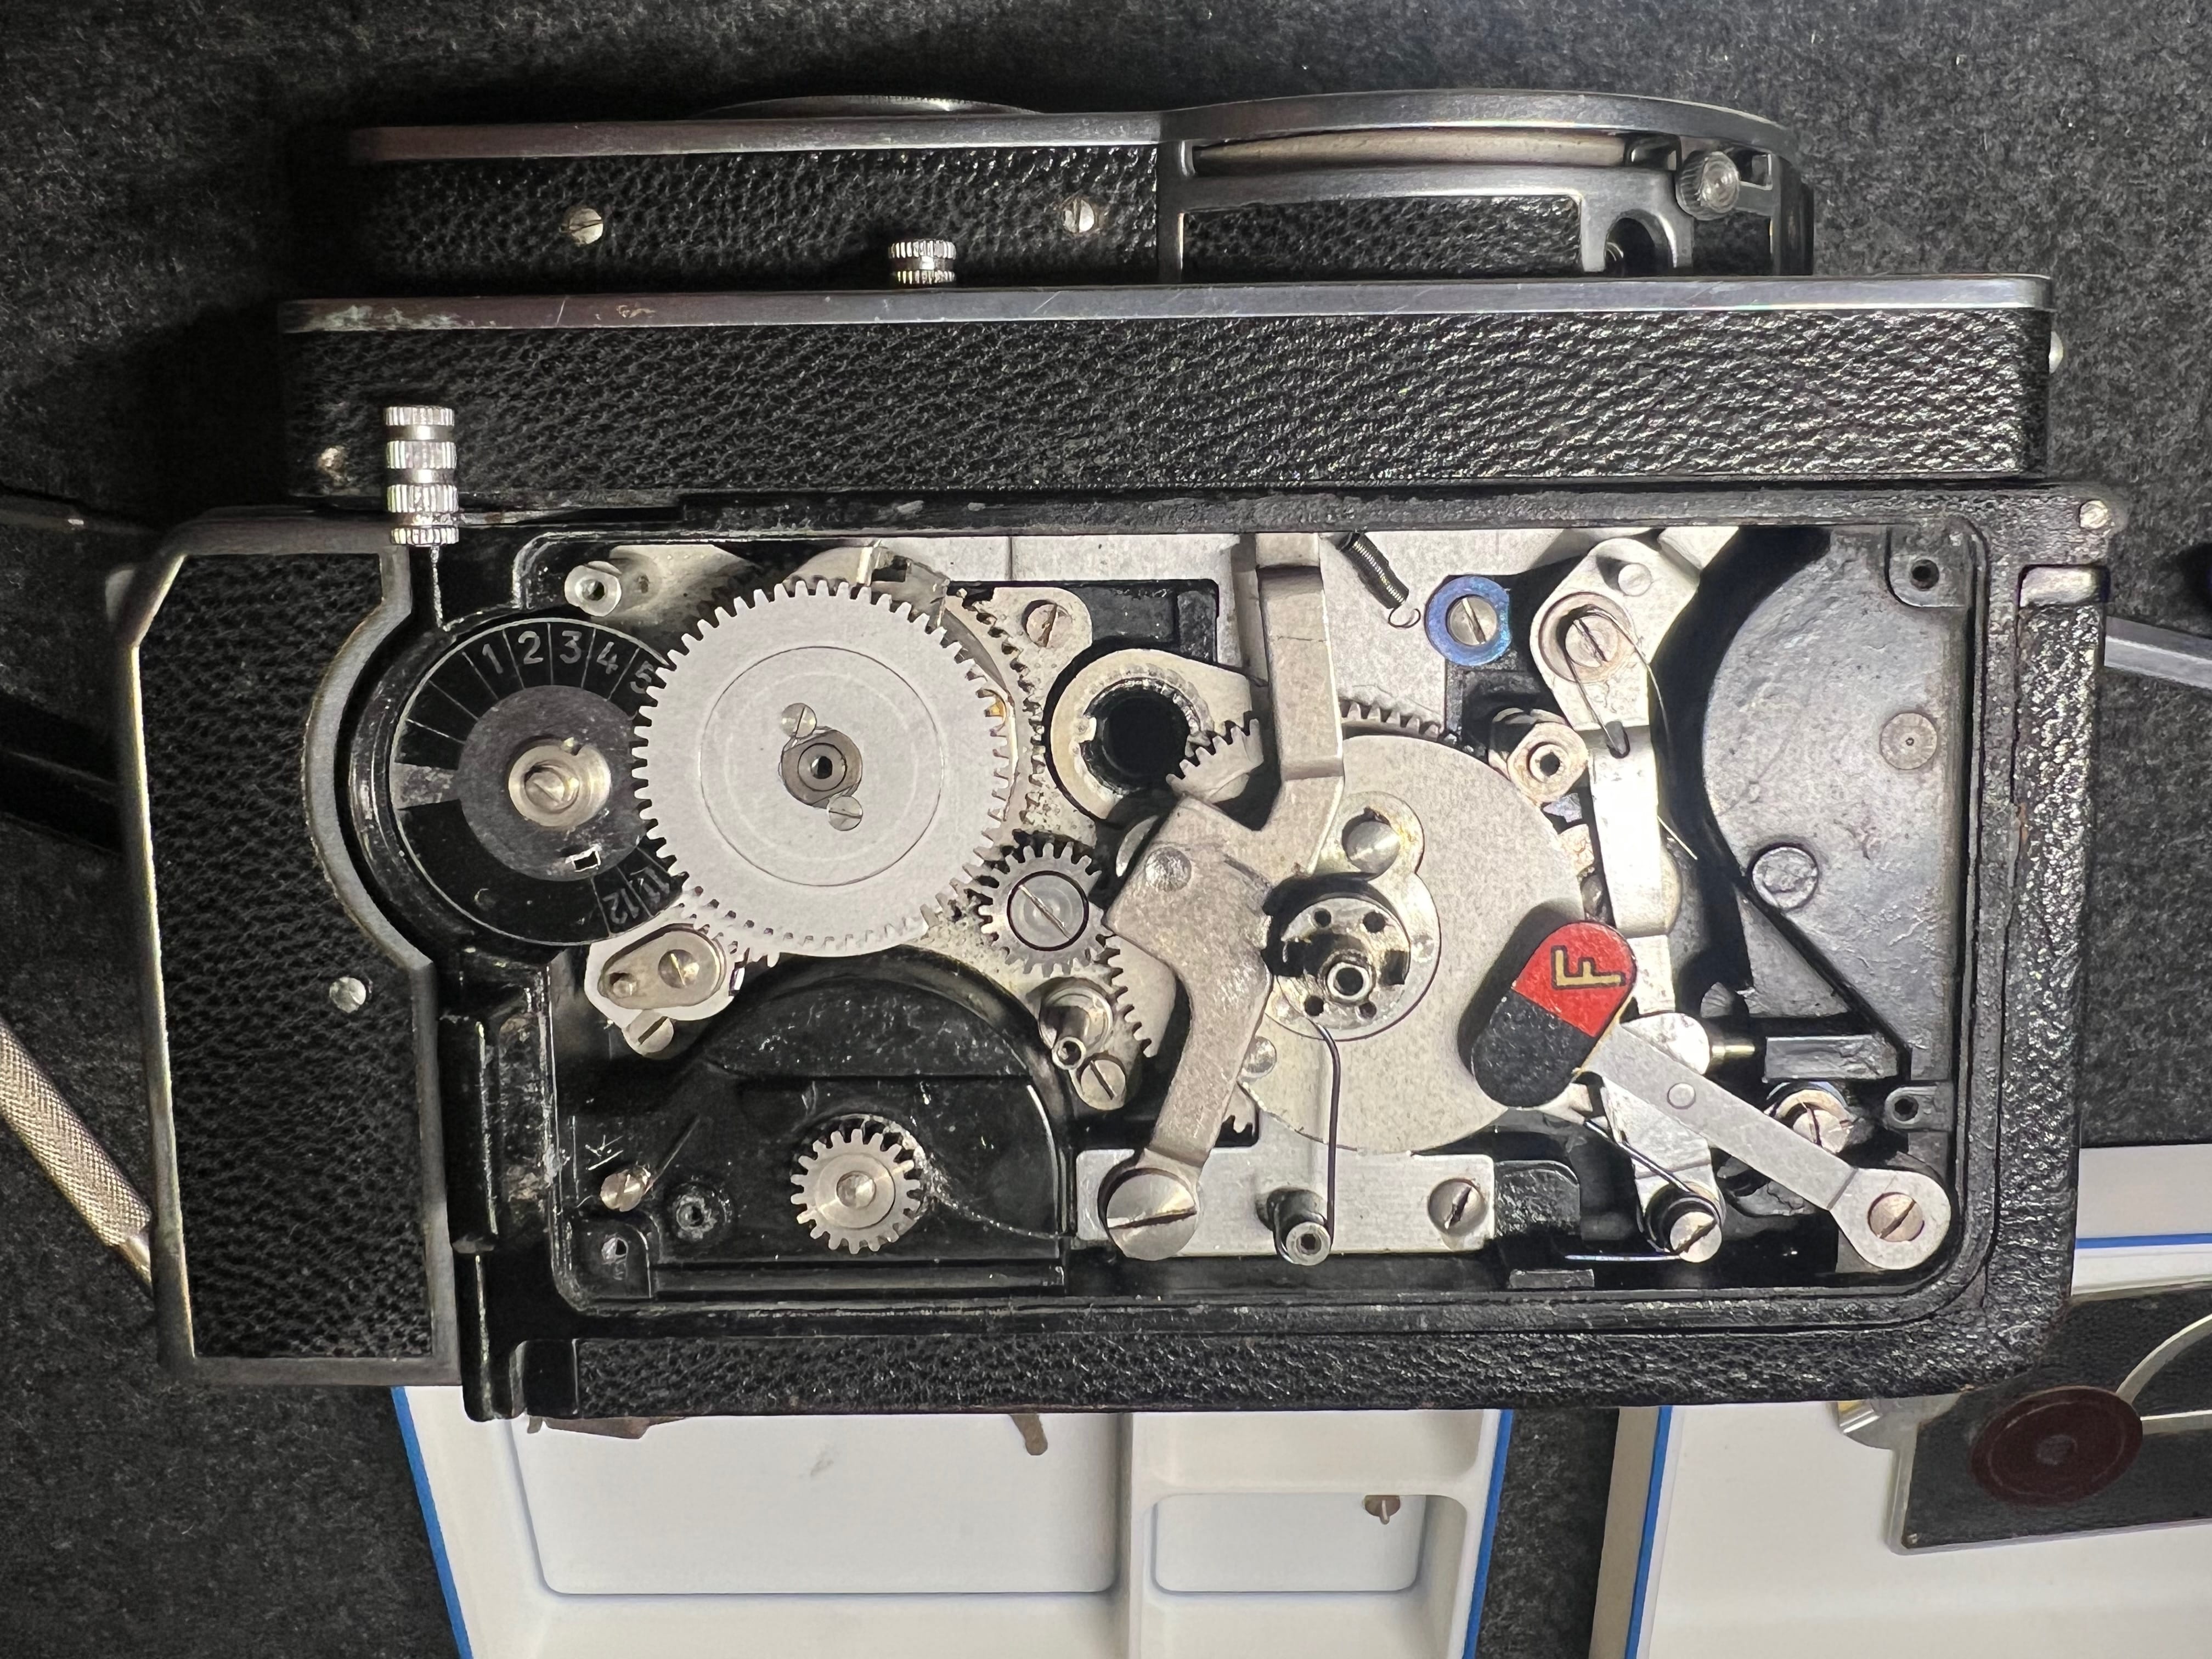
In the above photo you can see I have removed the shutter mechanism from the focus board. That is probably not needed to regrease the focus. It should be possible to unscrew the entire focus board from the focus rails, though I forget what exactly needs to be removed to get to the mounting screws. The focus board needs to be removed to get the focus rails out because the of the post going through the middle. And, there’s no point in disasembling it this far an not cleaning the grease from under the rails.
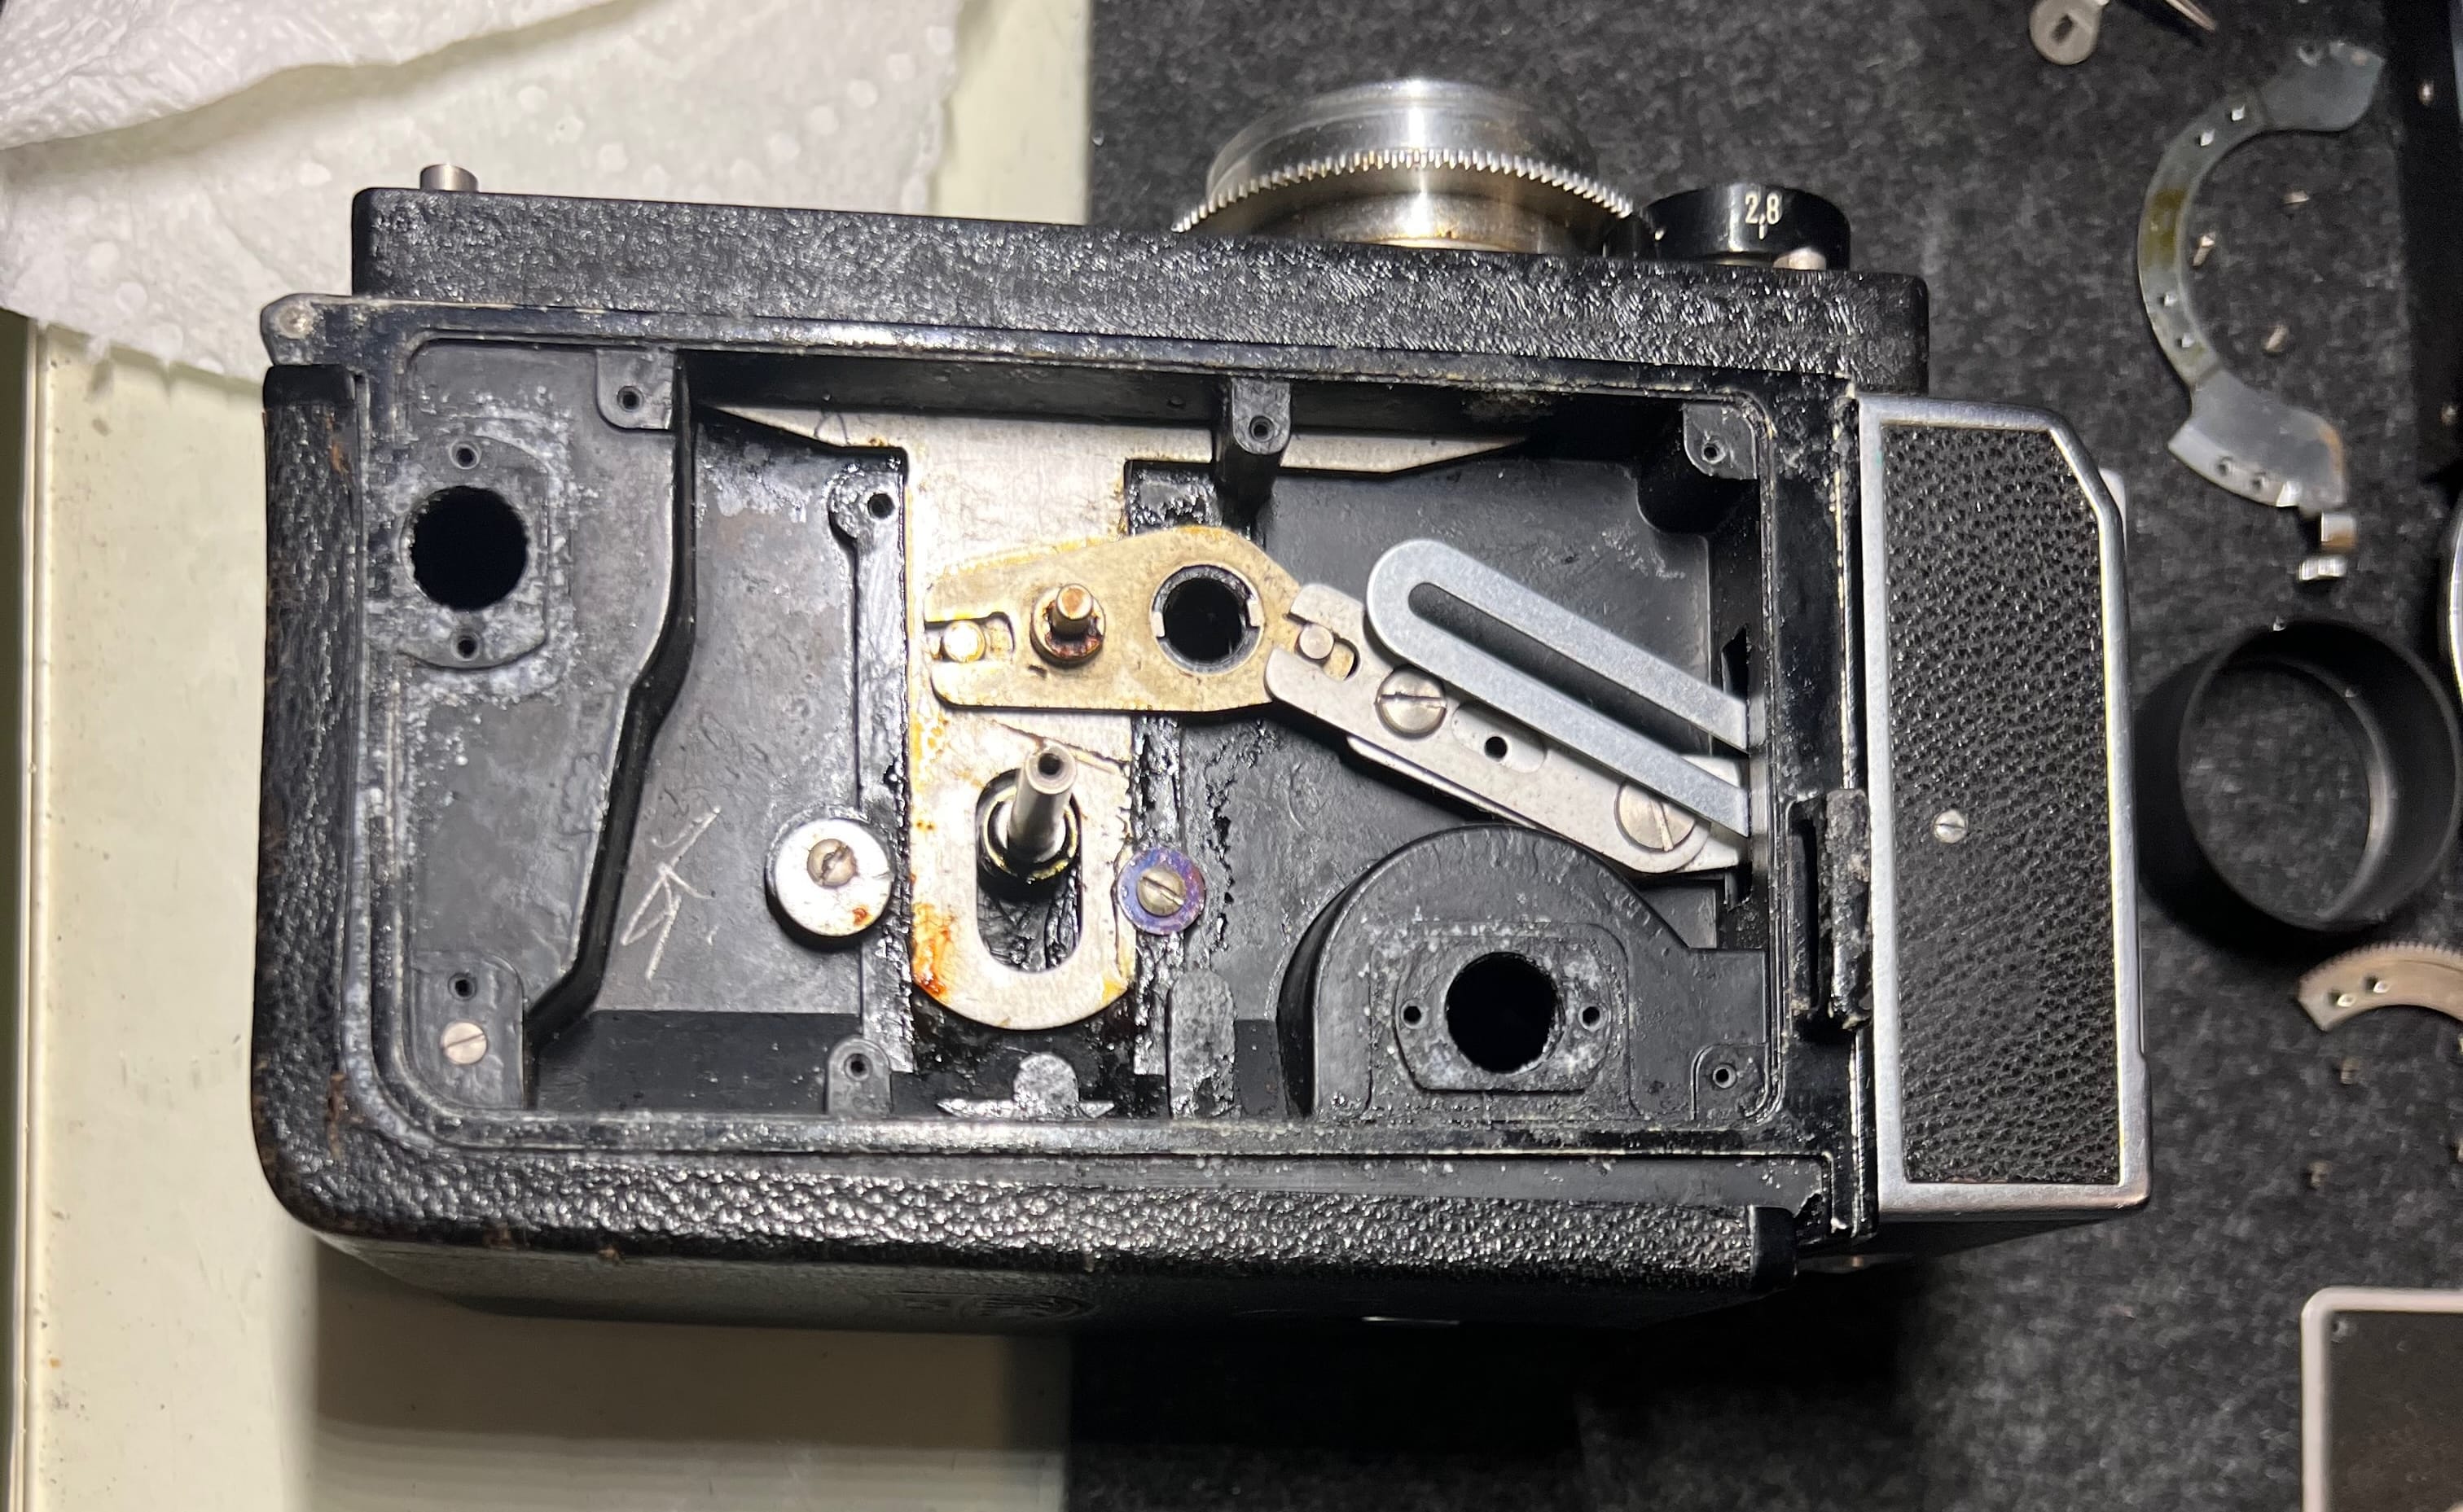
Once the screw on the connecting rod is removed, the remaing parts should come free easily. Remove all the focus components on this side, completely remove all of the old grease. Mixing different types of grease can lead to problems, the worst of which is hardening of the grease. The other side of the camera will need to be disasembled to remove the focus connecting rod and finish the cleaning.
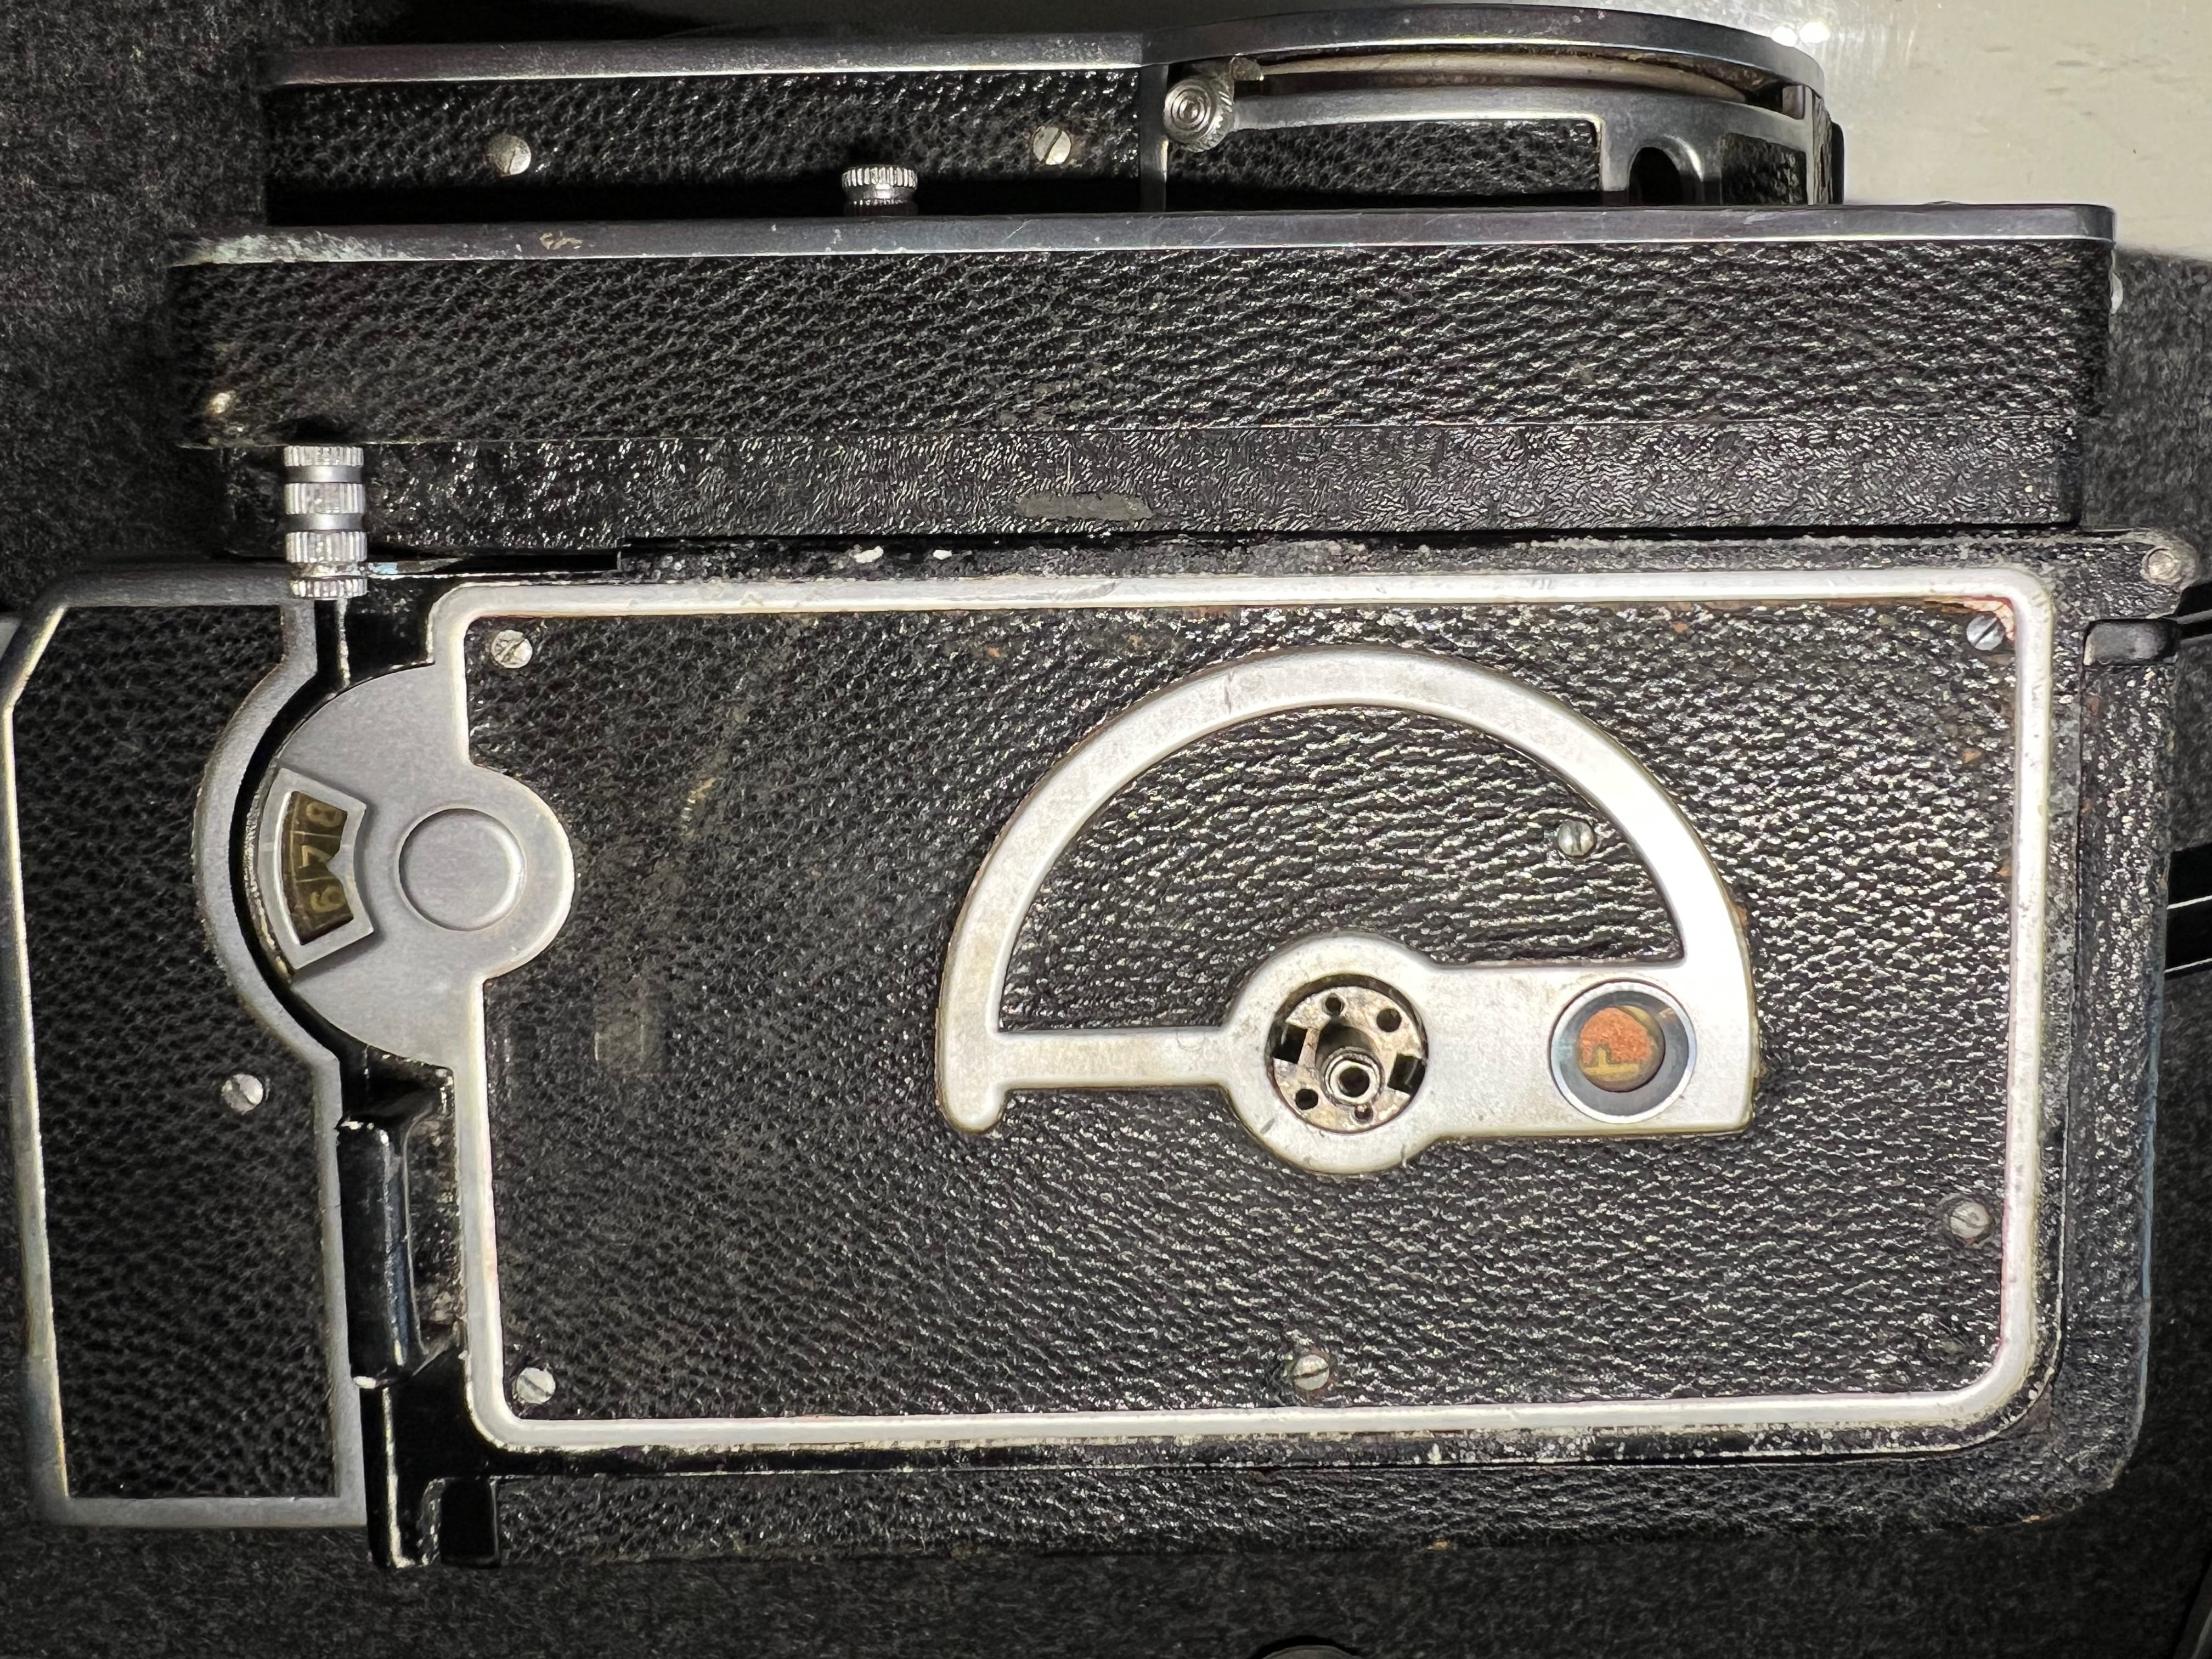
To remove the film crank start by removing the screw holding the decorative chrome piece in place; it will need to be pried off of the post. That will reveal four small screws. Remove those and carefully pull off the crank handle. There are small spacers underneath that can stick momentarily and follow off unexpectedly.
Side note: I’m not showing the reassembly steps, since it is just following the same steps in reverse order. But, I’ll mention some reassembly tips. The most common problems with the film mechanism have nothing to do with the mechanism itself, it has to do with the cover getting bent and pressing on the internal mechnism. The springs in the mechanism are light, and have grown weaker with age, so light pressure can prevent parts from snapping back into place when they should. I use small washers as spacers between the body and the cover when I run into this problem.
If the film loaded indicator does not spring back into place when film is removed, it is likely due to friction on the flag itself. The flag arm is a very soft metal and can easily be bent. Make sure it is not dragging on other components. Also clean and lubricate the surfaces around the screw.
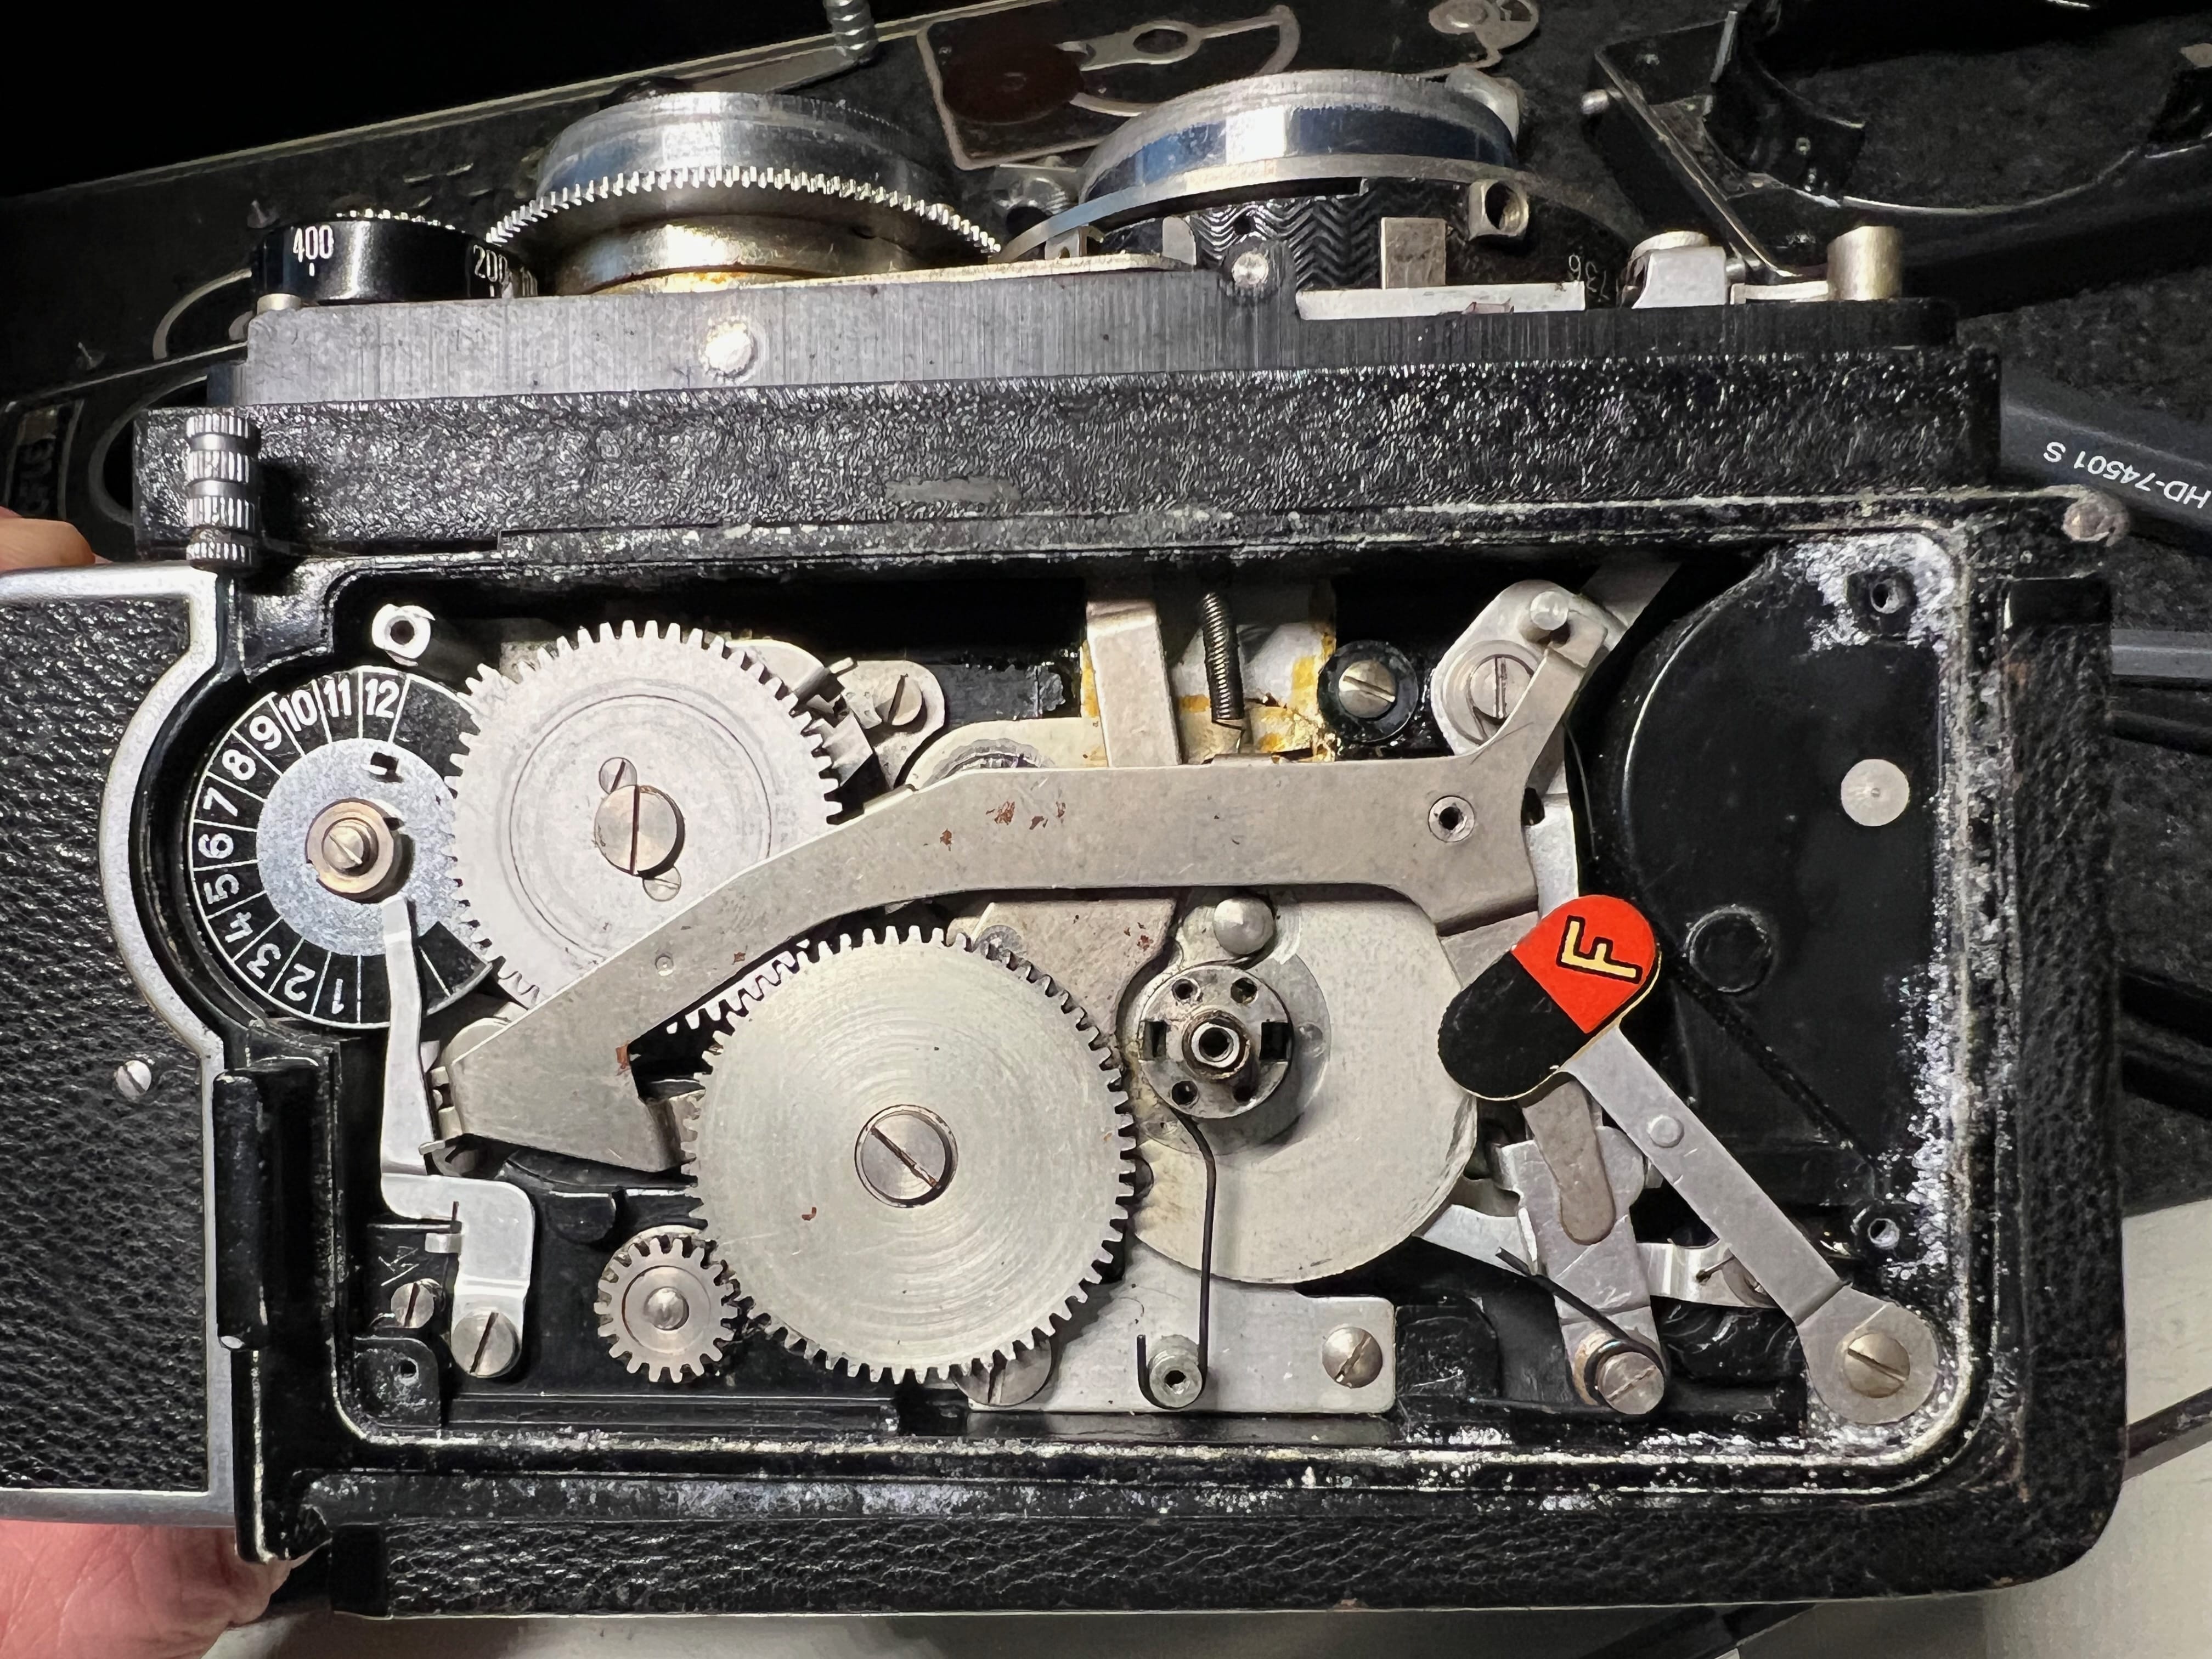
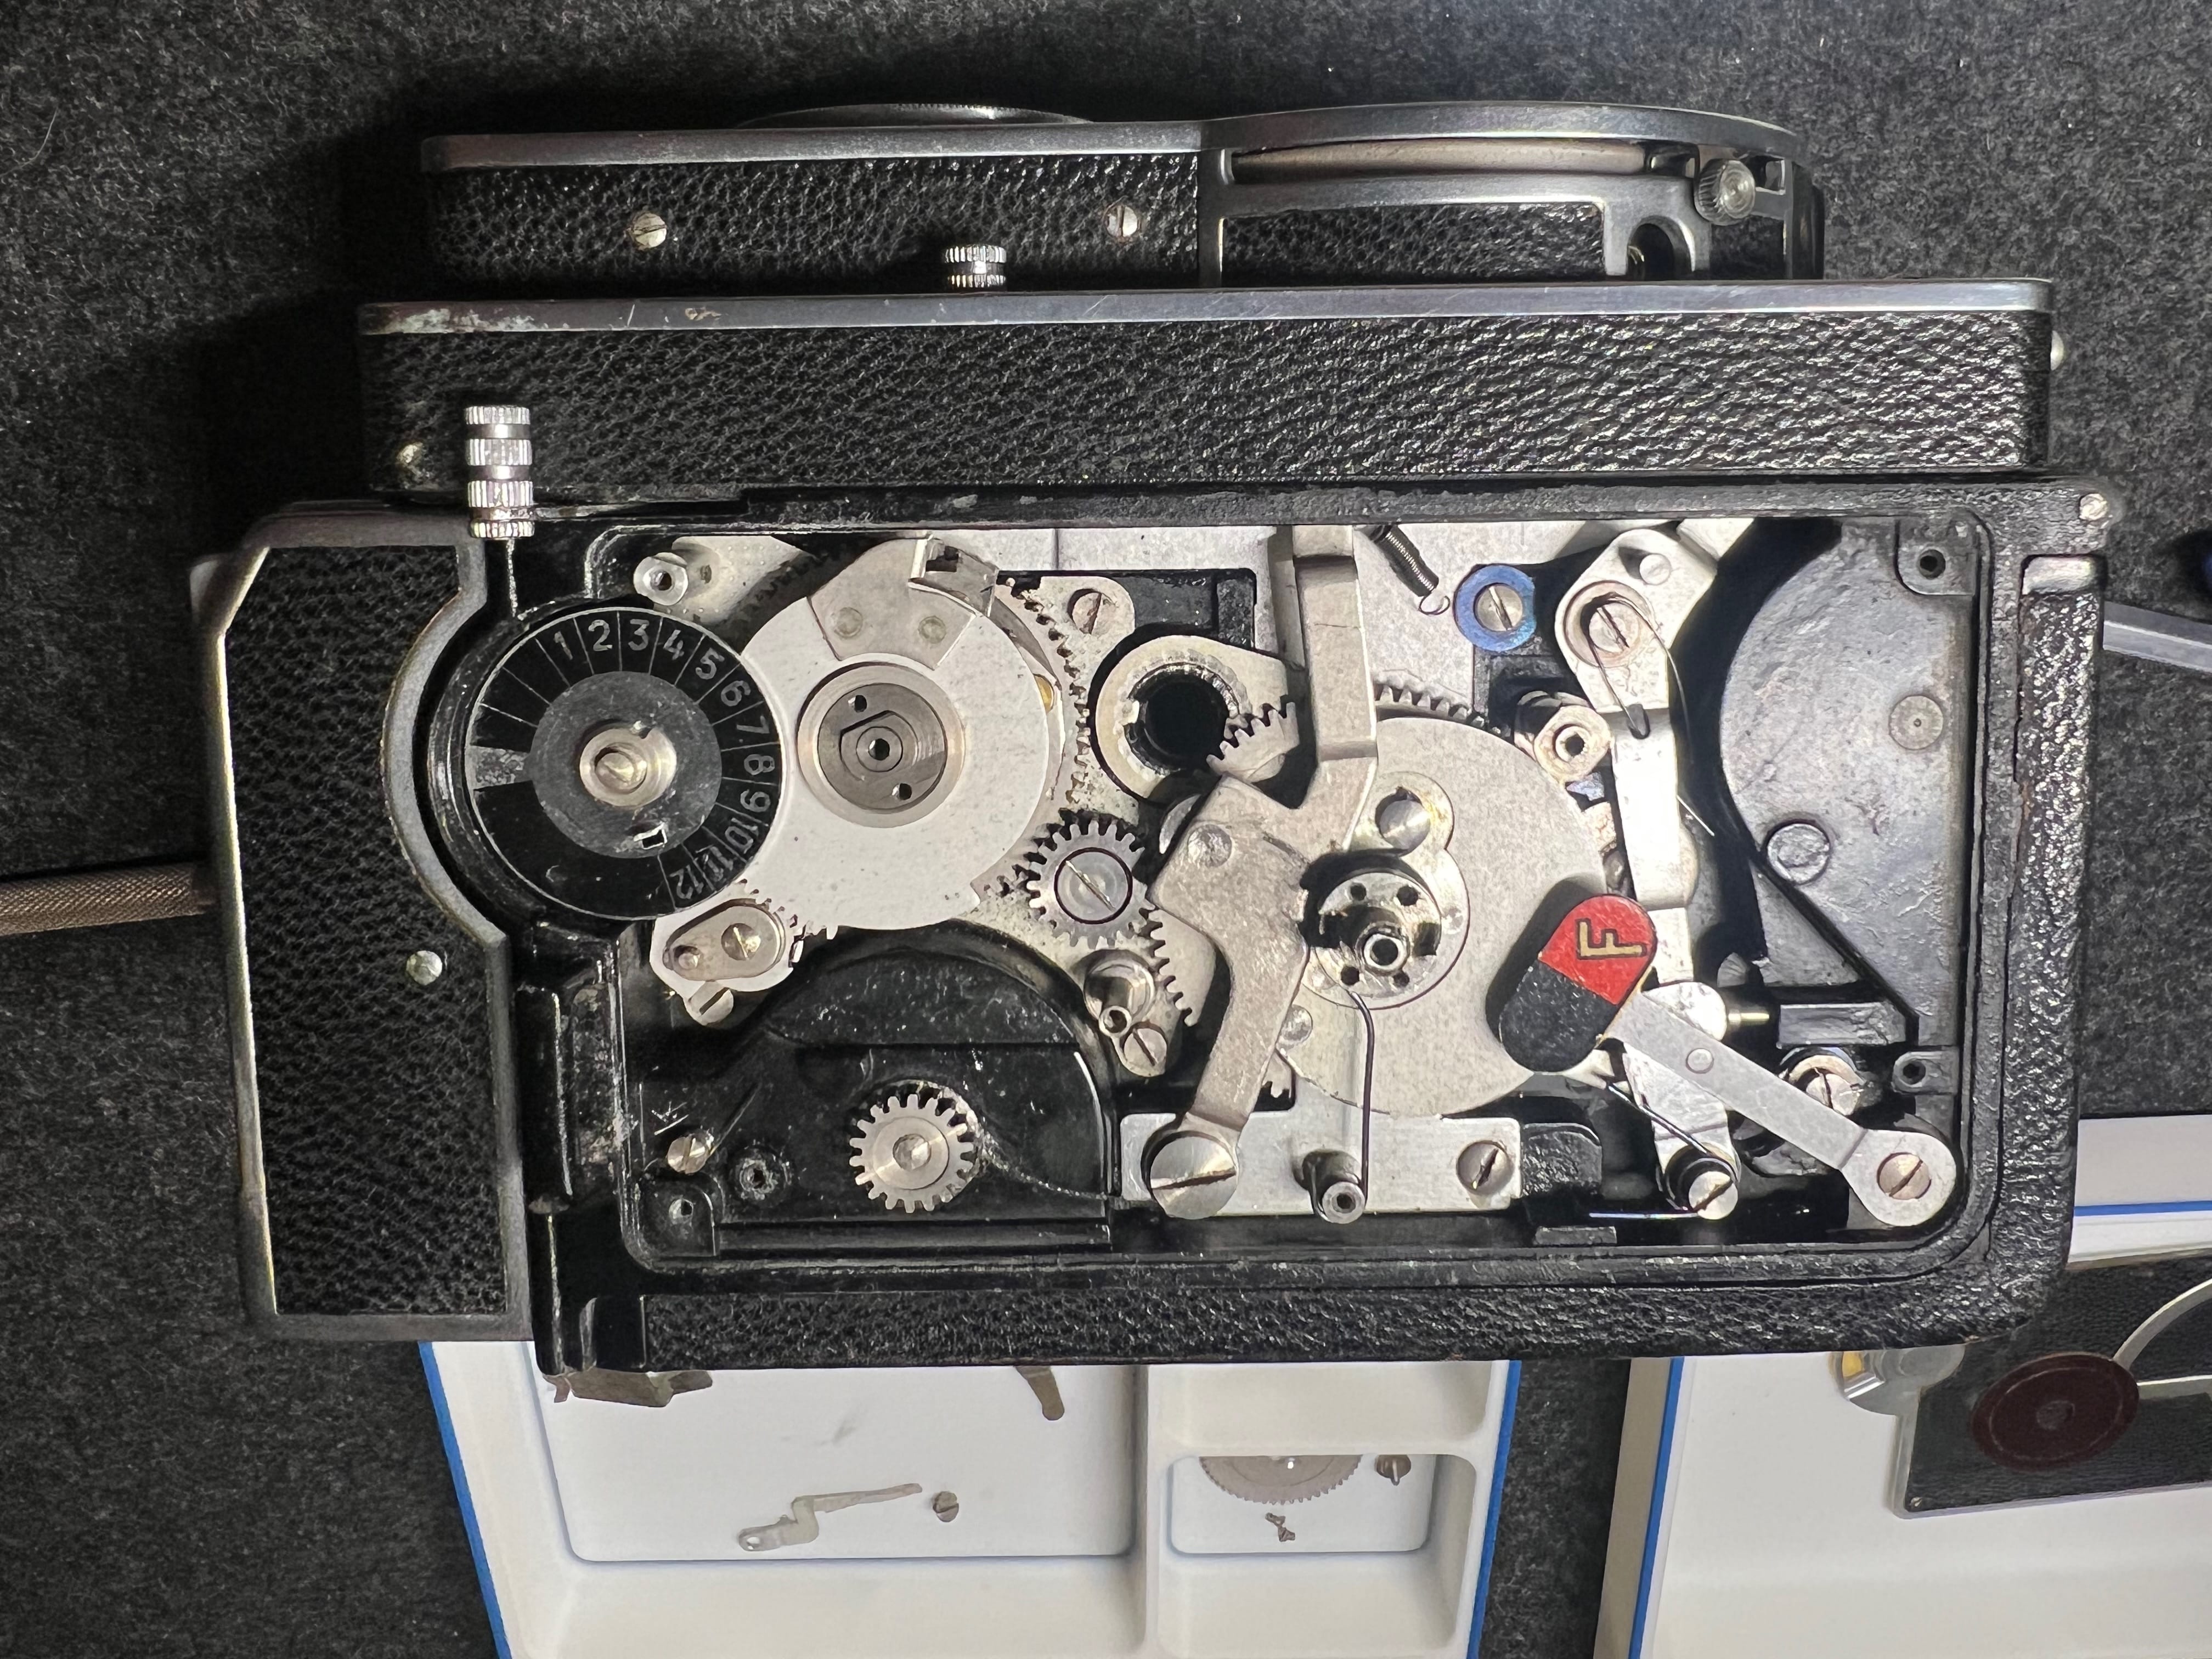
In the photo below you can see the large armature connecting the top mechanism to the bottom mechanism has come off of its pivot point. I often place a washer above that point and reinstall the cover screw to hold that part in place.
With the long armature removed you can start to see the focus connecting rod. The armature going from the center bottom to the center top sets the shutter when the film is wound.
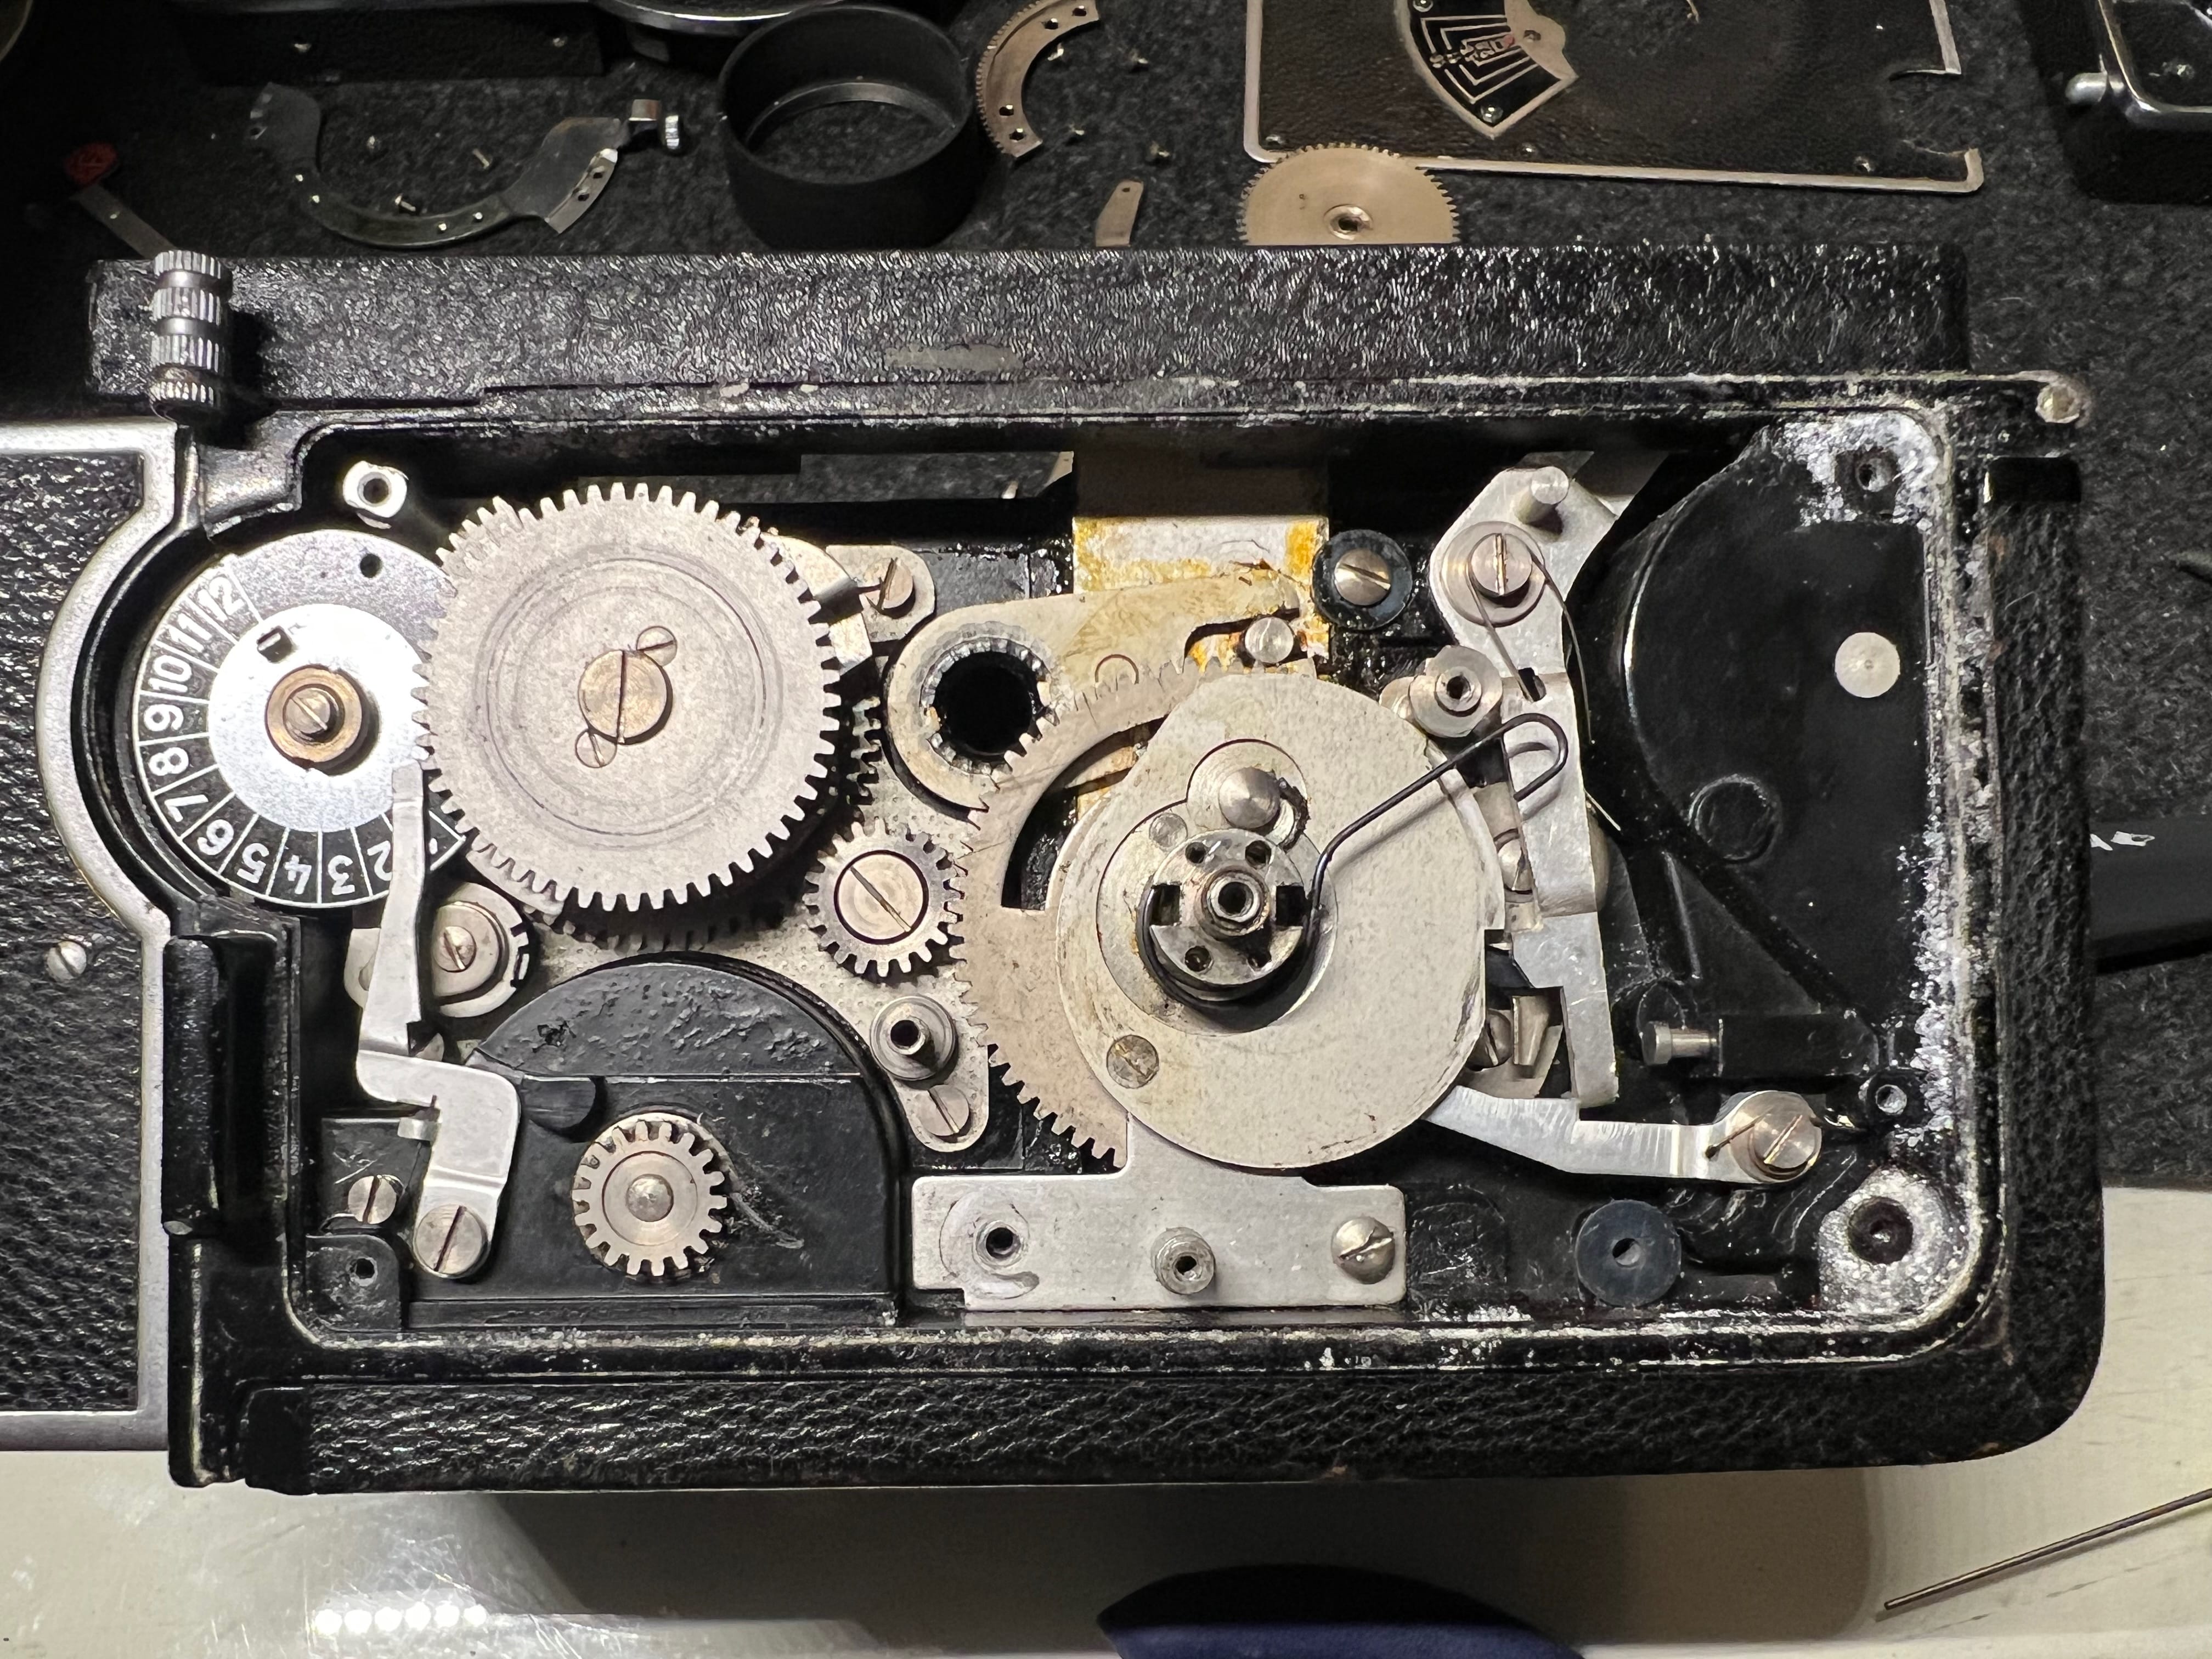
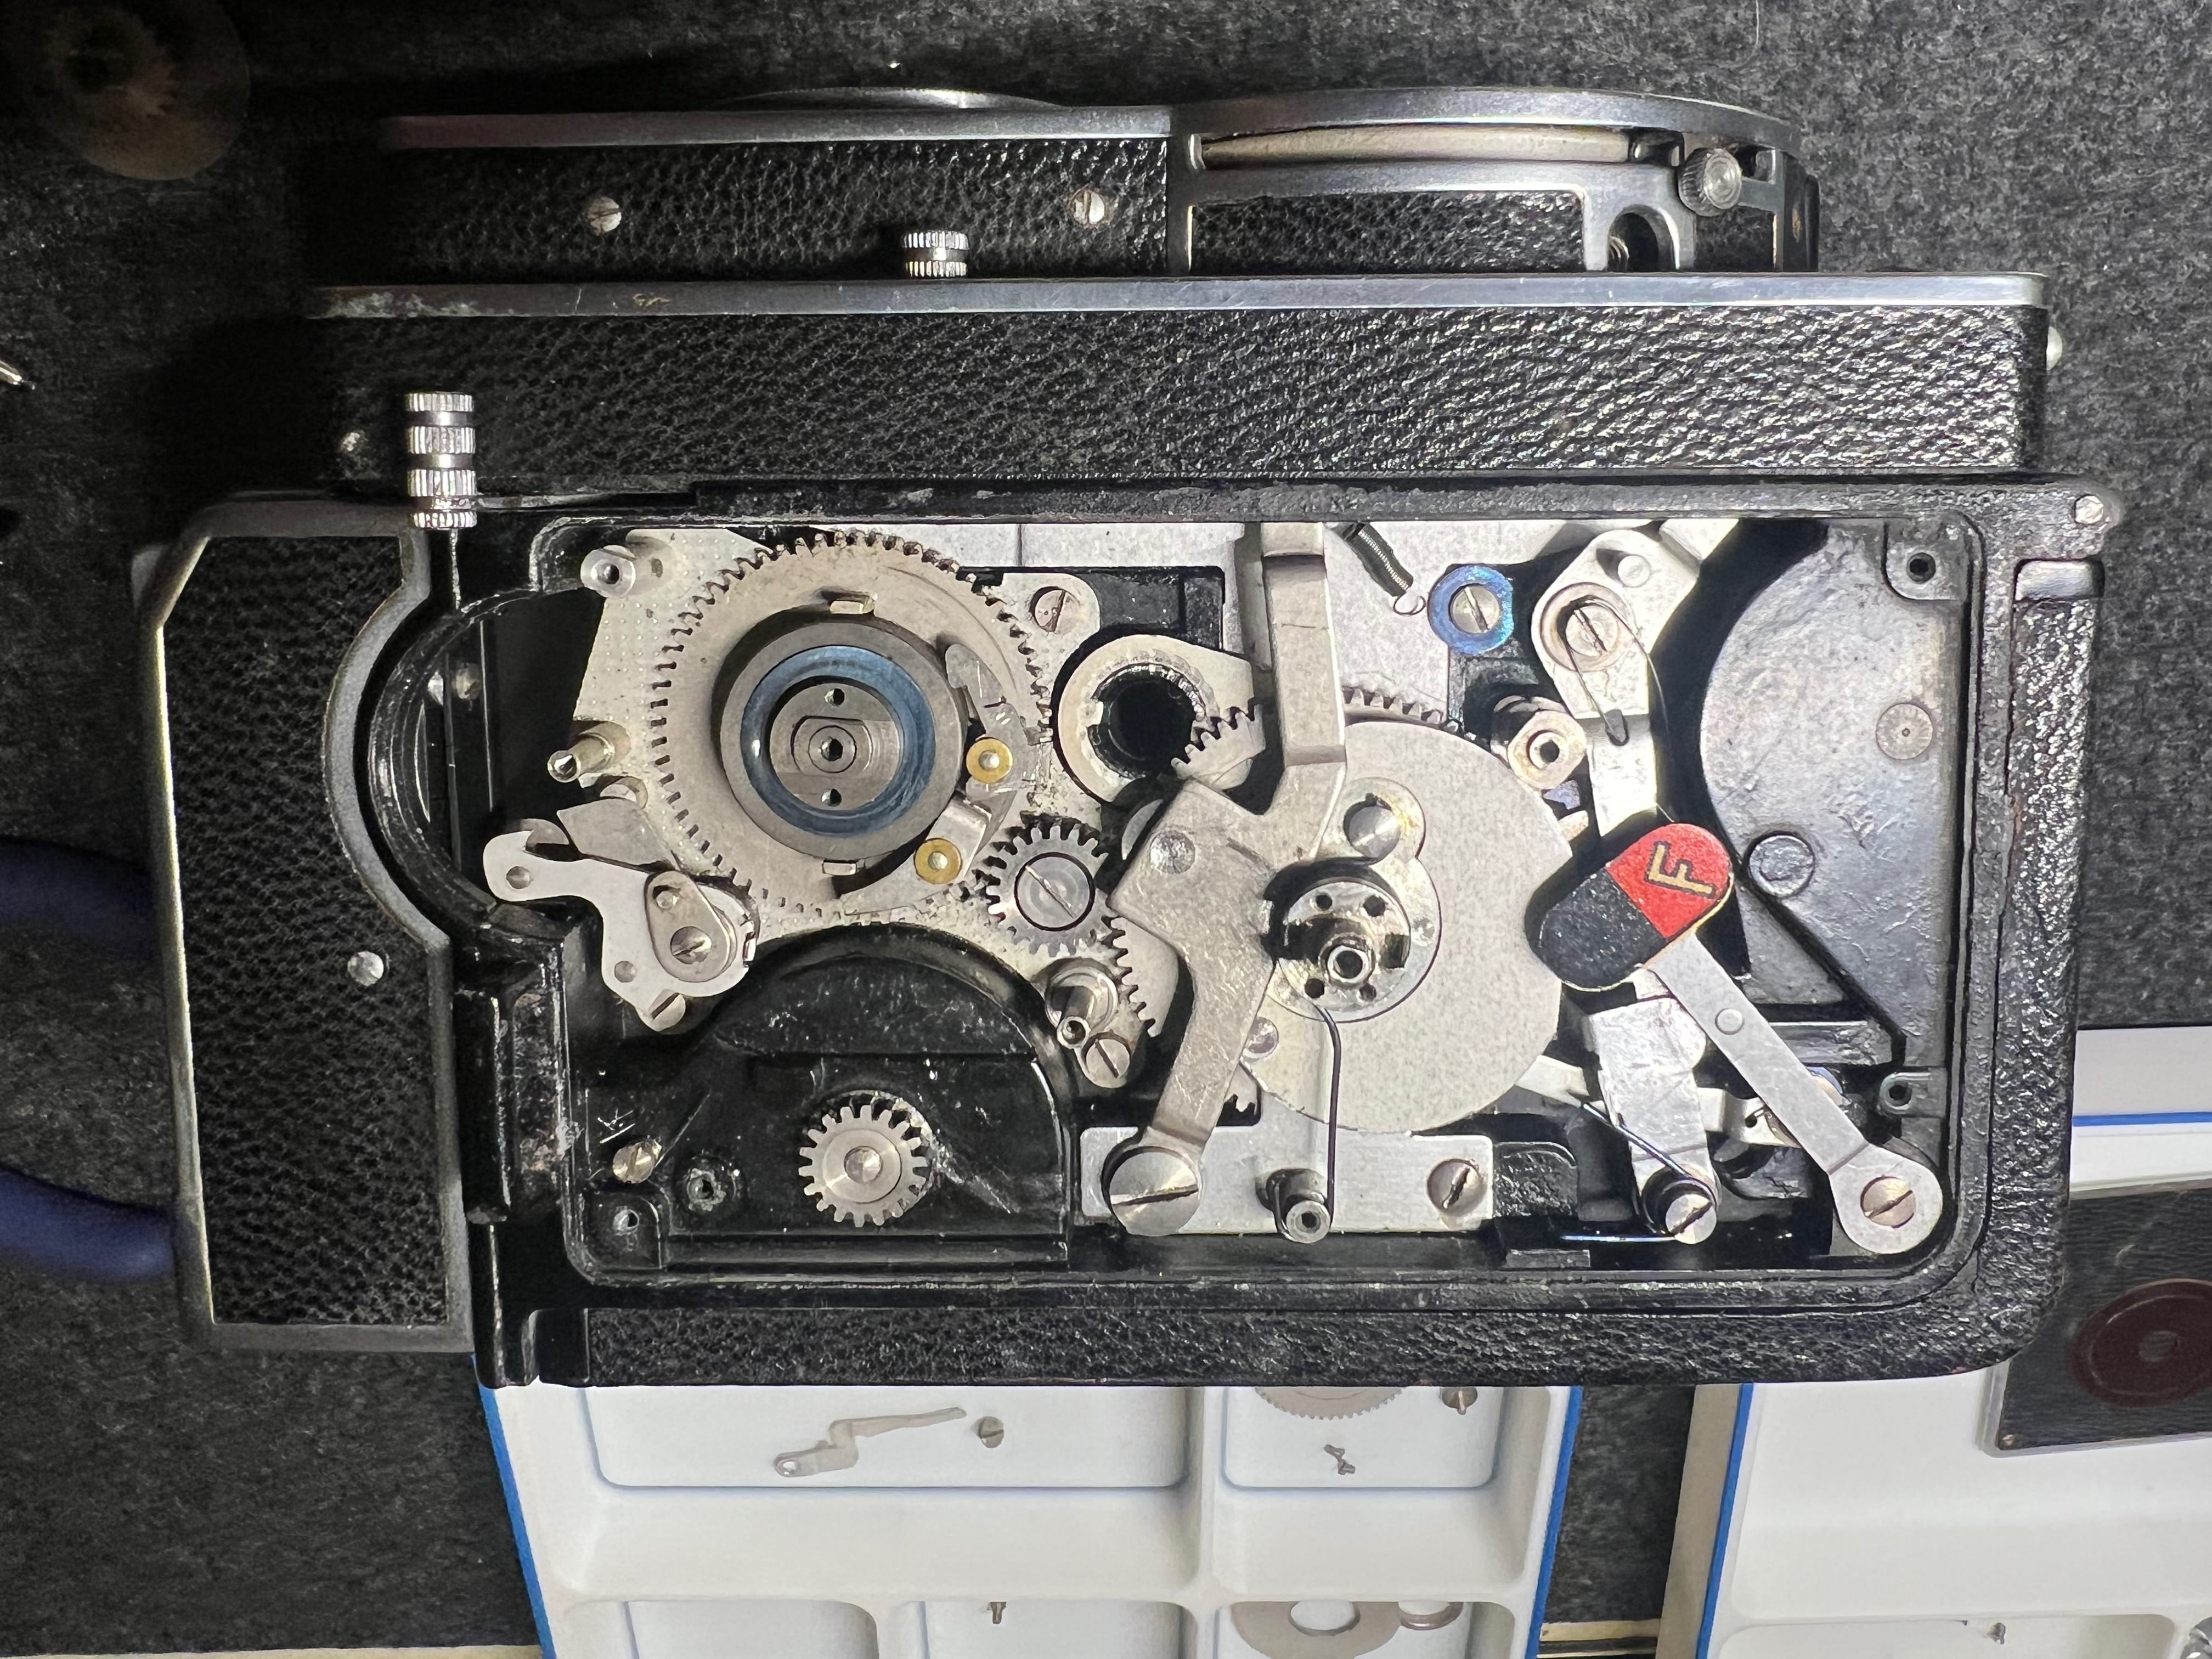
On the back of the bottom mechanism there is a pivoting arm with a strong spring that rests on a pin. When the back is open that pin slides out and the pivoting arm resets the lower mechanism. This arm is made of soft metal and caution should be used when reinstalling it.
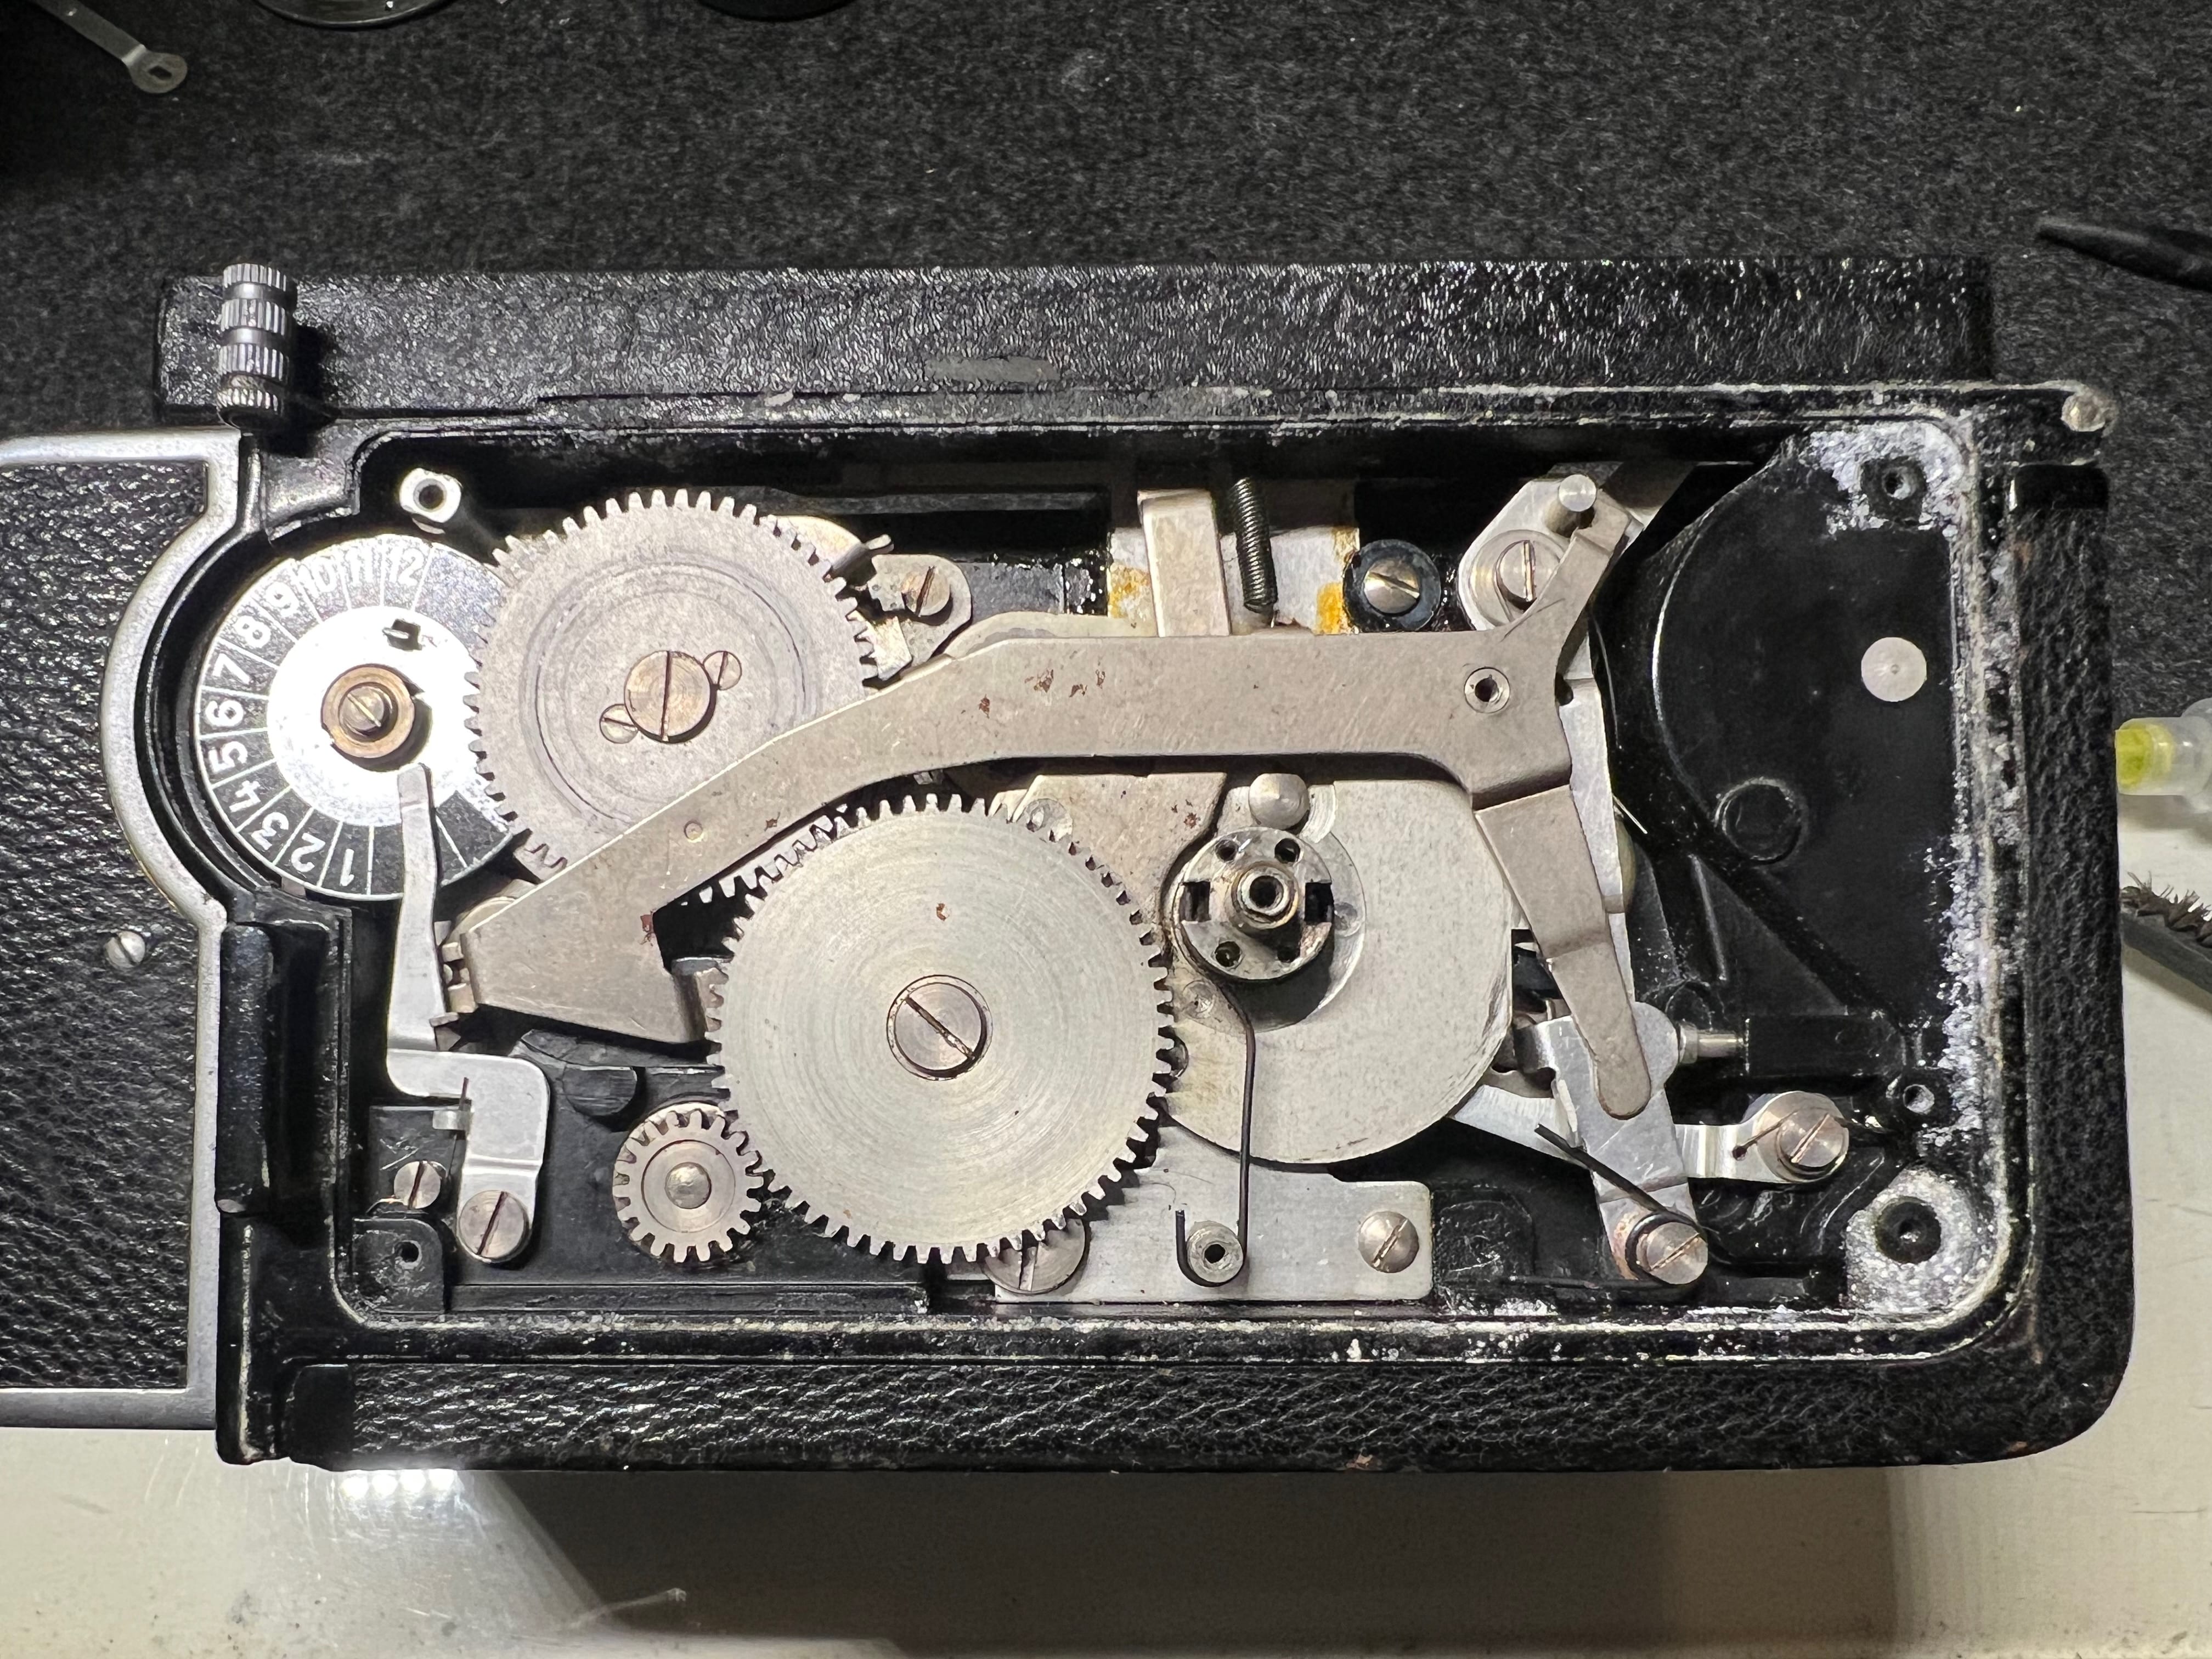
The armature removed (from the above picture to the one below) unlocks the winding mechanism after the shutter is fired. When the shutter is set that part prevents the film from winding and thus prevents empty frames.
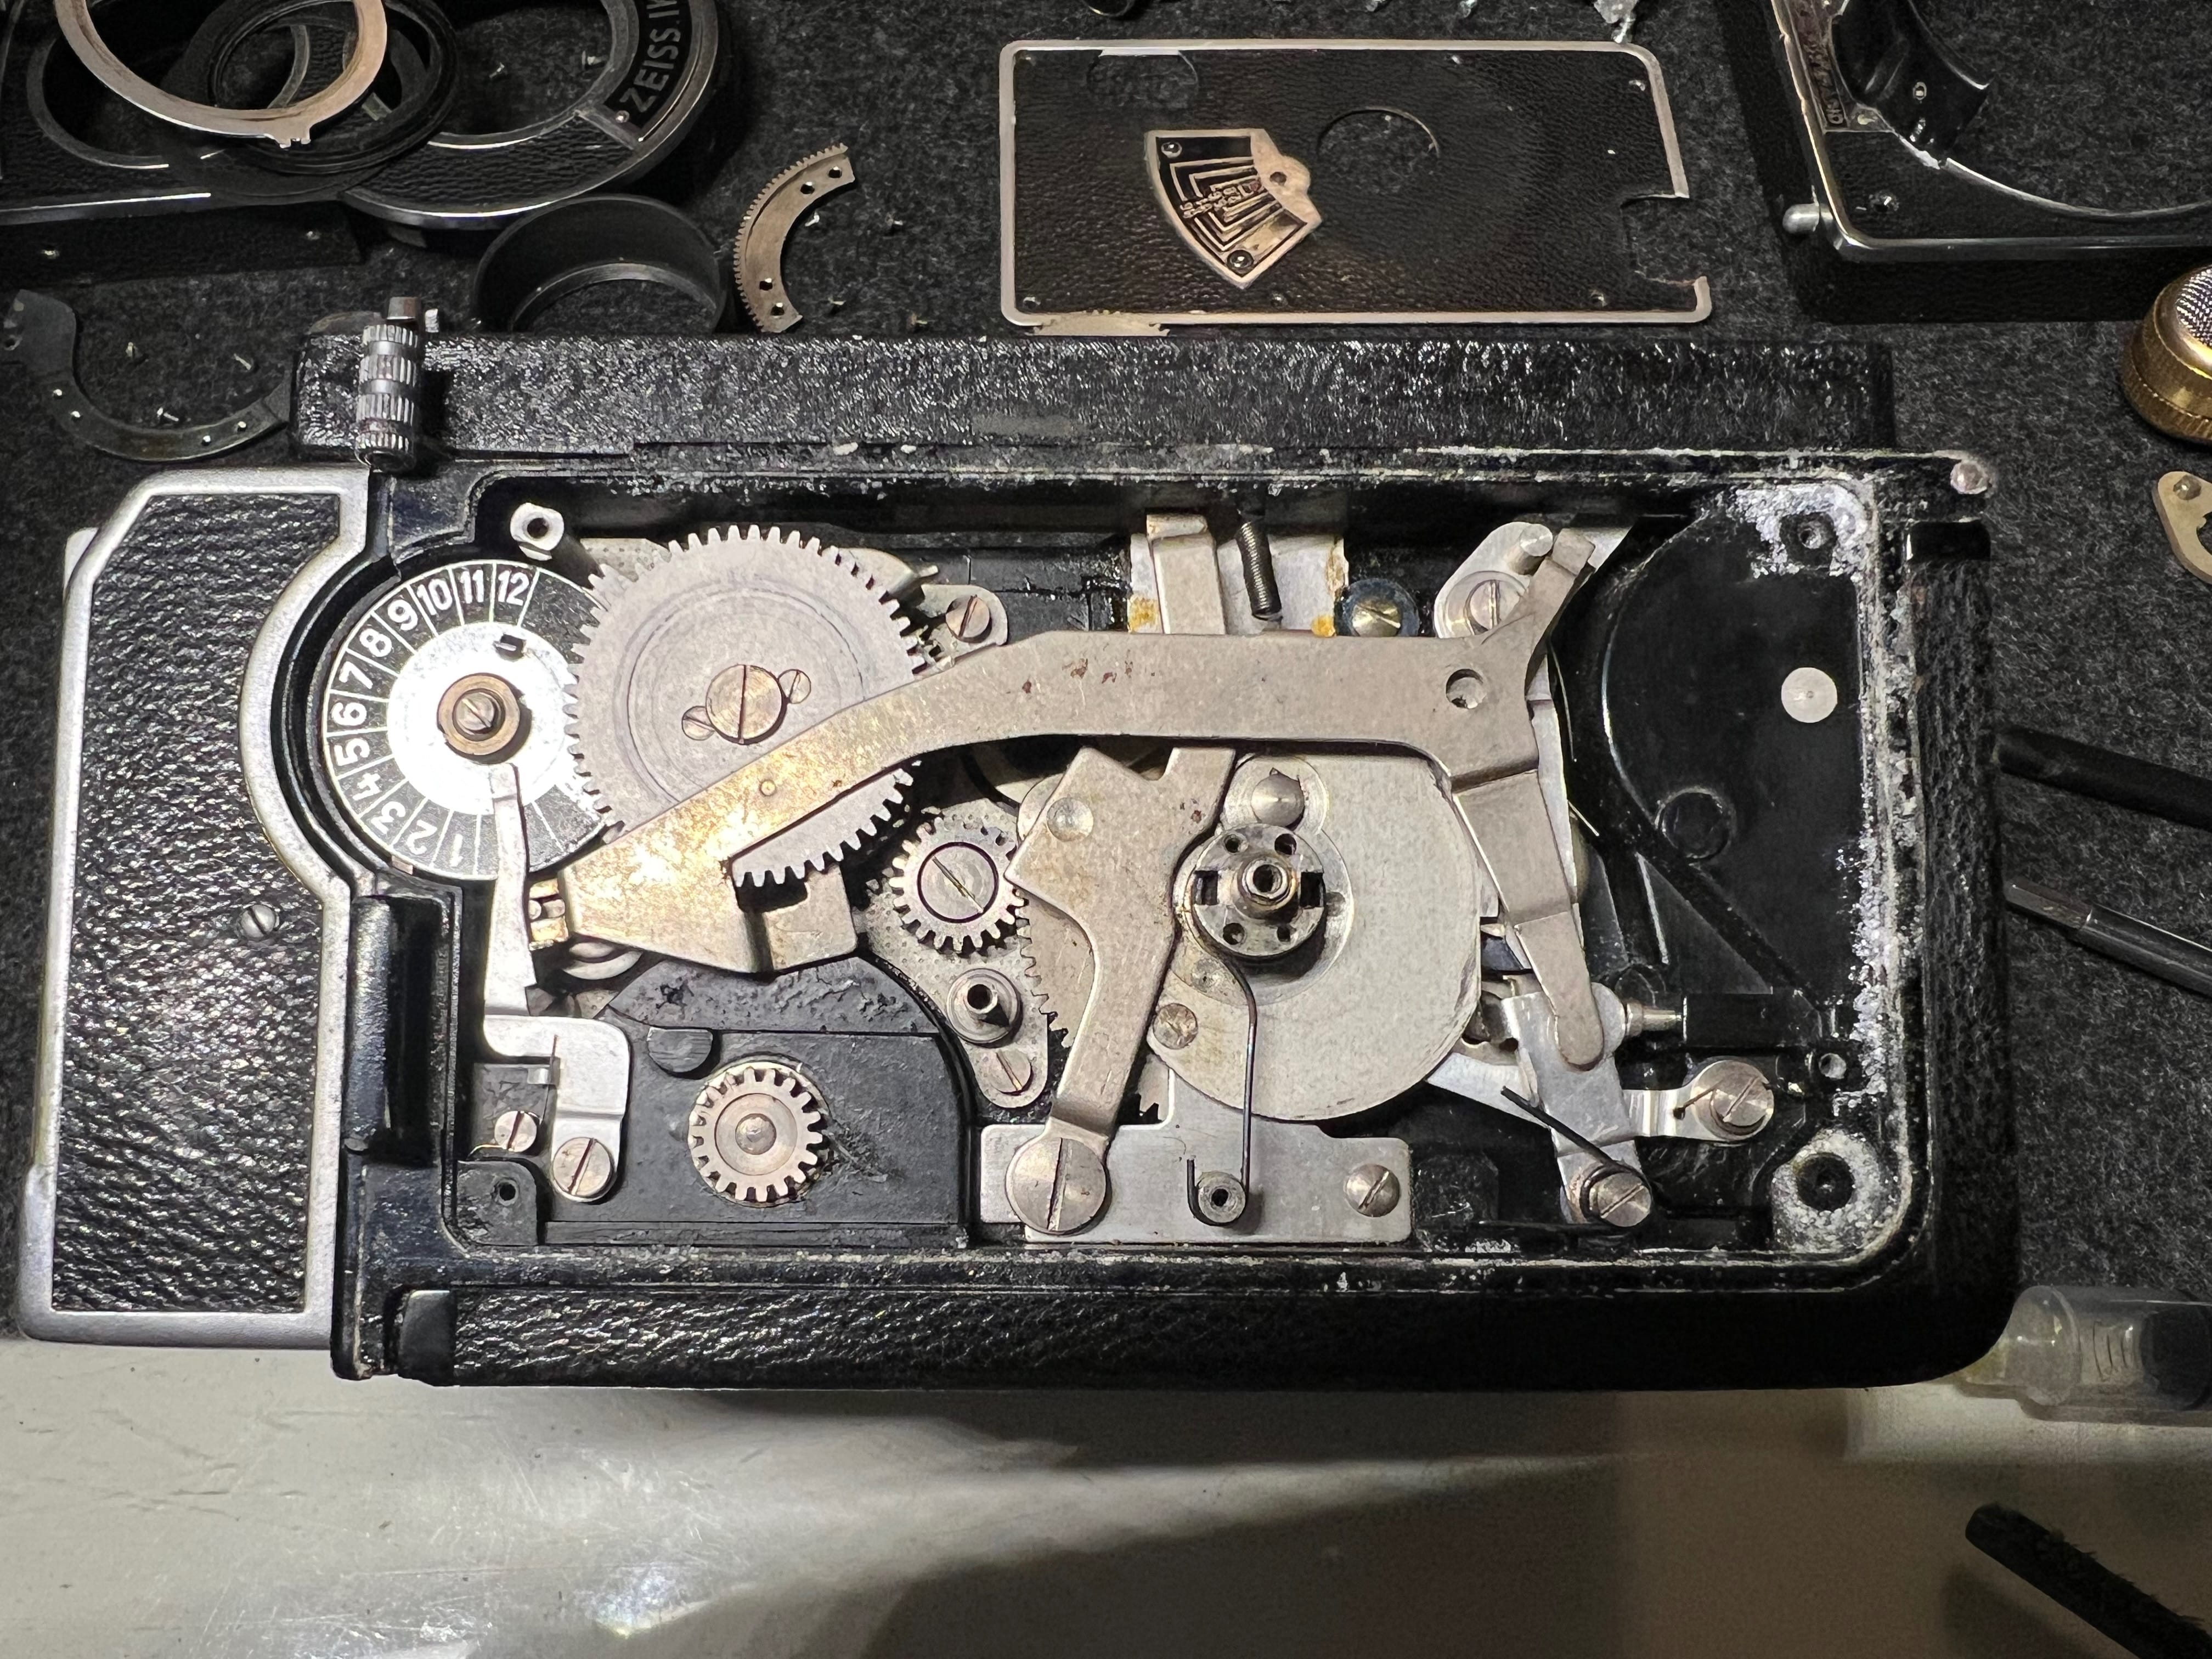
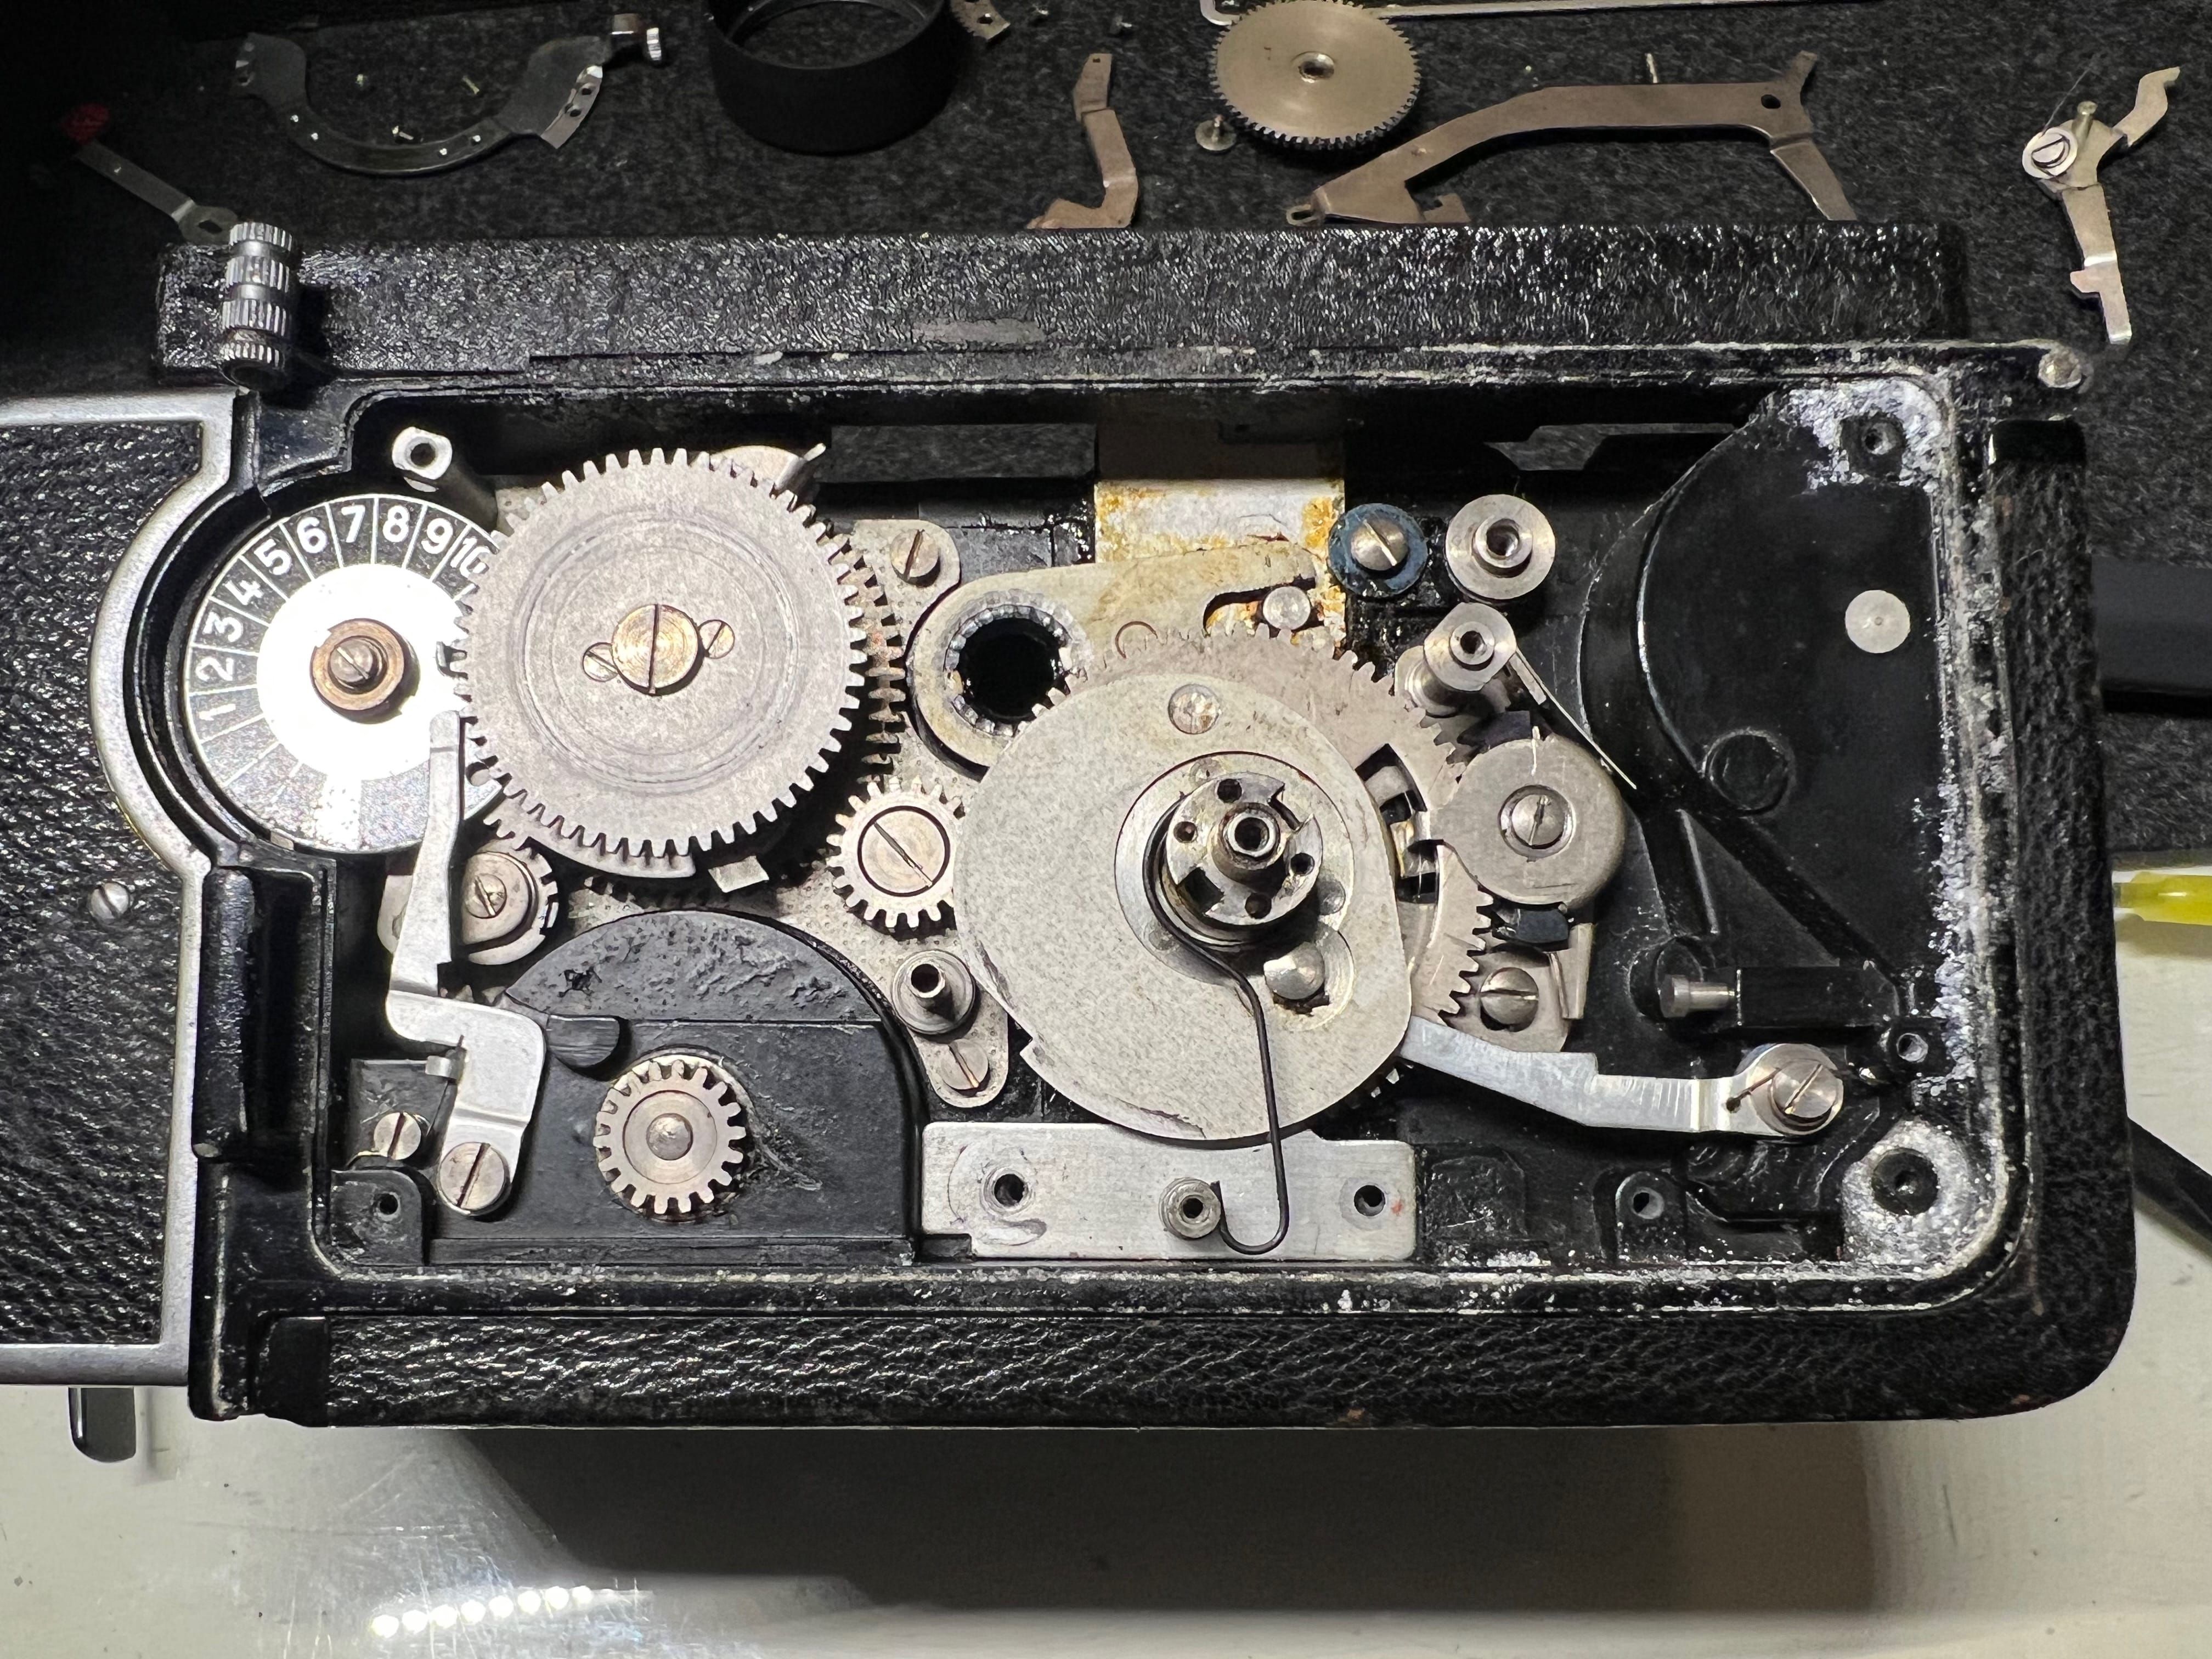
Take care when unlatching the strong main spring, and be careful when removing the ratcheting mechanism. I don’t have detailed photos of its disassembly, but all the pieces should fit in place.
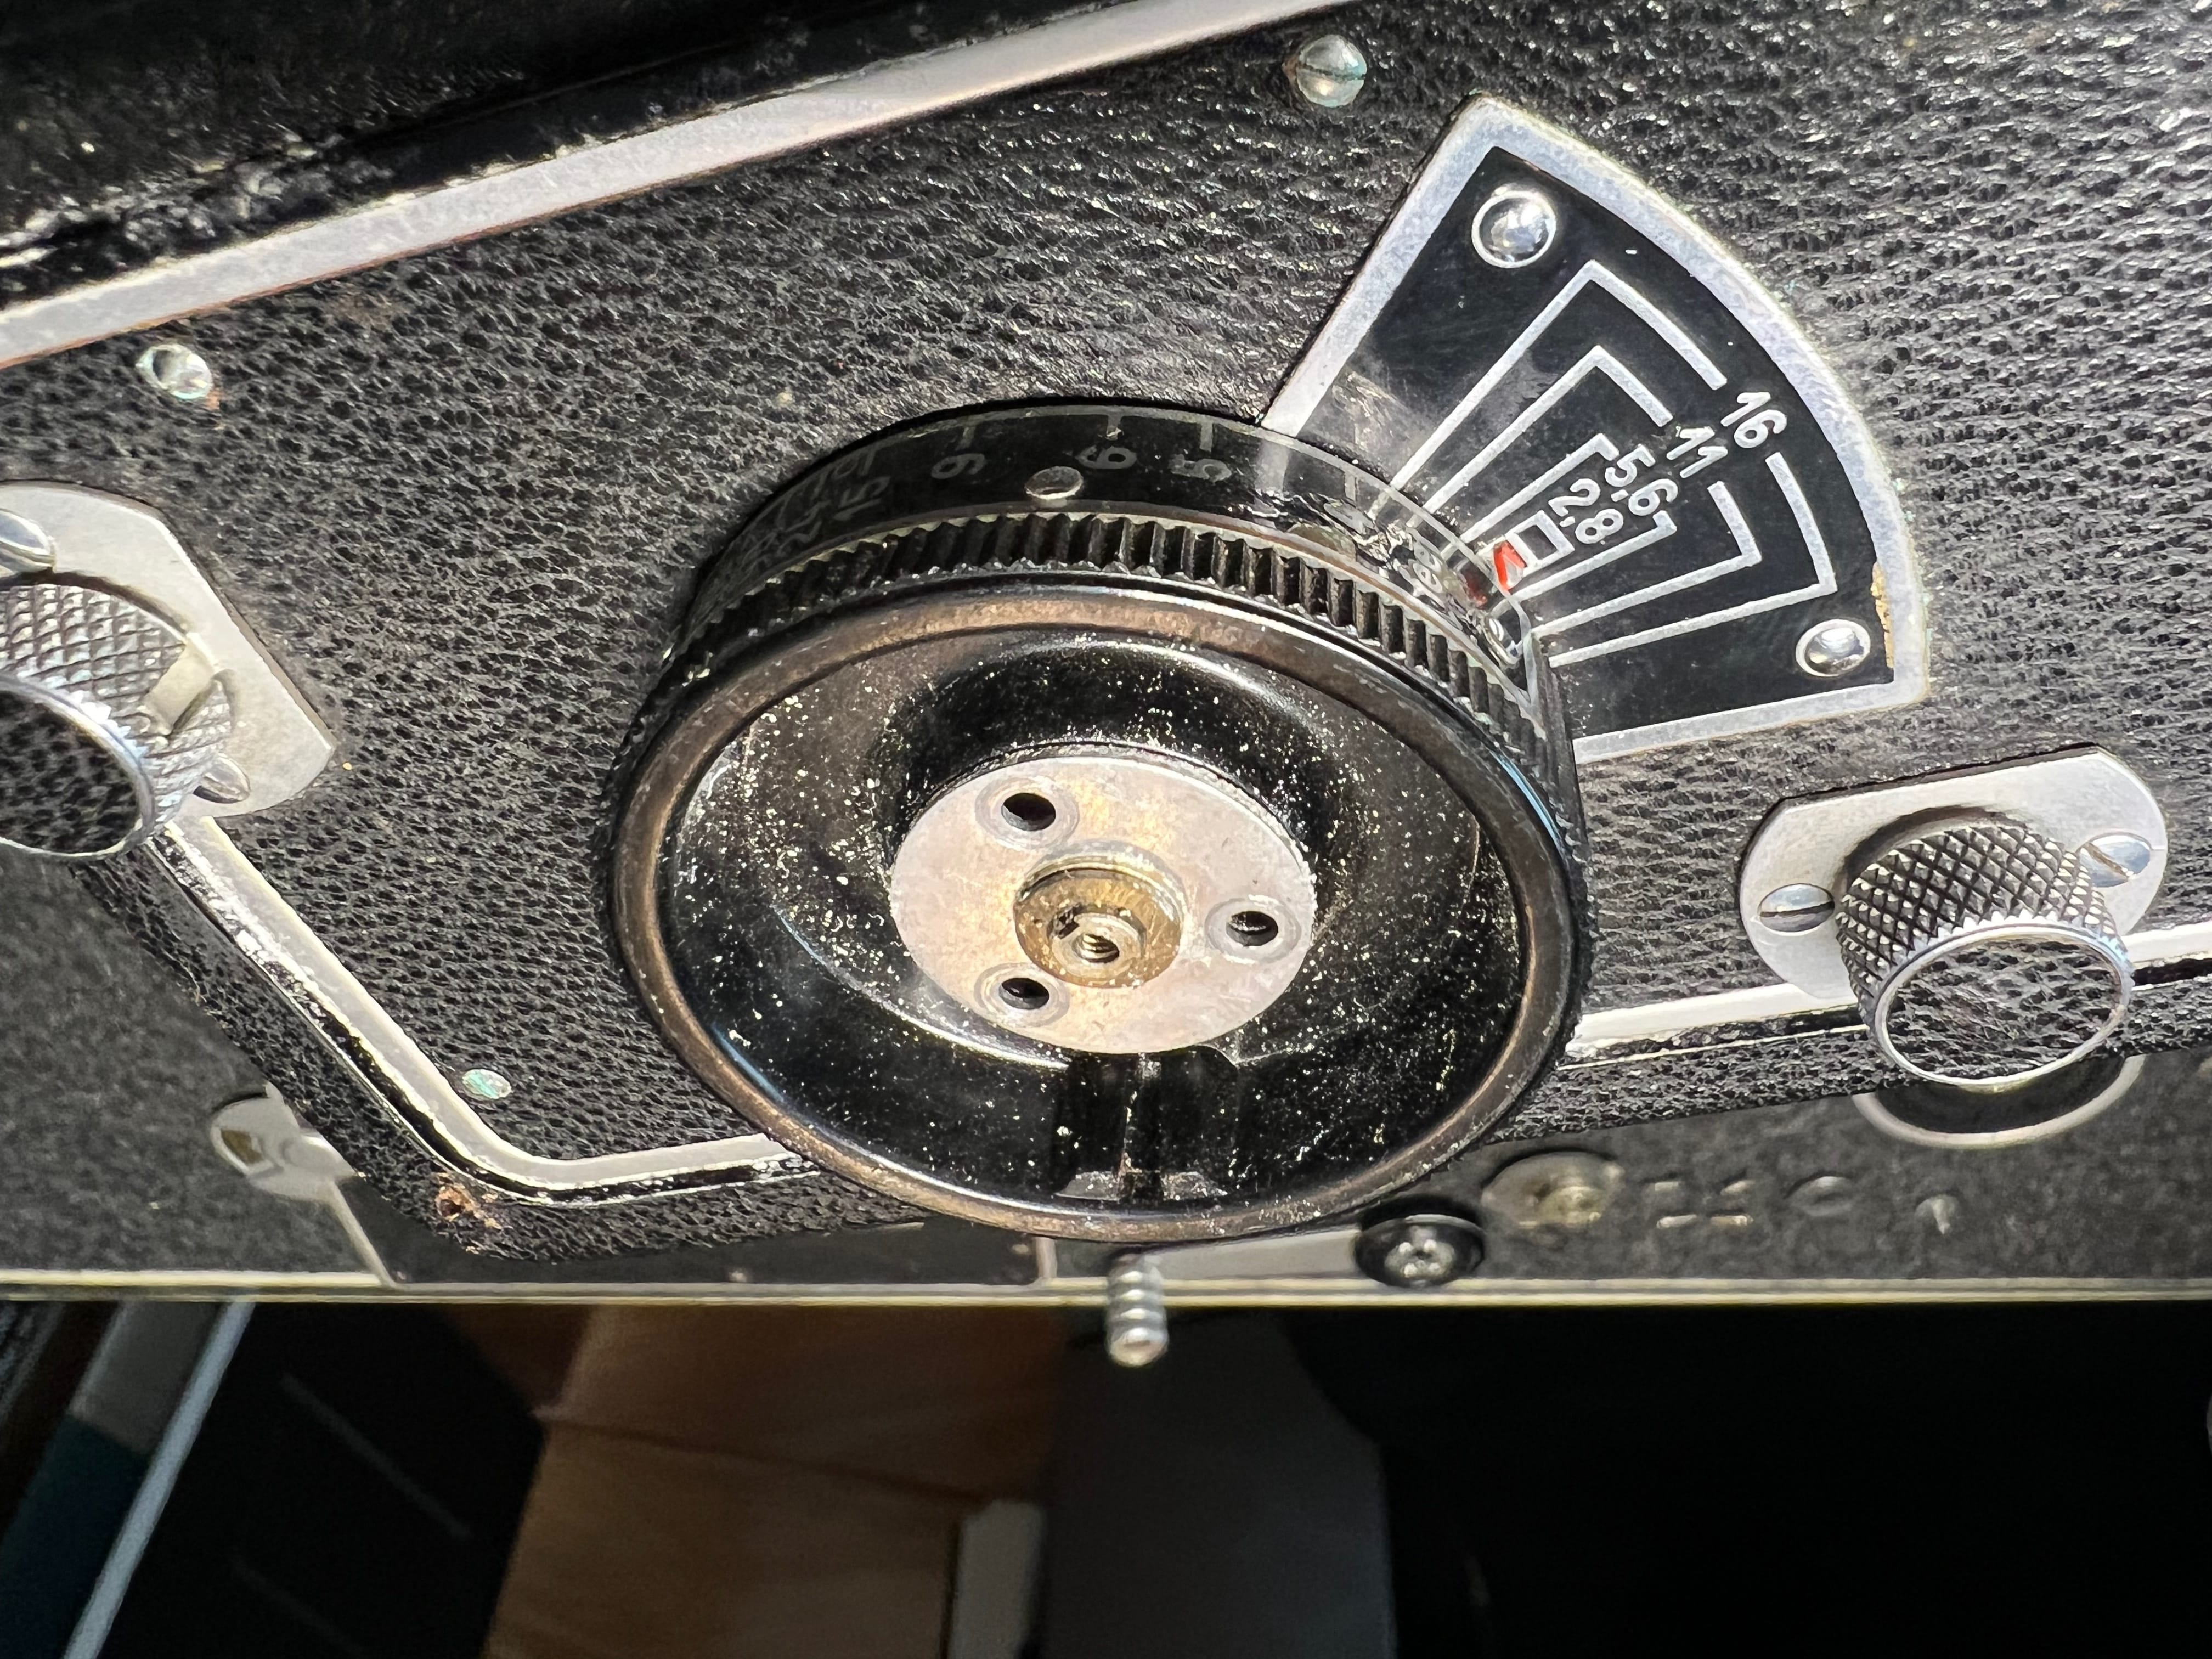
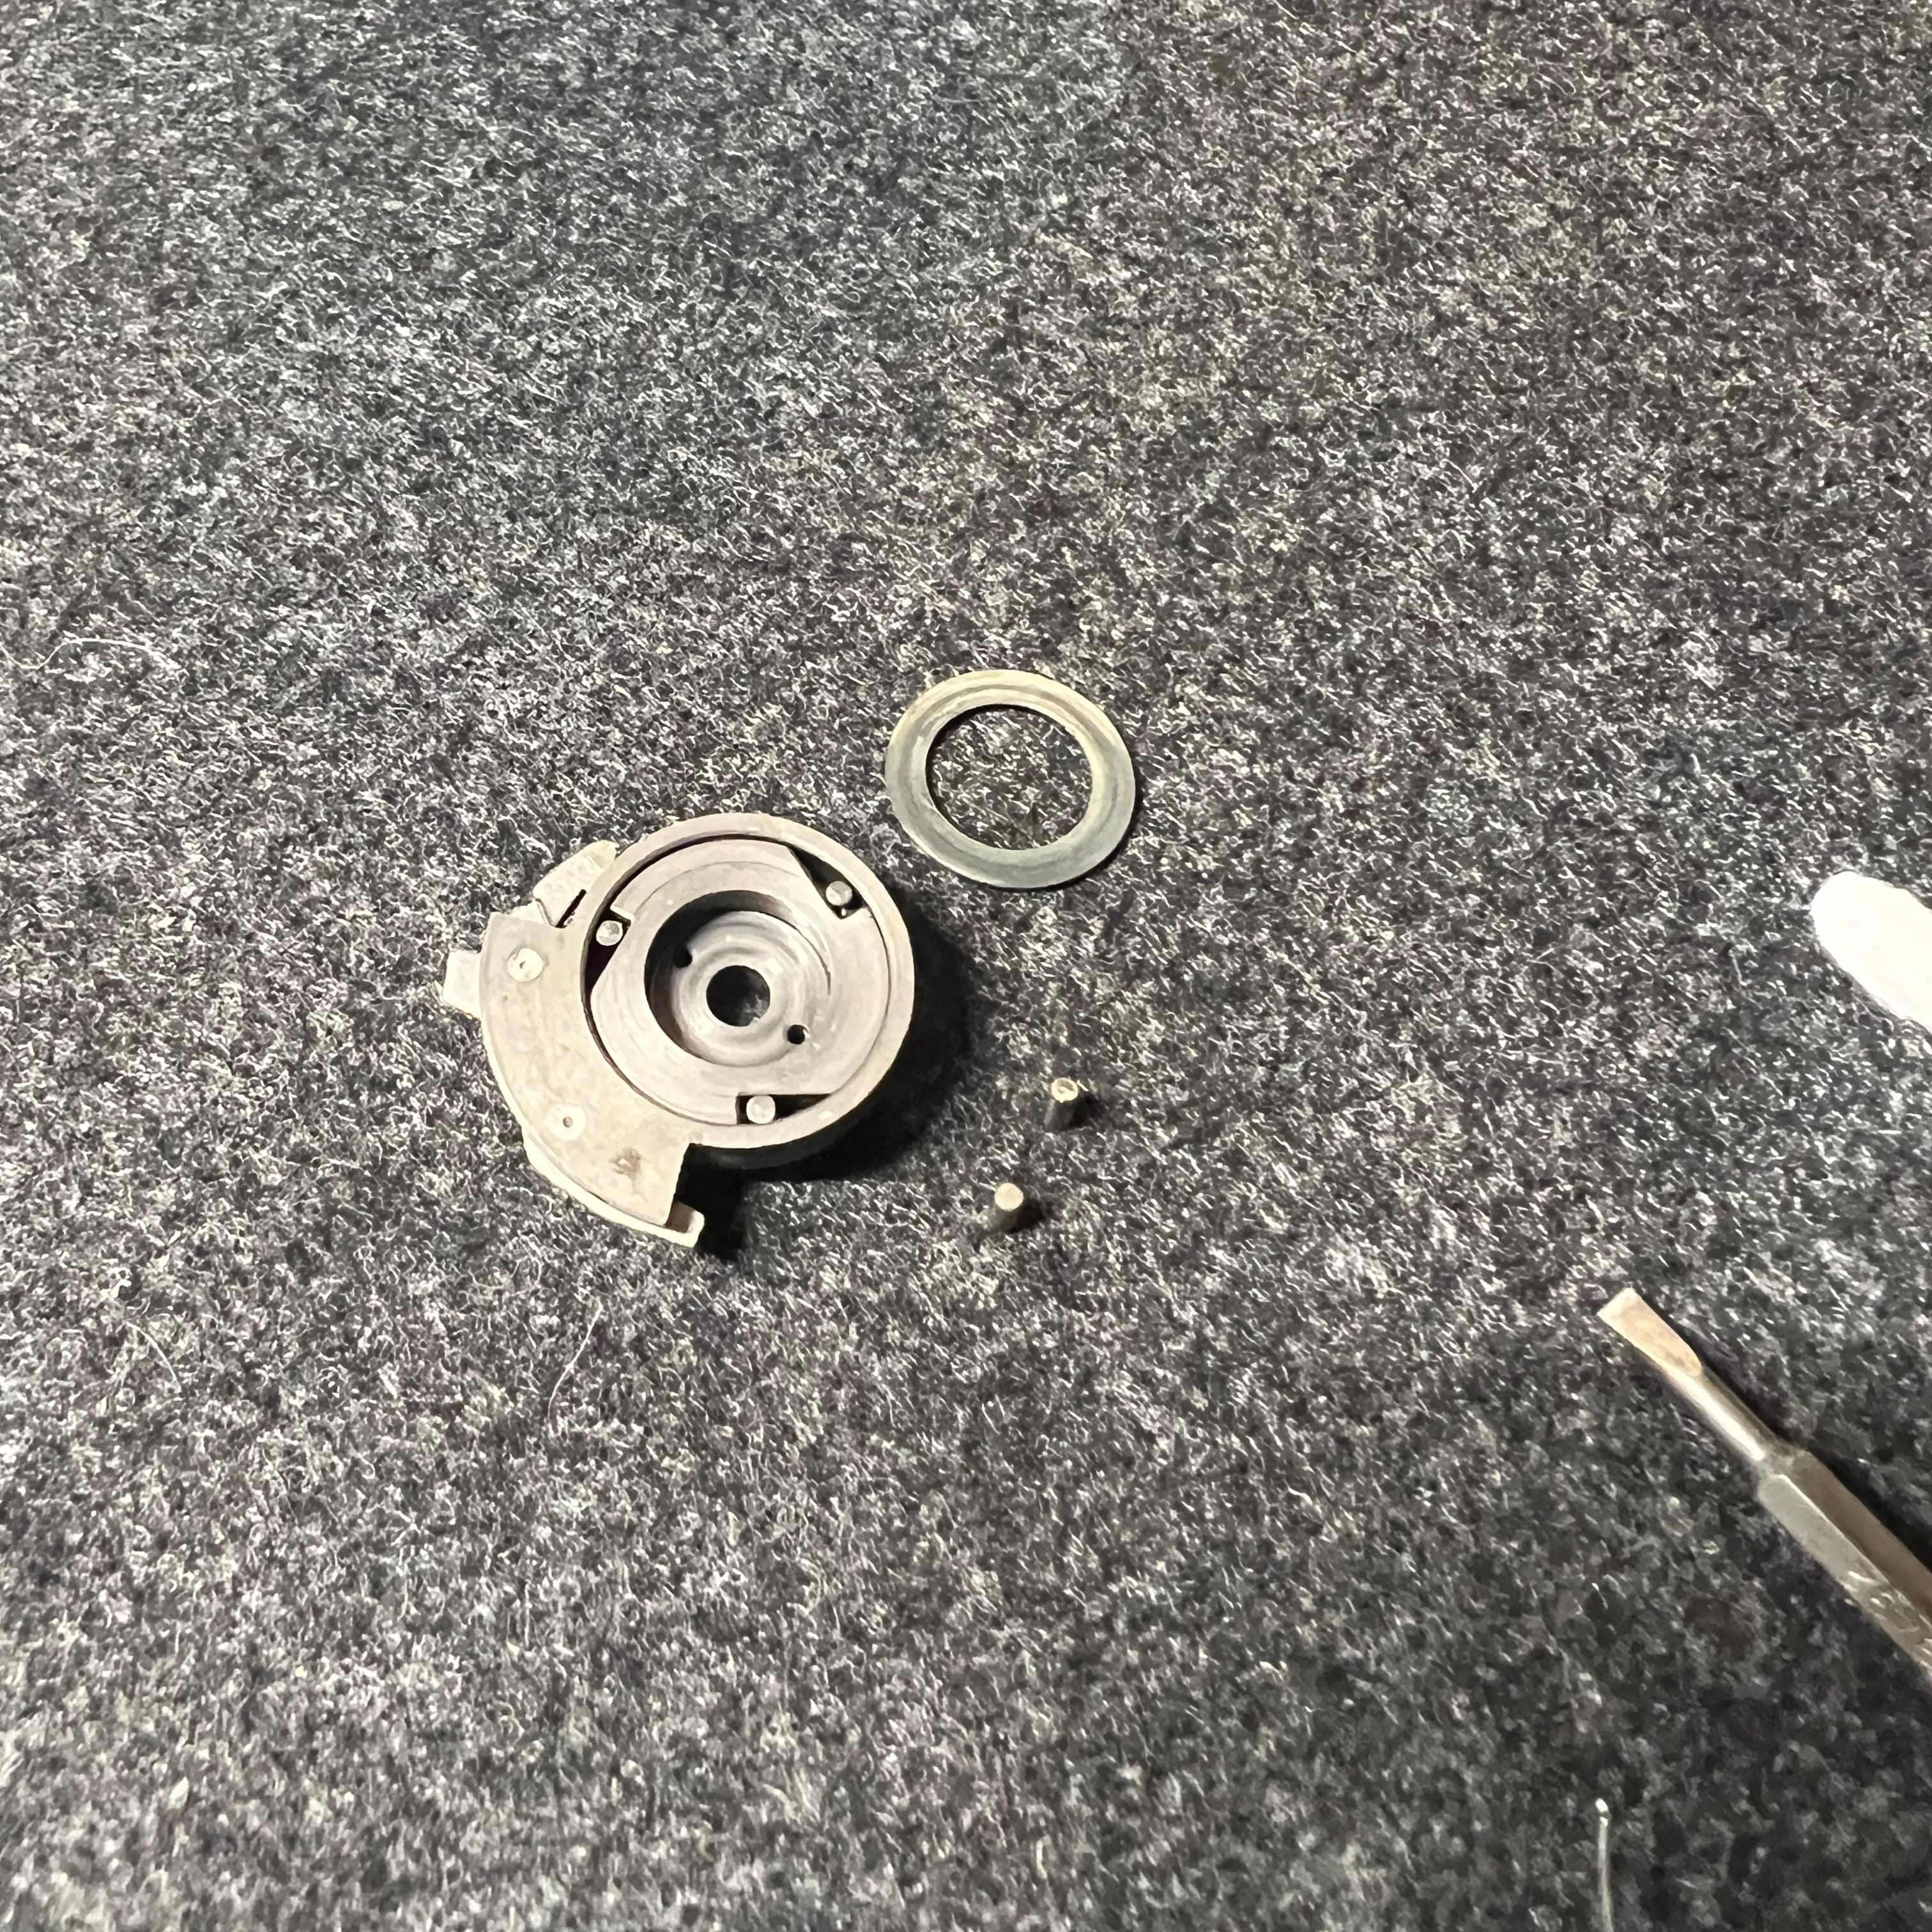
In the picture below there is a plate with a connection to the ratchet mechanism installed on the focusing post. Below it is what I believe to be a sort of spring. It is a disc that is lightly bent, like a taco. I think it prevents friction between the focus rail and the main gears. When reassembling it is important that the plate fits snuggly with the sleave around the post. I had to resize the curvature of the disc spring so that I could get it seated properly.
Before greasing and final re-assembly:
Check the fit. The metal in the frame corrodes in ways that causes swelling. If the focus connecting rod does not move smoothly after cleaning, the parts will need to be re-sized to fit together properly.
For resizing:
The following steps should not be necessary. There is little that can go wrong with the upper mechanism, but I am inlcuding it’s disassembly for completeness.
We start by removing the lever that locks the long armature we removed earlier. The pin that the larger arm connects with here drives the shutter release lock. Problems with the shutter release lock come from this area, however this mechanism is not likely the problem. The most common problem is that the long armature drags on the cover and does not engage/disengage properly.
The rest of this upper mechnism controls the frame number advance, stop, and reset.
When the frame counter is installed it should be under tension. The mechnism pushes the spring; after frame 12 it releases and the counter springs back to the blank side.
You can see that I have removed the clutch assembly (from the above shot to the below). I recommend against this.
In the shot above you can barely make out small springs protruding from the odd shaped collar around the gear post. Those springs push out small roller bearings inside the clutch (see below). Again, I would NOT take the clutch apart unless you have a good reason to do so; I don’t know what that reason would be, unless the clutch somehow became jammed.
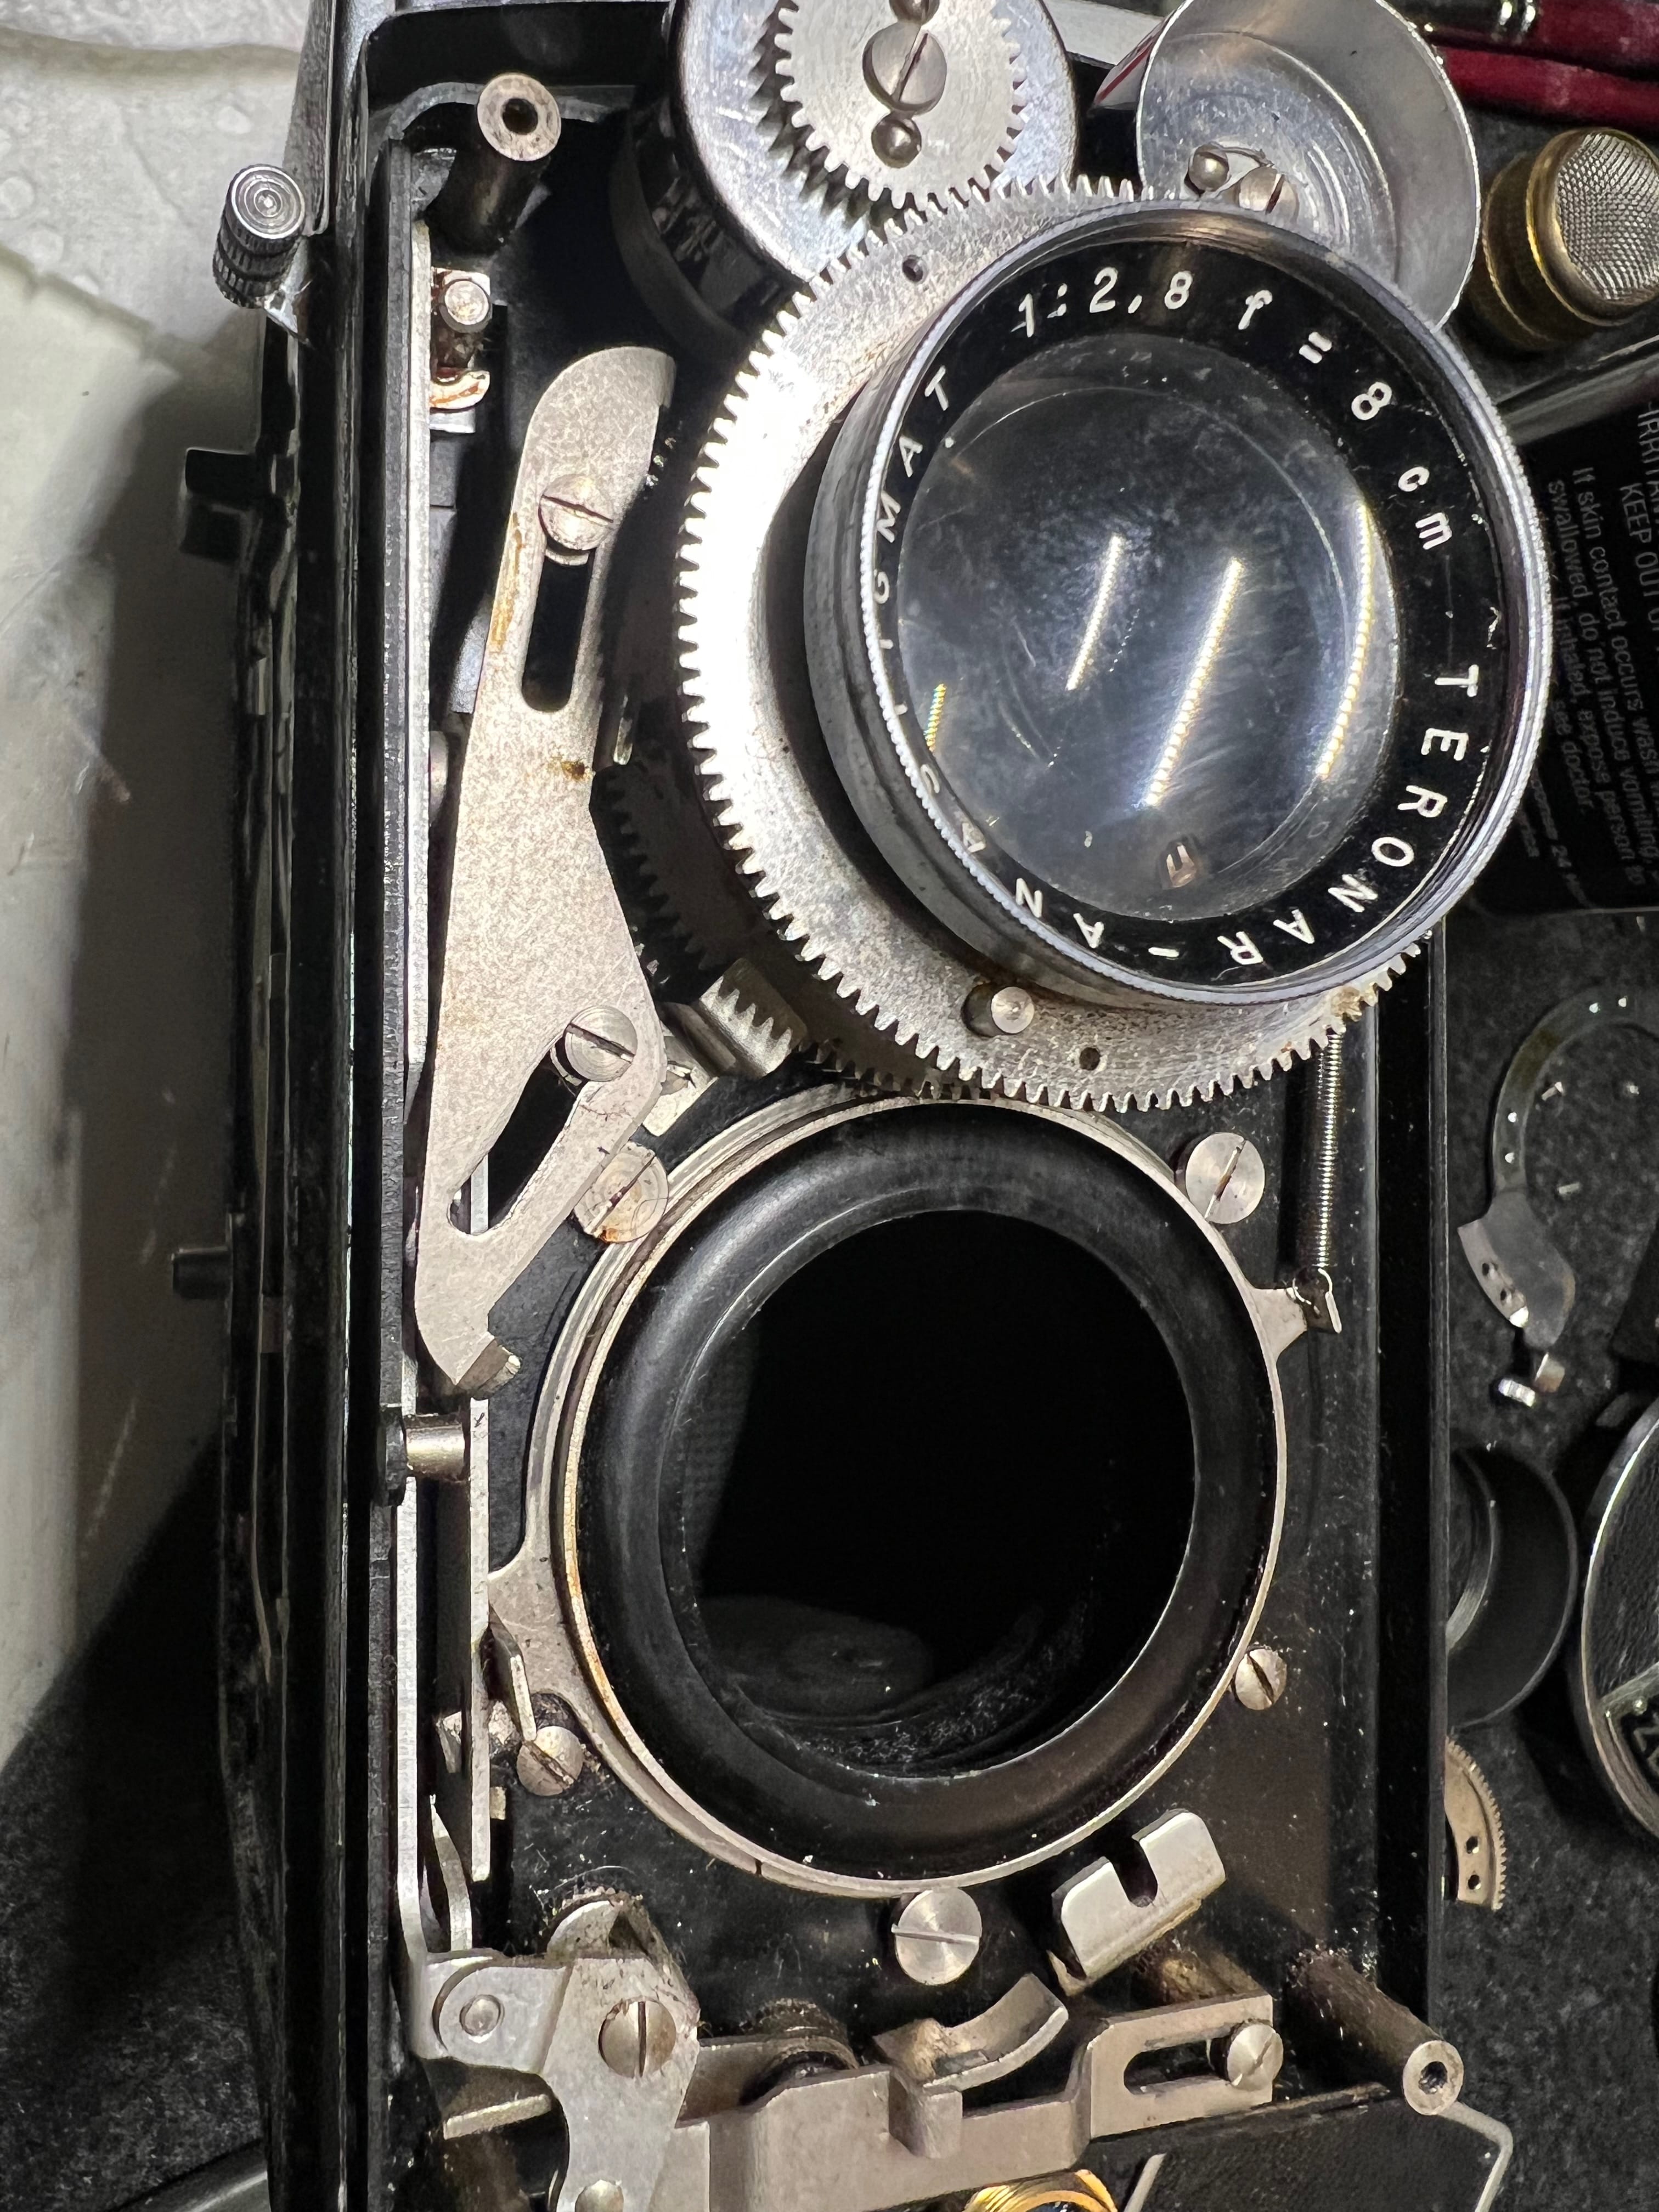
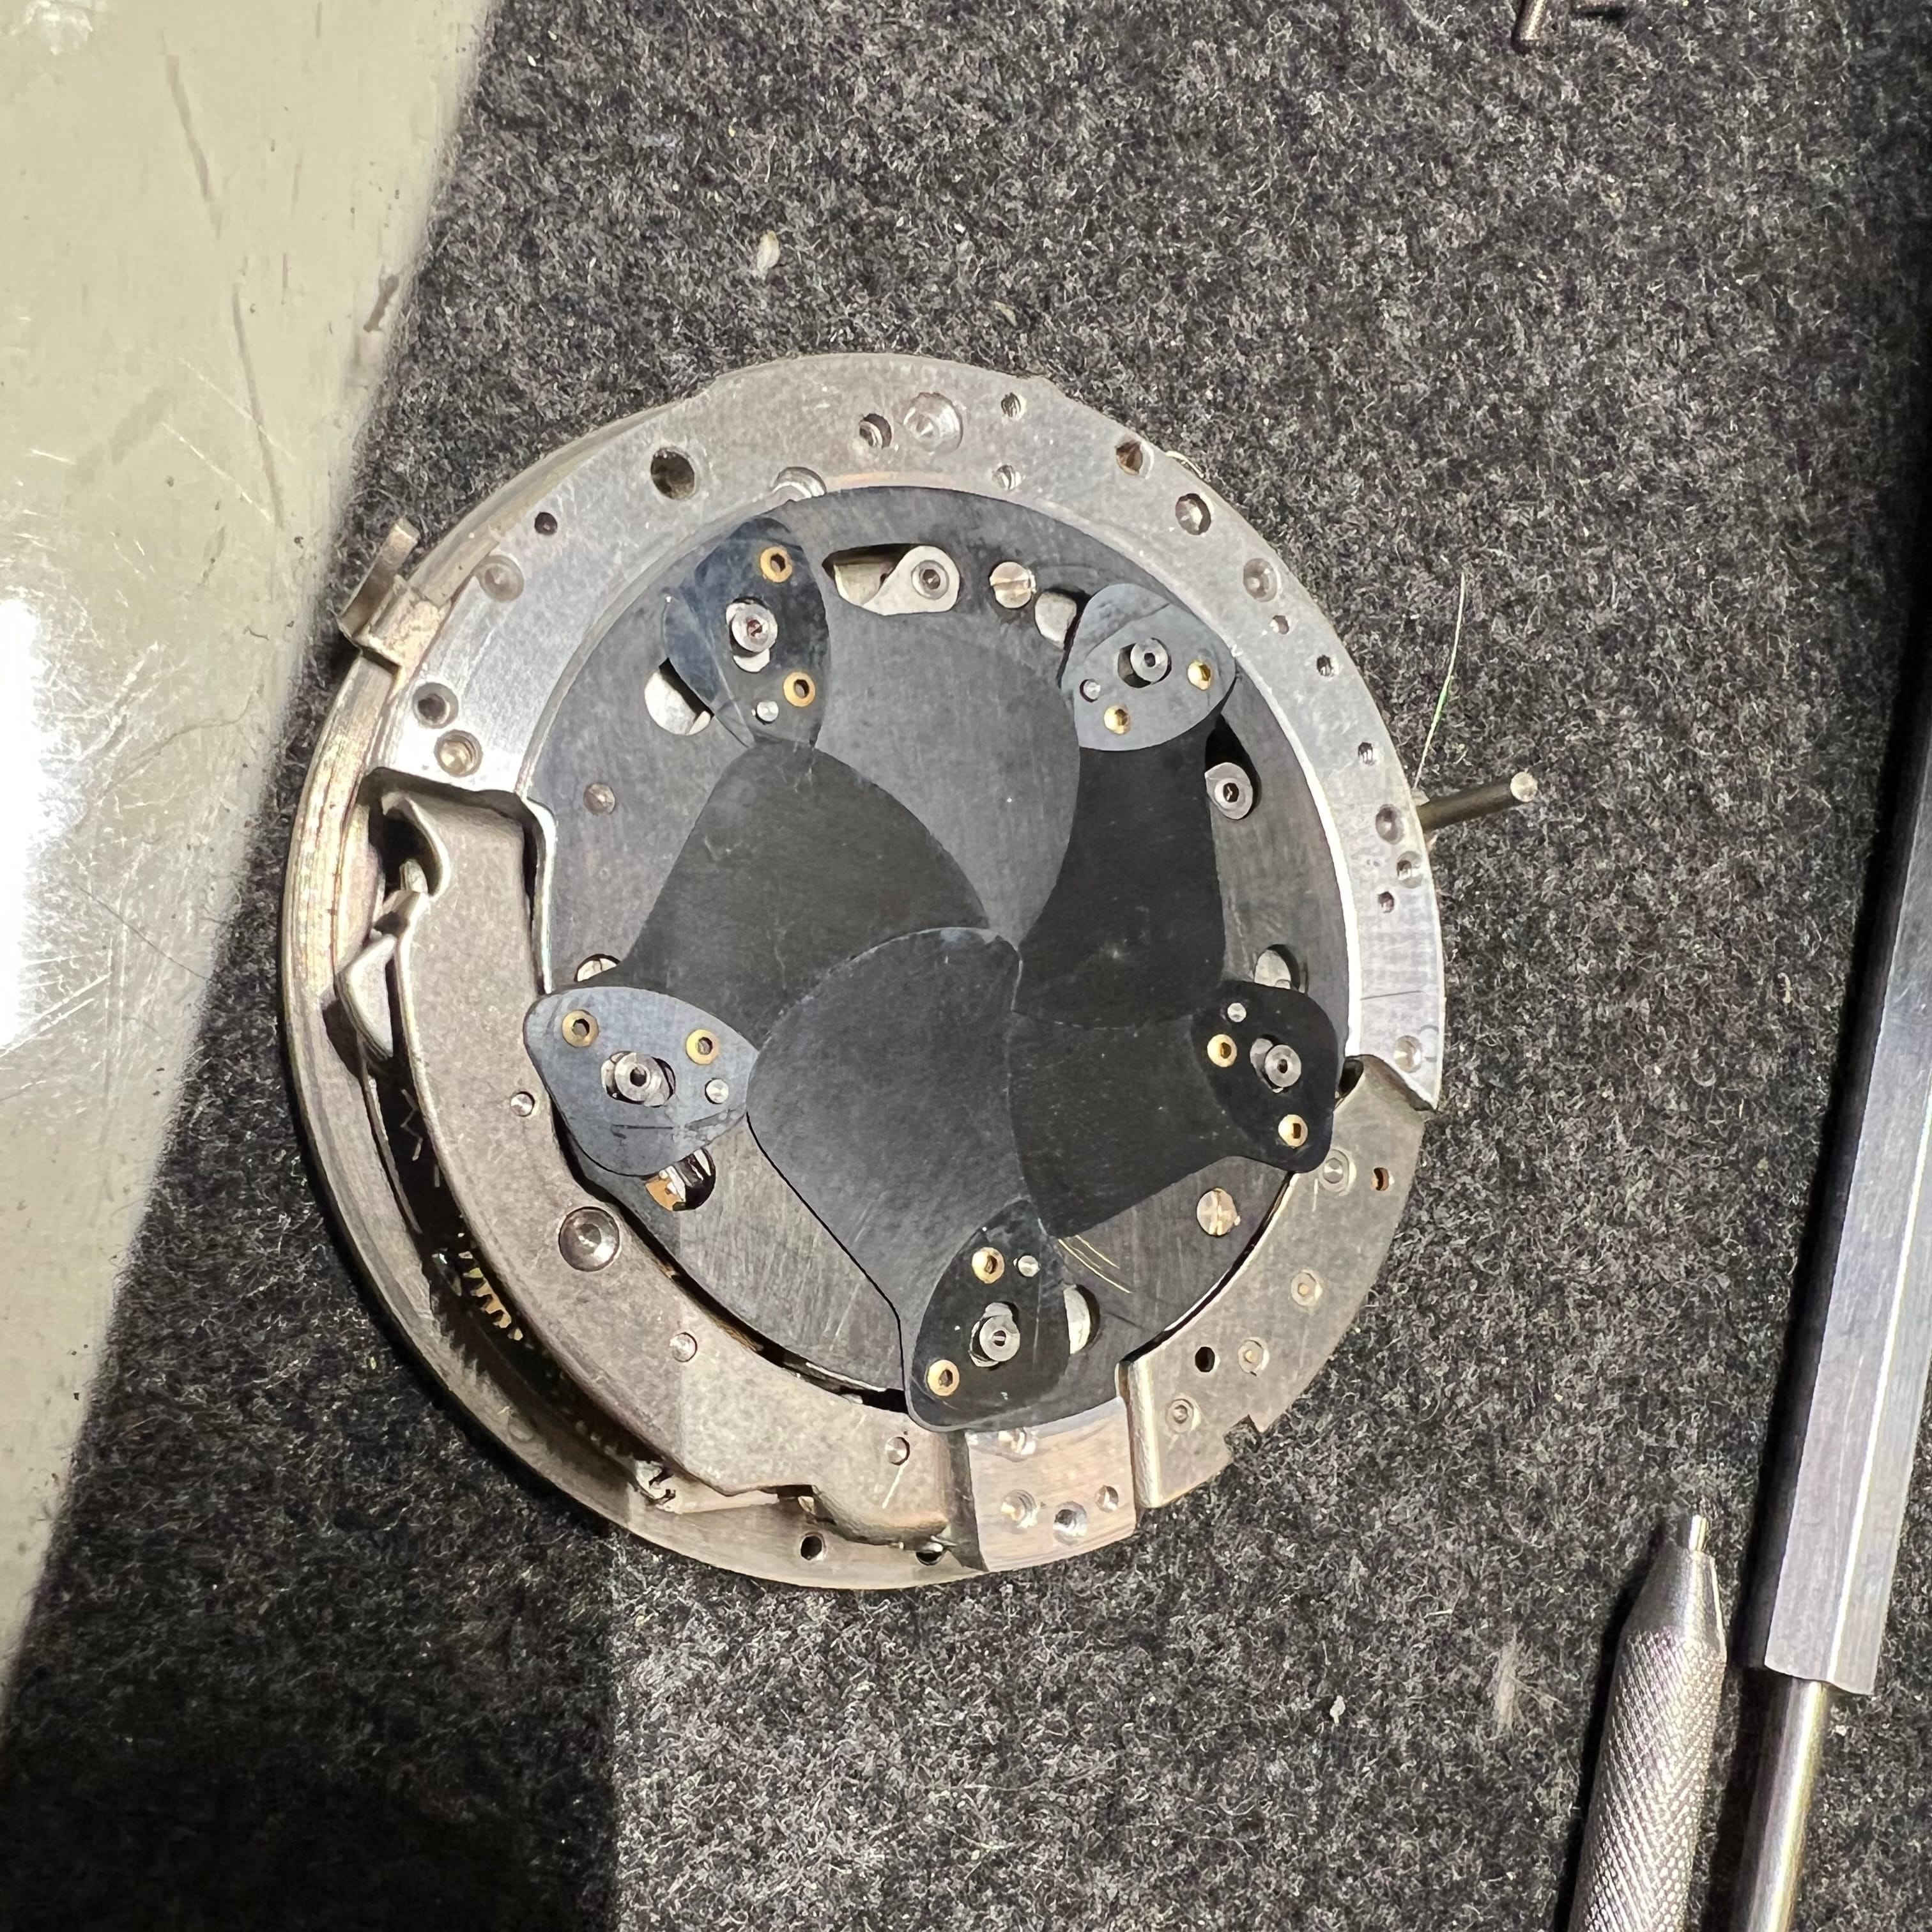
The image below shows the mechanisms on the front focus board (click to see at larger size). The large sliding plate on the top left is for the self timer. The shutter must be set before the self timer can be engaged.
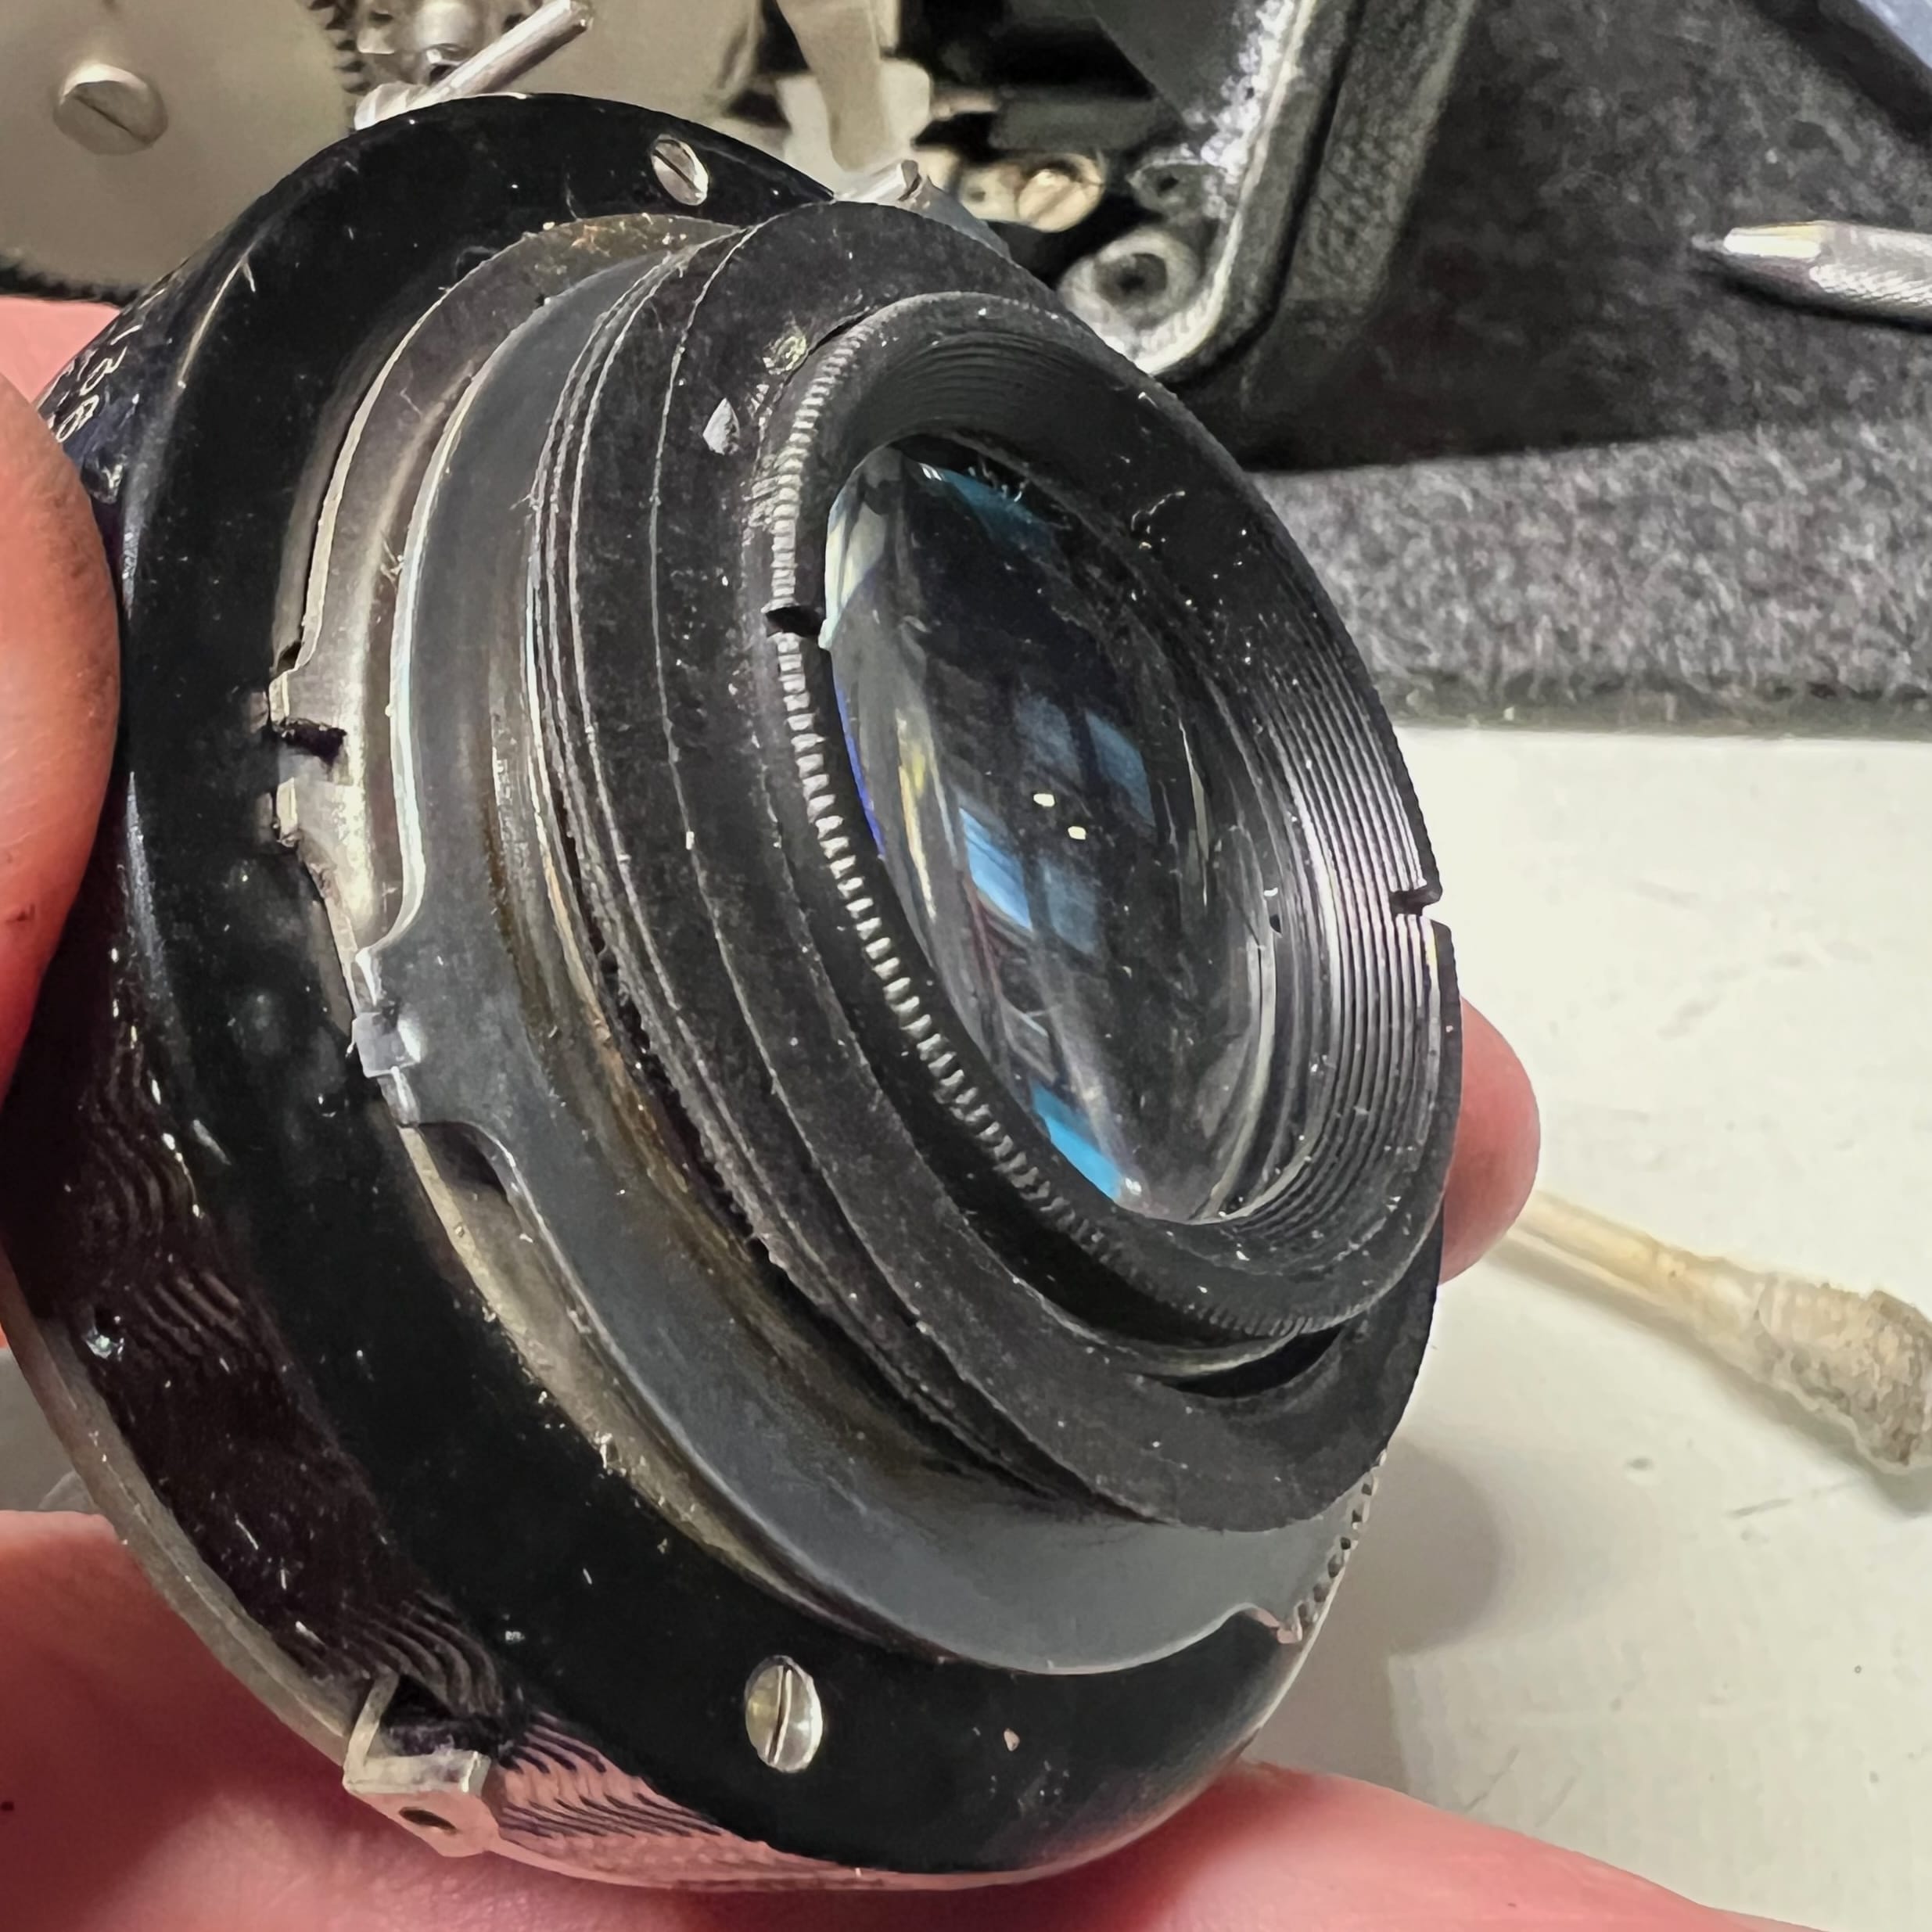
Below is the state of the lens when I received the camera. The center black ring can be removed by unscrewing it, but it is likely stuck in place. The best approach is probably to very carefully drill two small holes on opposite sides of the ring so that a spanner can be used to remove it. Again, I do not recommend that you do this because you could easily break the lens element.
If the shutter unit is removed from the lens plate, be sure to keep track of the small black paper washers seen below. These are spacers used to for the lens collimation, and they are delicate.
Manuals should be available online for compur rapid shutters. This shutter was in very good shape, so I only had to do minimal cleaning and lubrication.
The most common problem is dirt and corrosion on the outside of the center barrel preventing the mechanism from rotating easily. I like to focus on cleaning and only add a very tiny amount of very light oil. I don’t want any oil migrating to the aperture or shutter leaves.
It is probably not necessary to pull the shutter assembly from the outer shell, as shown below. But, if there is a problem with the shutter leaves this is how to get to them. They can easily be removed, cleaned, dried, and reinstalled.
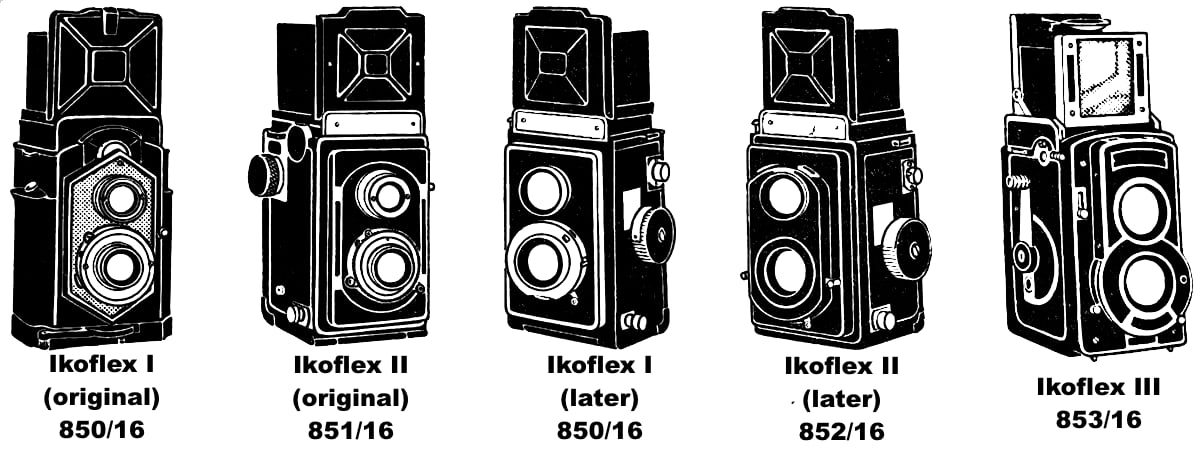
Don’t confuse this camera with the Ikoflex III (852/16). The Ikoflex III (852/16) was renamed to Ikoflex II after this cameras released, taking the name of the Ikoflex II (850/16) which was in turned renamed to Ikoflex I (850/16). I guess that prior to mass media, companies could arbitrarily change product name assignments. If you are interested in the Ikoflex’s strange naming lineage, I have a page dedicated to the history of Ikoflex cameras.
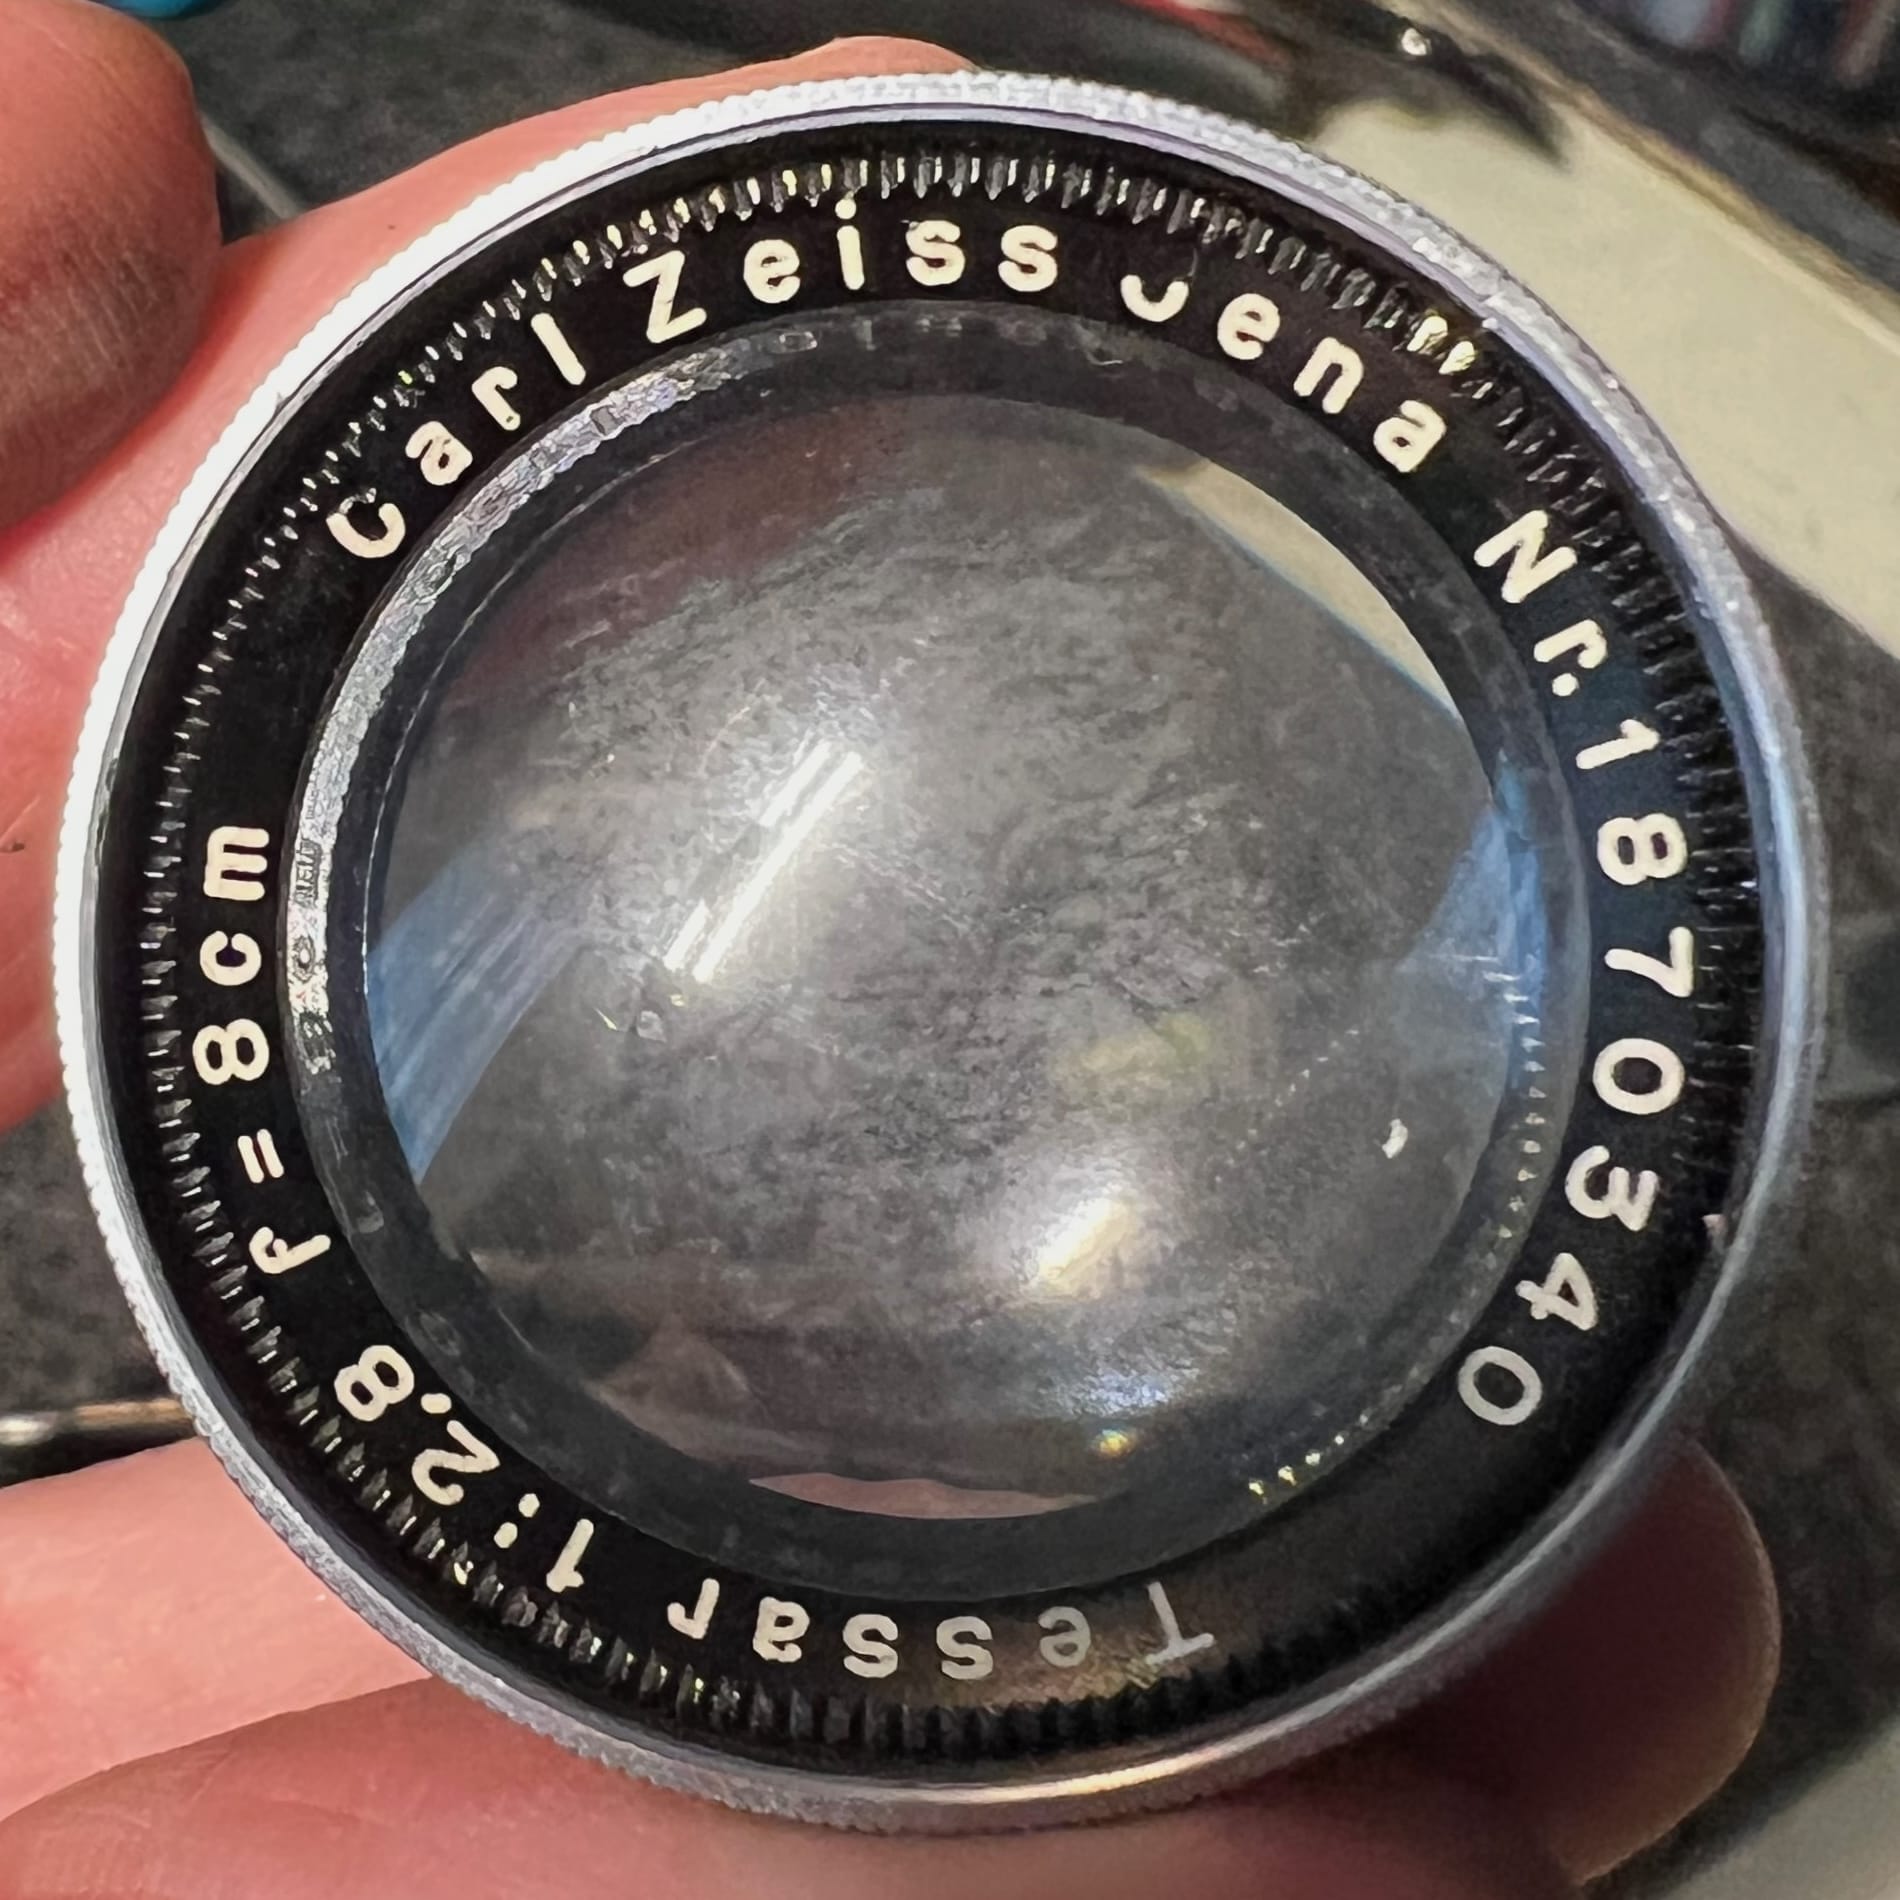
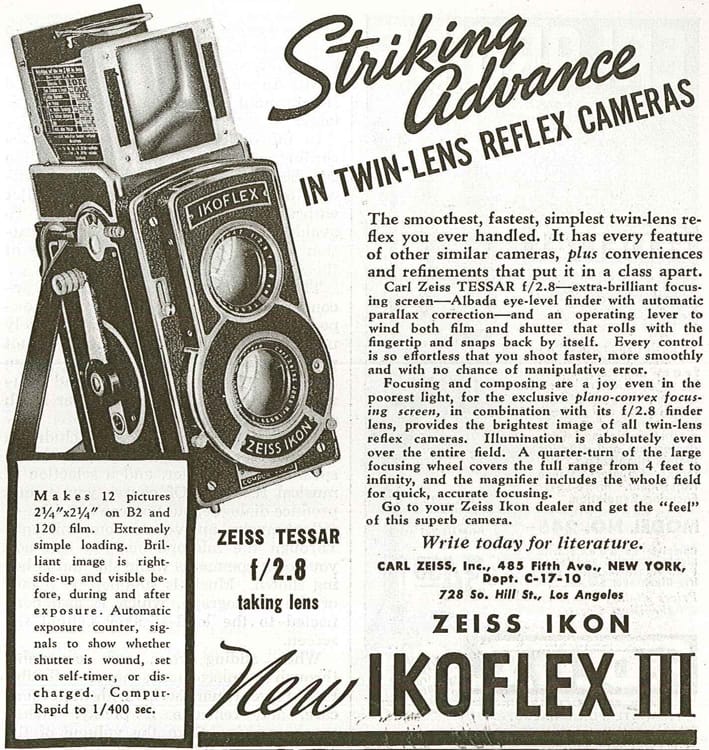
FOREMOST among reflex cameras, the new Ikoflex III has all the features of any other twin-lens reflex and many important new ones besides … an 8 cm Tessar f/2.8 Lens … a matching viewing lens which, with the plano-convex (condenser-type) focusing screen superseding the ground glass, gives an extremely brilliant and uniform image for focusing and viewing … and extra-large, smooth-working focusing knob requiring only a quarter turn for the full range from four feet to infinity … automatic loading of eight-exposure 2¼”x3¼” roll film with twelve 6x6 cm negatives from each roll … fully automatic operation throughout with all controls visible from above … Compur Rapid Shutter from 1 to 1 400th second and bulb with delayed-action release … making the Ikoflex III easily the leader in the twin-lens field … Ask your Zeiss Dealer to show you this outstanding camera…
The Albada finder has complete automatic parallax correction.
The 4-X magnifier covers the whole focusing screen for ultra-sharp focusing.
One swing of the lever winds both film and shutter for the next exposure.